
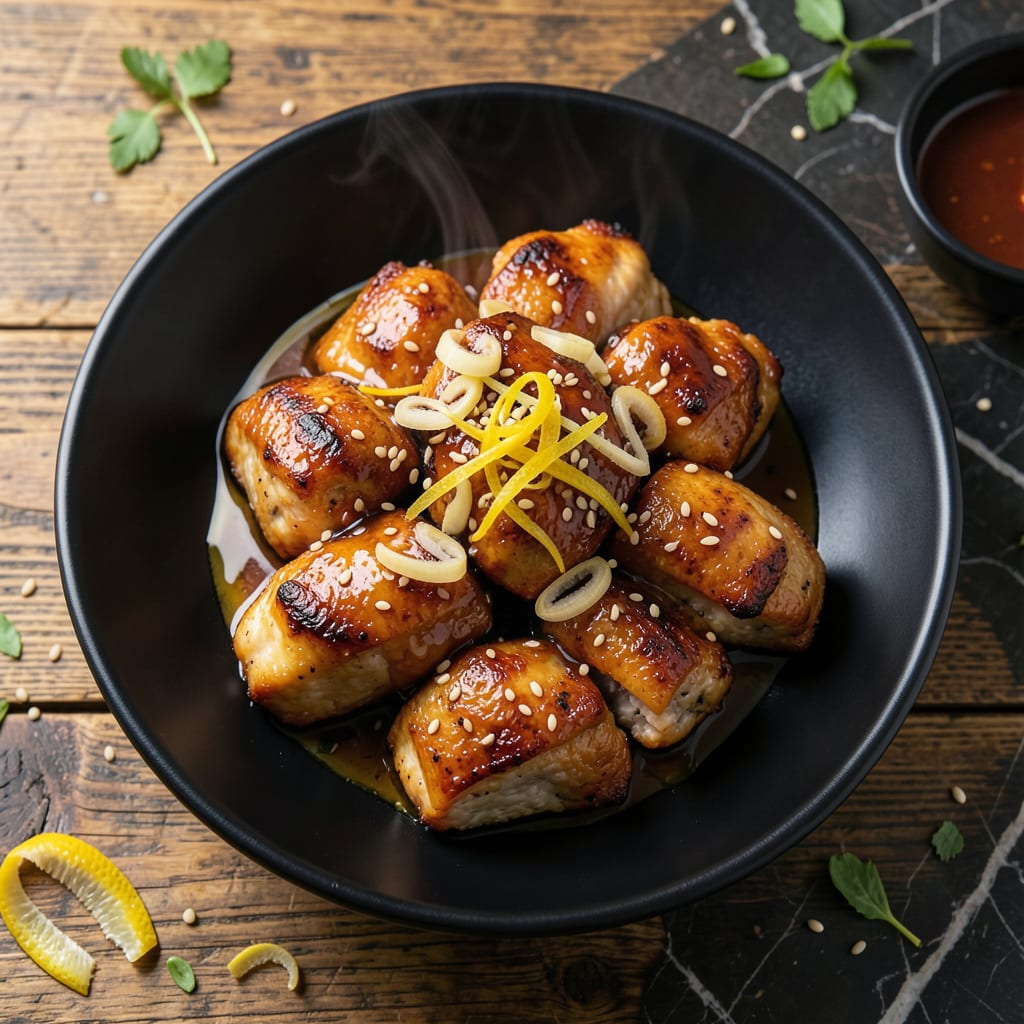
This dish transforms simple chicken into something extraordinary with just a few key ingredients. The combination of sesame oil and soy sauce creates a rich, aromatic base that defines Asian-inspired cooking.
What sets this recipe apart is its balance of savory depth and subtle nuttiness. The technique ensures tender chicken with a glossy, flavorful finish that’s ready in under 30 minutes.
Ingredients for Chicken Recipe with Sesame Oil and Soy Sauce
Transform simple chicken with aromatic sesame oil and rich soy sauce for this Asian-inspired dish.
| Ingredient | Amount | Notes |
|---|---|---|
| Boneless Skinless Chicken Thighs 🍗 | 1 ½ lb | Cut into bite-sized pieces |
| Soy Sauce 🥢 | ½ cup | Low-sodium preferred for balance |
| Sesame Oil 🫒 | 2 tbsp | Toasted variety for depth |
| Garlic Cloves 🧄 | 4 cloves | Minced finely for even distribution |
| Fresh Ginger Root 🌿 | 1 tbsp | Grated or minced |
| Rice Vinegar 🍶 | 2 tbsp | For brightness and acidity |
| Honey 🍯 | 2 tbsp | Balances savory with sweetness |
| Cornstarch 🌾 | 1 tbsp | For thickening the sauce |
| Red Pepper Flakes 🌶️ | ½ tsp | Adjust for heat preference |
| Green Onions 🧅 | 4 whole | Thinly sliced for garnish |
| Sesame Seeds 🌰 | 1 tbsp | Toasted for garnish |
| Neutral Cooking Oil 🫒 | 2 tbsp | For stir-frying chicken |
| Kosher Salt 🧂 | ½ tsp | Season to taste |
| Black Pepper 🌶️ | ½ tsp | Freshly ground preferred |
[recipeingredientscaler]
The toasted sesame oil is non-negotiable—it delivers that signature nutty depth. Kikkoman soy sauce is my go-to for consistency, but any quality brand works. For the chicken, thighs stay juicier than breasts during high-heat cooking. Source these from a trusted butcher or Whole Foods for optimal freshness. Ginger and garlic should be fresh; the pre-minced versions lack punch.
No soy sauce? Tamari (gluten-free) or coconut aminos work in a pinch. Maple syrup or agave can stand in for honey. If you’re avoiding cornstarch, arrowroot powder thickens just as well. Red pepper flakes can be swapped for Sriracha or gochujang—use sparingly. Green onions? Chives add similar freshness if that’s what’s on hand.
This keeps 3-4 days refrigerated in an airtight container. The flavors deepen overnight, so it’s even better as leftovers. Freezes well for up to 3 months (thaw before reheating). Garnish with sesame seeds just before serving to maintain crunch.
Why You’ll Love This Recipe
- One Pan Wonder: I toss everything in a single skillet—chicken, garlic, ginger, soy, and sesame oil—and dinner’s half-done before the oven even preheats.
- Umami Bomb: That first bite where the soy sauce caramelizes with the sesame oil? Ridiculously good, and the ginger-garlic punch lingers just right.
- Weeknight Hero: It’s my Tuesday lifesaver—ready before the kids finish their homework, and still impressive enough for company.
- Leftovers Win: Honestly, it tastes even better the next day—cold or reheated—so I always double the batch for lunches.
Step-by-Step Instructions for Chicken Recipe With Sesame Oil And Soy Sauce
Master the wok technique for restaurant-quality results at home with precision timing.
Step 1: Prepare and Marinate the Chicken
Cut the 1.5 lb Boneless Skinless Chicken Thighs into uniform 1-inch pieces. This ensures even cooking and maximum surface area for sauce absorption. Pat the pieces dry with paper towels—this prevents steaming in the pan.
In a bowl, combine the chicken with 0.5 cup Soy Sauce, 2 tbsp Sesame Oil, 4 cloves Garlic Cloves (minced), 1 tbsp Fresh Ginger Root (grated), 2 tbsp Rice Vinegar, 2 tbsp Honey, 0.5 tsp Red Pepper Flakes, 0.5 tsp Kosher Salt, and 0.5 tsp Black Pepper. Mix thoroughly and let marinate for 15 minutes at room temperature. The soy sauce will begin to break down the proteins, ensuring tenderness.
Step 2: Create the Cornstarch Slurry
In a small bowl, whisk together the 1 tbsp Cornstarch with 2 tbsp of the marinade liquid. This slurry will thicken the sauce to a glossy, restaurant-style consistency. Set it aside while you cook the chicken—it needs to be added at the precise moment to avoid clumping.
Reserve the remaining marinade for cooking. The residual starch in the marinade will also contribute to the final sauce texture, but the dedicated slurry guarantees the perfect thickness without over-reliance on reduction.
Step 3: Stir-Fry the Chicken to Perfection
Heat a wok or large skillet over high heat until smoking. Add the 2 tbsp Neutral Cooking Oil and swirl to coat the pan. Working in batches to avoid crowding, add the chicken pieces in a single layer. Sear undisturbed for 2-3 minutes until the edges develop a deep golden-brown crust.
Stir-fry the chicken for another 3-4 minutes until cooked through. The internal temperature should reach 165°F. Transfer the chicken to a plate and repeat with the remaining batches. Pour any accumulated juices back into the pan.
Step 4: Build and Reduce the Sauce
Return all the chicken to the pan along with the reserved marinade. Pour in the cornstarch slurry and stir constantly. The sauce will begin to thicken almost immediately—watch for it to turn from a thin liquid to a glossy coating that clings to the chicken.
Cook for an additional 1-2 minutes until the sauce has reduced slightly and the chicken is fully glazed. The sauce should be thick enough to leave trails when you drag a spoon through it, but still fluid enough to pour easily.
Step 5: Garnish and Serve Immediately
Remove from heat and stir in the 4 whole Green Onions (thinly sliced) and 1 tbsp Sesame Seeds. The residual heat will soften the green onions slightly while keeping them bright and fresh. Taste and adjust seasoning if needed, though the marinade should provide balanced flavor.
Serve immediately over steamed rice or noodles. The dish should have a glossy, umami-rich sauce with visible sesame seeds and green onion ribbons throughout. Each bite should deliver tender chicken with a perfect balance of sweet, savory, and slightly spicy notes.
Pro Tips For Making Chicken Recipe With Sesame Oil And Soy Sauce
- Pat Chicken Dry: Use paper towels to dry the thighs thoroughly before cooking—this guarantees a proper sear instead of steamed, soggy meat.
- Bloom Aromatics First: Cook the minced garlic and ginger in sesame oil for 30 seconds until fragrant before adding chicken, or the flavors will taste raw and harsh.
- Don’t Overcrowd Pan: I learned this the hard way—crowding the pan steams the chicken instead of browning it, so cook in batches if needed.
- Rest Before Slicing: Give the chicken a solid 5 minutes to rest after cooking, or all those juicy soy-sesame flavors will end up on the cutting board.
Serving Suggestions for This Dish
Over Rice or Noodles
Serve this dish over steamed jasmine rice to soak up that glossy, savory sauce. I recommend 1 cup uncooked rice for 4 servings. For variety, try udon or soba noodles—their chewy texture pairs wonderfully with the tender chicken. 🥢
Vegetable Pairings
Steamed bok choy or broccoli adds freshness and color to your plate. I toss 2 cups chopped veggies with a drizzle of the leftover sauce for extra flavor. A quick stir-fry in 1 tsp sesame oil enhances their natural sweetness.
Fresh Garnishes
Beyond the recipe’s green onions and sesame seeds, try adding sliced cucumbers or bean sprouts for crunch. A sprinkle of crushed peanuts introduces a delightful nutty contrast. I love the texture combo with the tender chicken.
Beverage Pairings
A crisp Asian lager like Sapporo or Asahi cuts through the richness. For non-alcoholic options, jasmine tea or ginger beer complements the dish’s aromatic notes. Serve drinks chilled for maximum refreshment. 🍺
Family-Style Service
Present the chicken in a large, shallow bowl with serving spoons for easy sharing. I use a ceramic dish to retain heat. Keep garnishes in small bowls so everyone can customize their plate. This makes for a lively, interactive dining experience.
Leftovers Tip
If serving later, store the chicken and sauce separately to prevent sogginess. Reheat gently in a skillet with a splash of water for 2-3 minutes to restore the sauce’s glossy texture. The flavors often taste even better the next day. 💡
Nutrition Facts
Frequently Asked Questions
Can I use chicken breast instead of thighs?
Yes, but thighs stay juicier. If using breasts, cut into 1-inch pieces and reduce cooking time to 2-3 minutes per side to prevent dryness.
How do I prevent the sauce from being too salty?
Use low-sodium soy sauce and balance with 2 tbsp honey or extra rice vinegar. Taste before adding salt.
What if my sauce doesn’t thicken?
Mix 1 tsp cornstarch with 1 tbsp cold water, then stir into the sauce. Cook for 1-2 minutes until glossy.
Can I make this ahead of time?
Store cooked chicken and sauce separately for up to 3 days. Reheat gently with a splash of water to restore texture.

- Jollof Rice Sauce Recipe: West African Tomato and Spice Infusion - September 25, 2026
- Japanese Rice Soup Recipe: Umami-Rich Comfort in a Bowl - September 25, 2026
- Homemade Cream Of Rice Recipe: Silk-Smooth Breakfast in Minutes - September 25, 2026