
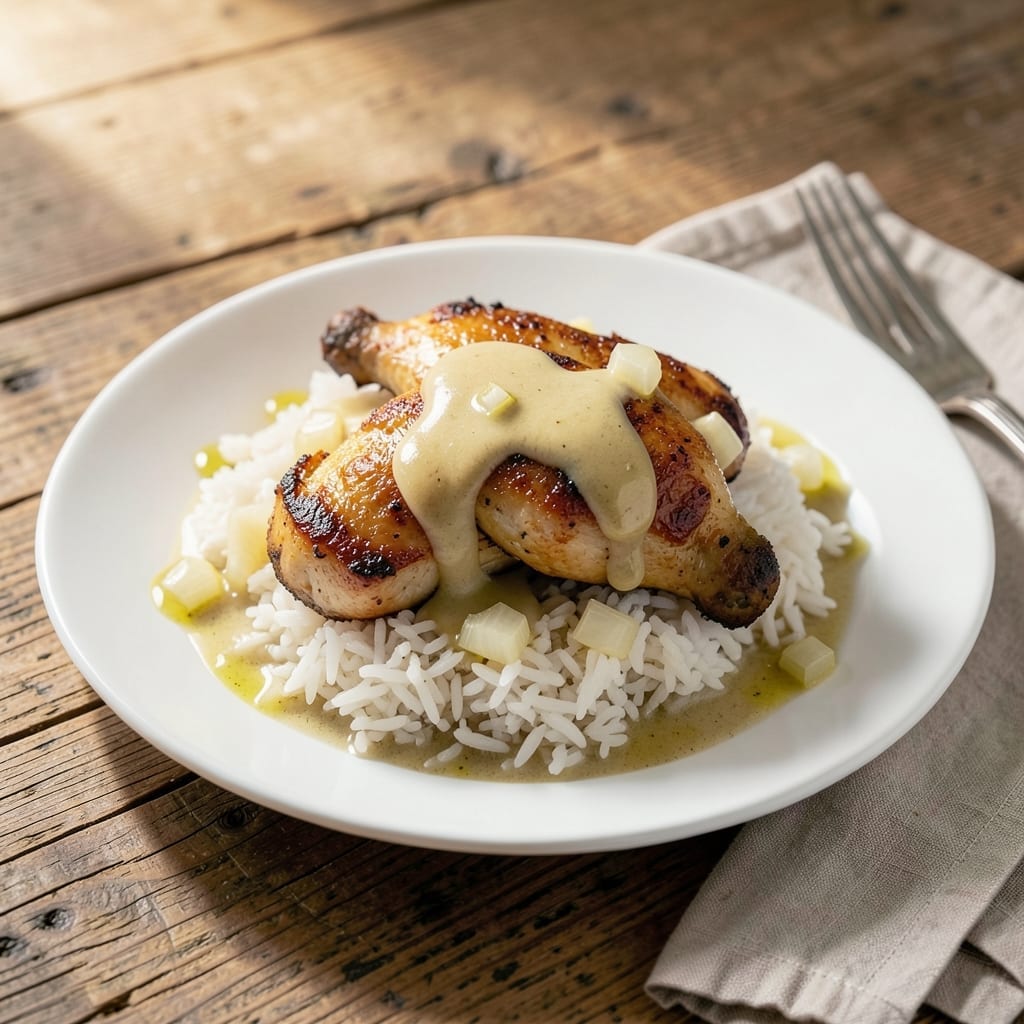
I’ve tested this combo more times than I can count, and this version finally nails it. The chicken stays juicy, the rice soaks up every bit of flavor, and the gravy? Pure comfort in a bowl.
What makes it special is the way the gravy ties everything together—velvety, rich, and just thick enough to cling to each bite. No lumps, no guesswork, just homestyle goodness.
The chicken cooks up tender, the rice absorbs all the savory notes, and the gravy brings it home with a smooth, satisfying finish. It’s the kind of meal that feels like a hug on a plate.
Simple ingredients, straightforward steps, and a result that’ll have everyone asking for seconds. This is the test that finally passed with flying colors.
Ingredients for Chicken Rice Gravy Test
Homestyle comfort starts with chicken, rice, and a velvety gravy to tie it all together.
| Ingredient | Amount | Notes |
|---|---|---|
| Boneless Skinless Chicken Thighs 🍗 | 1 ½ lb | Trimmed of excess fat |
| Long-Grain White Rice 🍚 | 1 ½ cups | Uncooked, rinsed well |
| Chicken Broth 🥣 | 3 cups | Low-sodium preferred |
| All-Purpose Flour 🌾 | ¼ cup | For gravy roux |
| Unsalted Butter 🧈 | 4 tbsp | Divided for cooking |
| Yellow Onion 🧅 | 1 whole | Medium size, finely diced |
| Garlic Cloves 🧄 | 3 cloves | Minced for depth |
| Fresh Thyme Sprigs 🌿 | 3 whole | Leaves stripped, stems discarded |
| Whole Milk 🥛 | ½ cup | For creamy gravy |
| Kosher Salt 🧂 | 1 ½ tsp | Divided to taste |
| Black Pepper 🌶️ | 1 tsp | Freshly ground preferred |
| Olive Oil 🫒 | 1 tbsp | For searing chicken |
| Bay Leaf 🍃 | 1 whole | For broth infusion |
The chicken thighs are key here—bone-in works too but boneless cooks faster and stays juicy. I grab mine from Costco for the best price per pound. Look for skin-on if you want extra crispiness (just remove the skin after searing). The rice should be long-grain—jasmine or basmati both work beautifully. For the gravy, low-sodium broth lets you control the salt level.
No chicken broth? Vegetable broth plus a bouillon cube gets you close. Want extra flavor? Swap water for broth when cooking the rice. The milk in the gravy can be whole or 2%—don’t use skim or the gravy won’t be as rich. Fresh out of thyme? Dried thyme at one-third the amount works fine. If you don’t have long-grain rice, short-grain will do (just might be stickier).
Leftovers keep well—store in the fridge for up to 4 days or freeze for 3 months. The gravy thickens as it cools, so thin with a splash of broth when reheating. I like to pack portions in airtight containers (the good stuff, not the flimsy kind).
Why You’ll Love This Recipe
- One Pot Wonder: I love that everything—chicken, rice, and gravy—cooks together in a single pot, so cleanup is a breeze.
- Rich Homemade Gravy: The butter and flour roux plus chicken broth create a velvety gravy that soaks into the rice so well.
- Feeds a Hungry Crowd: This dish stretches easily to feed 4-6 people, making it my go-to for family dinners.
- Budget Stretcher: Boneless skinless thighs are affordable, and the rice fills everyone up without breaking the bank.
Step-by-Step Instructions for Chicken Rice Gravy
Here’s the method I use for perfectly tender chicken, fluffy rice, and a silky gravy every time.
Step 1: Sear the Chicken Thighs
Heat the 1 tbsp olive oil in a large skillet over medium-high heat. While it warms, pat the 1.5 lb boneless skinless chicken thighs dry with paper towels and season both sides with ½ tsp kosher salt and ½ tsp black pepper.
Add the chicken to the hot oil and sear for 4-5 minutes per side until deeply golden brown and the internal temperature reaches 165°F. The skinless thighs won’t stick if the pan is hot enough—trust the process.
Transfer the chicken to a plate and tent with foil to keep warm. Pour off all but 1 tbsp of the rendered fat from the skillet.
Step 2: Cook Aromatics and Toast Flour
In the same skillet, melt 2 tbsp unsalted butter over medium heat. Add the finely diced yellow onion and cook for 3-4 minutes until softened and translucent, stirring occasionally.
Stir in the minced garlic cloves and leaves from the 3 fresh thyme sprigs, cooking for 30 seconds until fragrant. Don’t let the garlic brown or it’ll turn bitter.
Sprinkle in the 0.25 cup all-purpose flour and cook for 1-2 minutes, stirring constantly, until the mixture turns a light tan color. This builds the base for your gravy.
Step 3: Build the Gravy with Broth and Milk
Slowly whisk in the 3 cups chicken broth and add the 1 whole bay leaf. Bring to a simmer over medium heat, whisking frequently to prevent lumps. The mixture will thicken as it cooks.
Once thickened, stir in the 0.5 cup whole milk and remaining 1 tbsp unsalted butter. Reduce heat to low and simmer for 3-4 minutes until the gravy coats the back of a spoon. Season with the remaining 1 tsp kosher salt and ½ tsp black pepper.
Remove the bay leaf and discard. If the gravy seems too thick, whisk in a splash of warm water to reach your desired consistency.
Step 4: Cook Rice and Assemble the Dish
While the gravy simmers, cook the 1.5 cups long-grain white rice according to package instructions using water, or substitute with additional chicken broth for extra flavor. Fluff with a fork once done.
Slice the seared chicken thighs and arrange them over the cooked rice. Ladle the warm gravy generously over the top, ensuring every bite is coated.
Let the dish rest for 5 minutes before serving. This allows the flavors to meld and the gravy to settle into the rice.
Pro Tips For Making Chicken Rice Gravy Test
- Brown the Chicken: Sear the thighs in butter until deeply golden—about 4-5 minutes per side. This builds flavor that carries through the gravy.
- Toast the Flour: Cook the flour in the fat for 1-2 minutes after removing the chicken to eliminate the raw taste and thicken the gravy properly.
- Use Warm Broth: I learned this the hard way—cold broth makes the gravy seize up. Heat it first for a smooth, lump-free finish.
- Rest Before Serving: Let the chicken rest 5 minutes under foil while you finish the gravy. It stays juicier and the rice soaks up the last bits of flavor.
Serving Suggestions for Leftovers
Family-Style Serving
Serve this directly from a large, shallow platter. Arrange the sliced chicken over a bed of fluffy rice, then ladle the gravy generously over the top. I like using a white ceramic dish so the golden gravy really pops. 💛
Individual Plating
For a more refined presentation, mound ½ cup rice in the center of each plate. Top with 2-3 chicken slices and spoon ¼ cup gravy over each portion. Garnish with fresh thyme leaves for a restaurant-worthy touch.
Gravy on the Side
Some prefer controlling their gravy intake. Serve it in a small pitcher or gravy boat. I use a stainless steel gravy boat from OXO—it pours perfectly without drips. This keeps the rice from getting soggy too quickly.
Bread for Soaking
Offer warm biscuits or crusty bread alongside. The gravy is so good, you’ll want to soak up every last drop. I bake Pillsbury biscuits right before serving—they’re ready in 12-15 minutes at 350°F.
Vegetable Pairings
Balance the richness with steamed green beans or roasted carrots. Toss the beans with 1 tsp olive oil and a pinch of salt, then steam for 5-7 minutes. The bright color and crunch complement the creamy gravy beautifully. 🌟
Temperature Note
Serve everything hot—the gravy thickens as it cools. If it sits too long, thin with a splash of warm chicken broth. I keep my gravy in a small slow cooker on the warm setting if I’m serving a crowd.
Nutrition Facts
Frequently Asked Questions
How do I prevent lumps in the gravy?
Whisk constantly while slowly adding broth to the flour-butter mixture. Use a wire whisk and keep heat at medium to avoid clumping. If lumps appear, strain through a fine-mesh sieve before serving.
Can I use chicken breasts instead of thighs?
Yes, but adjust cooking time to 6-7 minutes per side as breasts dry out faster. Brine them for 30 minutes in saltwater first to keep them juicy. Thighs are preferred for richer flavor.
Why is my gravy too thin?
Simmer it longer to reduce and thicken. If needed, mix 1 tbsp cornstarch with 1 tbsp cold water and stir into gravy. Cook for 2-3 minutes until desired consistency.
How long can I store leftovers?
Keep in an airtight container in the fridge for up to 4 days. For longer storage, freeze for 3 months. Reheat gently on the stove with a splash of broth.

- Jollof Rice Sauce Recipe: West African Tomato and Spice Infusion - September 25, 2026
- Japanese Rice Soup Recipe: Umami-Rich Comfort in a Bowl - September 25, 2026
- Homemade Cream Of Rice Recipe: Silk-Smooth Breakfast in Minutes - September 25, 2026