
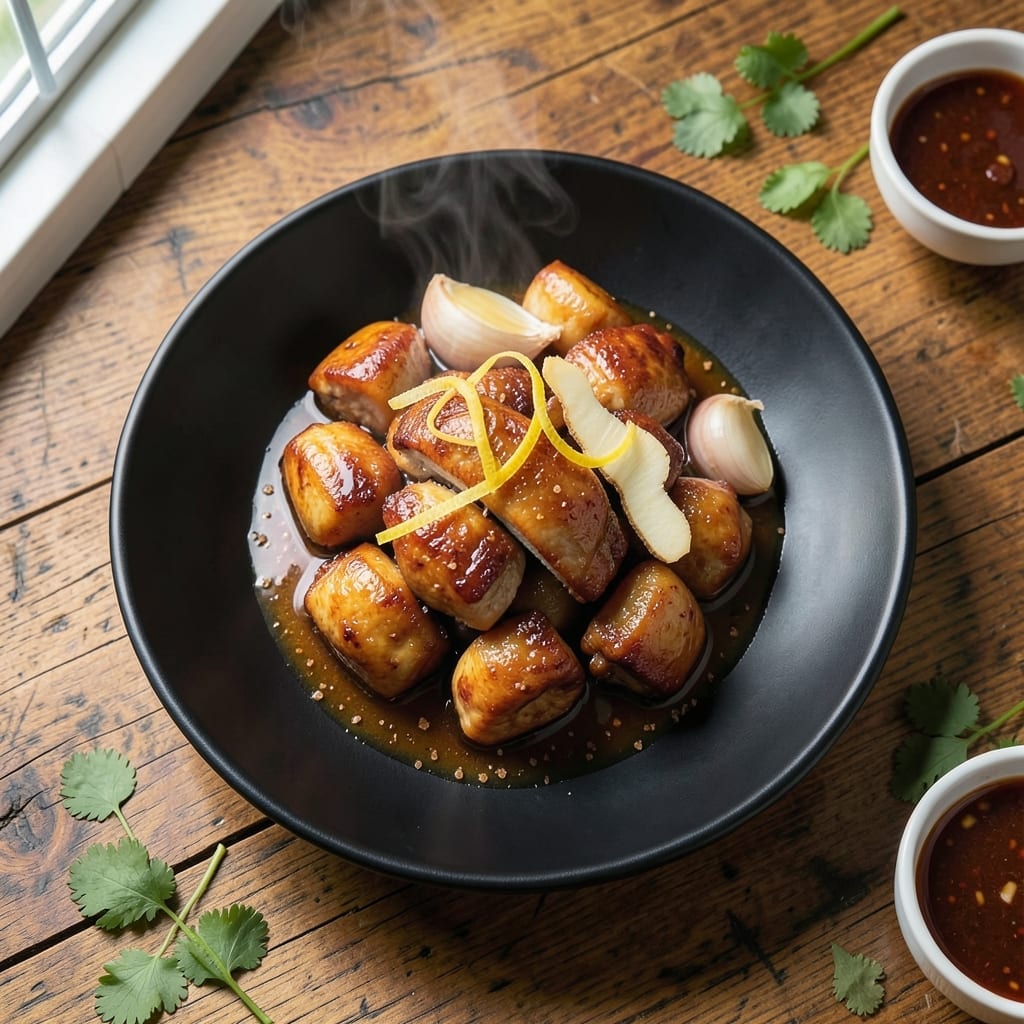
This wok-tossed dish delivers a perfect balance of tangy and savory flavors with minimal effort. The rice wine vinegar brightens the chicken while keeping it juicy and tender.
I developed this method after years of perfecting stir-fry techniques in professional kitchens. High heat and quick cooking preserve the tender texture of the meat.
The sauce comes together in seconds, coating every piece with aromatic depth. Serve over steamed rice for a complete, restaurant-quality meal.
Ready in under 30 minutes, this is weeknight cooking at its finest.
Ingredients for Chicken Rice Wine Vinegar
Professional-grade ingredients for restaurant-quality results at home with minimal effort.
| Ingredient | Amount | Notes |
|---|---|---|
| Boneless Skinless Chicken Thighs 🍗 | 1 ½ lb | Cut into bite-sized pieces |
| Rice Wine Vinegar 🫒 | 3 tbsp | Unseasoned variety preferred |
| Soy Sauce 🫒 | 2 tbsp | Low-sodium for balance |
| Light Brown Sugar 🍚 | 1 tbsp | Packed, for caramelization |
| Fresh Ginger 🌿 | 1 tbsp | Minced or finely grated |
| Garlic Cloves 🧄 | 3 cloves | Minced for aromatic depth |
| Sesame Oil 🫒 | 1 tbsp | Toasted variety for richness |
| Vegetable Oil 🫒 | 2 tbsp | High smoke point for stir-frying |
| Red Bell Pepper 🌶️ | 1 whole | Seeds removed, sliced thin |
| Green Onions 🧅 | 4 whole | Sliced, white and green parts separated |
| Cornstarch 🌾 | 1 tbsp | For velveting the chicken |
| Dry Sherry 🍷 | 1 tbsp | Optional for depth of flavor |
| Sesame Seeds 🌰 | 1 tsp | Toasted, for garnish |
| Steamed Jasmine Rice 🍚 | 2 cups | Cooked, for serving |
For the chicken, thighs are non-negotiable—they stay juicy under high heat where breasts would dry out. Seek out skinless, boneless from a trusted butcher or the organic section at Whole Foods. The rice wine vinegar should be unseasoned; Kikkoman makes a reliable version. Fresh ginger and garlic are essential—pre-minced versions lack the aromatic punch needed for this technique.
No rice wine vinegar? Apple cider vinegar at half the amount works in a pinch, though the flavor profile shifts slightly. Dry sherry can be swapped for Shaoxing wine (more authentic) or omitted entirely. For gluten-free, use tamari instead of soy sauce. The cornstarch velveting step is key—don’t skip it if you want that silky, restaurant-style texture.
The dish keeps 3-4 days refrigerated, though the chicken is best fresh. Reheat gently to avoid drying. Freezing isn’t recommended—the texture suffers. Always toast sesame seeds just before garnishing for maximum crunch.
Why You’ll Love This Recipe
- I’ll be real: chicken thighs are cheap, and this recipe turns them into something restaurant-worthy without breaking the bank.
- One Pan Wonder: I toss everything in one skillet—chicken, vinegar, soy, and ginger—and let it work its magic while I set the table.
- Sweet-Tangy Magic: The rice wine vinegar and brown sugar create this sticky, finger-licking glaze that clings to every bite of juicy thigh.
- Meal Prep Hero: Honestly, it reheats beautifully for lunches all week, and the flavors just get deeper.
Step-by-Step Instructions for Chicken Rice Wine Vinegar
Master the wok technique for perfectly tender chicken with a tangy, aromatic sauce.
Step 1: Velvet the Chicken for Maximum Tenderness
Cut the 1.5 lb boneless skinless chicken thighs into bite-sized pieces. In a bowl, combine the chicken with 1 tbsp cornstarch, 1 tbsp soy sauce, and 1 tbsp dry sherry. I always use my hands to massage the mixture into the meat, ensuring every piece is evenly coated.
This velveting technique creates a protective layer that locks in moisture during high-heat cooking. Let it marinate for 10 minutes while you prepare the remaining ingredients. The cornstarch will give the chicken a silky texture that absorbs the sauce beautifully.
Real talk: don’t skip the marinating time. The cornstarch needs those few minutes to adhere properly to the chicken surface, and the sherry begins to tenderize the meat.
Step 2: Stir-Fry Aromatics and Vegetables
Heat 2 tbsp vegetable oil in a wok or large skillet over high heat until it shimmers. Add the 1 tbsp fresh ginger and 3 cloves garlic cloves, stirring constantly for 15-20 seconds until fragrant. Be careful not to burn them—burnt garlic turns bitter quickly.
Immediately add the 1 whole red bell pepper and the white parts of the 4 whole green onions. Stir-fry for 2-3 minutes until the bell pepper softens slightly but retains its crispness. The vegetables should be vibrant and just beginning to develop color.
The high heat is crucial here—it creates the wok hei (breath of the wok) that gives stir-fries their characteristic flavor. If your kitchen isn’t well-ventilated, open a window; the aroma will be intense.
Step 3: Cook the Chicken and Build the Sauce
Increase the heat to maximum and add the marinated chicken in a single layer. Let it sear undisturbed for 1 minute to develop a light crust on the bottom. Then stir-fry for 3-4 minutes until the chicken is cooked through and no longer pink inside.
Pour in the remaining 1 tbsp soy sauce, 3 tbsp rice wine vinegar, and 1 tbsp light brown sugar. Stir well to coat the chicken and vegetables. The sauce should begin to thicken slightly as the sugar caramelizes.
Add the green parts of the green onions and toss everything together for another 30 seconds. The sauce should cling to the chicken and vegetables, creating a glossy coating.
Step 4: Finish and Serve Over Rice
Drizzle 1 tbsp sesame oil over the stir-fry and toss to incorporate. The sesame oil adds a rich, nutty depth that complements the tangy vinegar. Taste and adjust seasoning if needed—though with the soy sauce and vinegar balance, it should be perfectly seasoned.
Divide the 2 cups steamed jasmine rice among four plates. Spoon the chicken and vegetable mixture over the rice, ensuring each serving gets plenty of the flavorful sauce. Garnish with 1 tsp sesame seeds for a nutty crunch and visual appeal.
Serve immediately while hot. The contrast between the tender chicken, crisp vegetables, and fluffy rice creates a harmonious texture in every bite.
Pro Tips For Making Chicken Rice Wine Vinegar
- Sear Chicken First: I learned this the hard way—browning the thighs in a hot pan for 3-4 minutes per side before adding liquids locks in flavor and keeps them juicy.
- Use Fresh Ginger: After using powdered ginger once, I swore off shortcuts; freshly grated ginger (about 1 tablespoon per pound of chicken) adds the bright, zesty kick this dish needs.
- Balance the Vinegar: Rice wine vinegar can overpower if you’re heavy-handed; start with 3 tablespoons for every pound of chicken and adjust to taste after simmering.
- Reduce the Sauce: Once the chicken is cooked, let the sauce simmer uncovered for 5 minutes—this thickens it just enough to coat the thighs without being watery.
Storing and Reheating This Recipe
Refrigerator Storage
Let this dish cool for no more than 2 hours before transferring to airtight containers. I use glass containers with locking lids from my collection. Store in the fridge at 40°F or below for up to 3-4 days. The flavors actually deepen overnight as the vinegar melds with the chicken. ❄️
Freezing Guidance
Honestly, I don’t recommend freezing this creation. The chicken texture suffers significantly after thawing, becoming dry and stringy. The rice wine vinegar can also develop an off-flavor when frozen and reheated. If you must freeze, use within 1 month for best quality.
Stovetop Reheating
My preferred method is stovetop reheating in a skillet. Add 2 tbsp water or chicken broth to prevent sticking, then heat over medium-low heat for 4-5 minutes. Cover with a lid to trap steam and keep the chicken moist. Stir occasionally to ensure even heating.
Microwave Option
For quick reheating, place individual portions in a microwave-safe dish. Cover with a damp paper towel and heat on 70% power for 1-2 minutes, stirring halfway through. Add a splash of water if the sauce looks thick. This method works in a pinch but can dry out the chicken more than stovetop reheating. 🔥
Serving Refresh
After reheating, garnish with fresh green onions and sesame seeds to brighten the dish. A drizzle of sesame oil can restore some of the original aroma. Serve over freshly steamed rice if possible—the contrast of hot stir-fry over warm rice is ideal.
Nutrition Facts
Frequently Asked Questions
Can I substitute chicken breasts for thighs?
Thighs are ideal for this dish as they stay juicy under high heat, but you can use breasts. Cut them into smaller pieces and reduce cooking time to 2-3 minutes to prevent dryness
What if I don’t have rice wine vinegar?
Use apple cider vinegar at half the amount, or white wine vinegar with a pinch of sugar to mimic the flavor profile. The dish will still be delicious
How do I know when the chicken is done?
It should reach 165°F internally. Look for no pink inside and opaque meat that springs back when pressed. Overcooking will make it tough
Can I make this ahead of time?
Yes, but it’s best fresh. Store cooked chicken in an airtight container in the fridge for up to 3-4 days. Reheat gently to maintain moisture

- Jollof Rice Sauce Recipe: West African Tomato and Spice Infusion - September 25, 2026
- Japanese Rice Soup Recipe: Umami-Rich Comfort in a Bowl - September 25, 2026
- Homemade Cream Of Rice Recipe: Silk-Smooth Breakfast in Minutes - September 25, 2026