
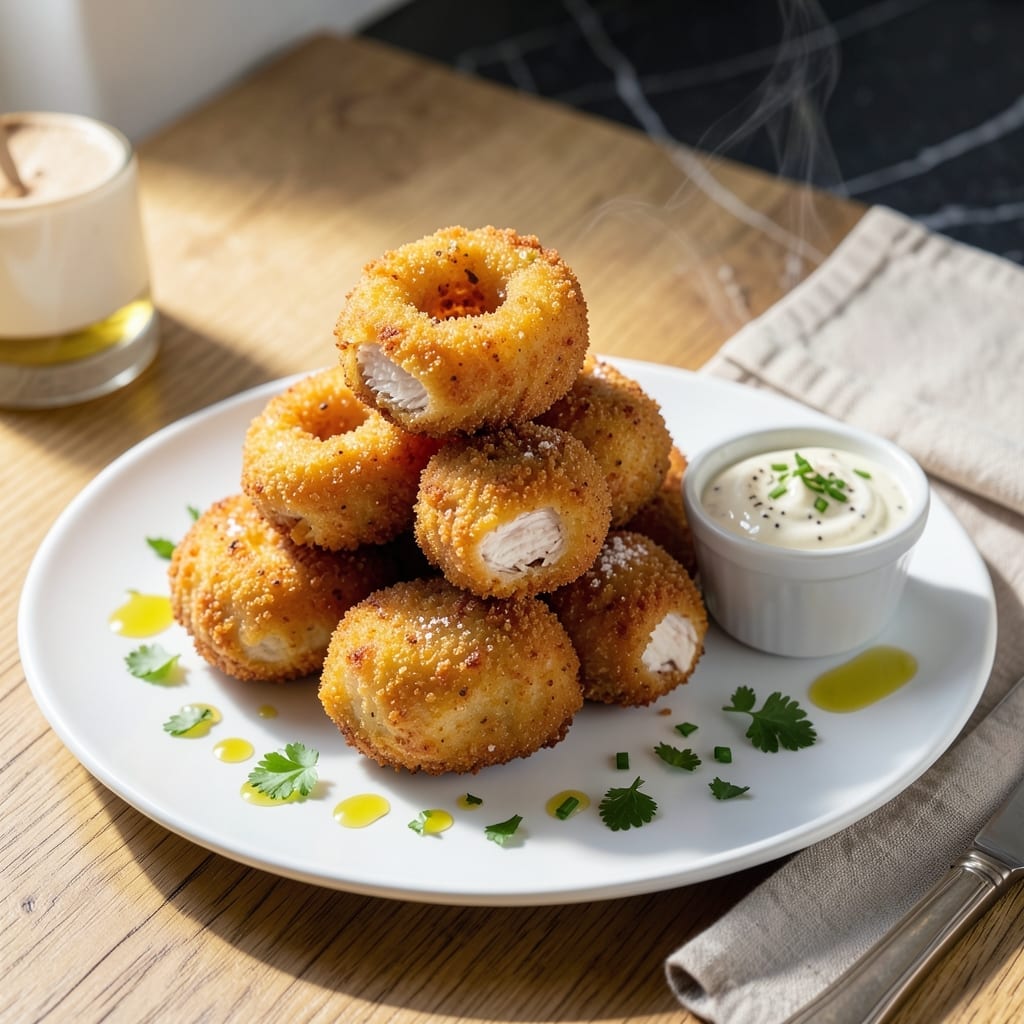
There’s something universally satisfying about biting into a perfectly breaded chicken ring with its crispy exterior and juicy center. This recipe transforms simple chicken into a crowd-pleasing dish that’s surprisingly easy to master.
The secret lies in a two-step breading process that ensures maximum crunch while keeping the meat tender. I’ve tested various methods, and this approach consistently delivers restaurant-quality results at home.
Each ring emerges golden and crunchy, with the chicken inside remaining moist and flavorful. The contrast in textures is what makes this dish so addictive.
Serve these as an appetizer, snack, or even a fun main course. The versatility makes them perfect for any occasion.
Ingredients for Chicken Rings
These quality ingredients create golden rings with crunchy exteriors and juicy centers every time.
| Ingredient | Amount | Notes |
|---|---|---|
| Boneless Skinless Chicken Breasts 🍗 | 1 ½ lb | Cut into 1-inch thick rings |
| All-Purpose Flour 🌾 | 1 cup | For initial dredging step |
| Large Eggs 🥚 | 2 whole | Beaten for egg wash |
| Buttermilk 🥛 | 1 cup | For tenderizing chicken |
| Panko Breadcrumbs 🍞 | 2 cups | For maximum crunch |
| Cornstarch 🌾 | ¼ cup | Mixed with panko |
| Garlic Powder 🧄 | 2 tsp | For seasoning breading |
| Onion Powder 🧅 | 2 tsp | For seasoning breading |
| Paprika 🌶️ | 1 tsp | Sweet or smoked variety |
| Salt 🧂 | 1 tsp | Diamond Crystal kosher preferred |
| Black Pepper 🌶️ | ½ tsp | Freshly ground preferred |
| Cayenne Pepper 🔥 | ¼ tsp | Adjust for heat preference |
| Vegetable Oil 🫒 | 2 cups | For frying, high smoke point |
The chicken quality directly impacts texture. Boneless, skinless breasts from Whole Foods or Costco consistently deliver tender results. For the breading, Kikkoman Panko provides superior crunch compared to standard varieties. Buttermilk is non-negotiable for tenderness—full-fat if available (worth the extra minute to seek it out).
No buttermilk? Whole milk plus 1 tbsp lemon juice or vinegar works in a pinch. Panko can be replaced with crushed cornflakes for similar crunch. Short on spices? Seasoned breadcrumbs at half the amount get you close. The cornstarch can be omitted, but expect slightly less crispiness. For gluten-free, swap all-purpose flour for rice flour.
Uncooked breaded rings keep 24 hours refrigerated. Fry immediately for best results. Leftover cooked rings reheat well in a 400°F oven for 10 minutes. Do not microwave—it kills the crunch. Store cooked rings maximum 3 days in airtight containers.
Why You’ll Love This Recipe
- One Pan Wonder: I just coat, bread, and bake—no frying mess, and the panko gives that restaurant-style crunch with half the effort.
- That Crispy Bite: The buttermilk soak keeps the chicken juicy while the panko delivers a satisfying crunch that’s honestly hard to resist.
- Kid-Approved Dinner: Even my pickiest eater devours these, and I love that they’re just as good cold in lunchboxes the next day.
- Budget Stretcher: A pound of chicken breasts turns into a meal that feeds four, and the pantry staples for breading cost next to nothing.
Step-by-Step Instructions for Chicken Rings
This method ensures a crispy exterior with perfectly juicy centers every time.
Step 1: Prepare and Season the Chicken
Cut the 1.5 lb boneless skinless chicken breasts into 1-inch thick rings. Pat them completely dry with paper towels—this is crucial for the breading to adhere properly. Season both sides lightly with a pinch of salt and black pepper.
Here’s the thing—dry chicken means crispy breading. Any moisture left on the surface will create steam, which leads to a soggy coating. I always take an extra minute to ensure every piece is bone-dry before moving to the next step.
Step 2: Set Up the Breading Station
In a shallow dish, combine the 1 cup all-purpose flour, 2 tsp garlic powder, 2 tsp onion powder, 1 tsp paprika, 1 tsp salt, 0.5 tsp black pepper, and 0.25 tsp cayenne pepper. This seasoned flour adds the first layer of flavor.
In a second dish, whisk together the 2 whole large eggs and 1 cup buttermilk until fully combined. In a third dish, mix the 2 cups panko breadcrumbs with the 0.25 cup cornstarch. The cornstarch in the panko creates an ultra-crispy texture that’s hard to beat.
Step 3: Bread the Chicken Rings
Working one piece at a time, dredge each chicken ring in the seasoned flour, shaking off any excess. Then dip it into the egg-buttermilk mixture, allowing any excess to drip off. Finally, press it firmly into the panko-cornstarch mixture, ensuring it’s fully coated on all sides.
Place the breaded rings on a wire rack set over a baking sheet. This setup allows air to circulate around the chicken, preventing the breading from becoming soggy while you finish coating the remaining pieces. Let them rest for 5-10 minutes to help the coating set.
Step 4: Fry to Golden Perfection
Heat the 2 cups vegetable oil in a deep, heavy-bottomed skillet over medium-high heat until it reaches 350°F. Use a deep-fry or candy thermometer to monitor the temperature—it’s the only way to ensure consistent results.
Carefully lower a few rings into the hot oil, being careful not to overcrowd the pan. Fry for 4-5 minutes per side until the coating is deep golden brown and the internal temperature reaches 165°F. Transfer the cooked rings to a paper towel-lined plate to drain excess oil.
Step 5: Rest and Serve Immediately
Let the chicken rings rest for 2-3 minutes before serving. This brief rest allows the juices to redistribute, ensuring the meat stays moist and tender. The coating will also crisp up slightly as it cools.
Serve the rings while they’re still hot and crispy. Each bite should deliver a satisfying crunch followed by juicy, flavorful chicken. The contrast between the crispy exterior and tender interior is what makes this dish so satisfying.
Pro Tips For Making Chicken Rings
- Chill the Chicken: Soak the chicken strips in buttermilk for at least 30 minutes before breading—I learned this the hard way after my first batch turned out dry and the coating slipped right off.
- Double Coat Crust: Dip each piece in flour, egg, then panko, and repeat the egg and panko step. Sounds tedious, but it’s the only way to get that shatteringly crisp crust that actually sticks to the chicken.
- Hot Oil, Small Batches: Keep your oil at 350°F and fry in small batches—crowding the pan drops the temperature, and you’ll end up with greasy, soggy rings instead of golden, crisp ones.
- Rest Before Frying: Let the breaded rings rest for 10 minutes before frying—yes, even if you’re hungry. This gives the coating time to set so it doesn’t slide off the second it hits the oil.
Flavor Customization for This chicken rings
Spicy Kick
For heat lovers, add 1 tsp additional cayenne pepper to the seasoned flour. I also like mixing ½ tsp chipotle powder into the panko for a smoky depth. Serve with cool ranch or blue cheese dressing to balance the spice. 🔥
Herb-Infused
Stir 1 tbsp dried Italian seasoning into the panko mixture. The blend of oregano, basil, and thyme adds a bright, aromatic note. Fresh herbs work too—finely chop 2 tbsp parsley and mix into the breading.
Cheesy Crunch
Mix ½ cup grated Parmesan into the panko for an umami boost. The cheese melts slightly during frying, creating extra crispy edges. For a bolder flavor, try Pecorino Romano instead.
Citrus Zing
Add 1 tbsp lemon zest to the panko mixture for a fresh, tangy twist. The citrus brightens the richness of the fried coating. Pair with a honey mustard dipping sauce for a perfect sweet-tart combo. ✨
Extra Garlicky
Double the garlic powder in the flour to 4 tsp for intense garlic flavor. I also minced 2 fresh garlic cloves into the egg wash once—game changer. Just be sure your guests love garlic as much as you do!
Sweet and Spicy
Add 1 tbsp brown sugar to the seasoned flour for a subtle sweetness. Balance it with an extra ¼ tsp cayenne. The contrast between sweet and spicy is addictive—my kids request this version constantly.
Nutrition Facts
Frequently Asked Questions
Can I bake these instead of frying?
Yes! Bake at 400°F for 15-20 minutes, flipping halfway. The texture won’t be as crispy as frying, but it’s a healthier option.
How do I keep the breading from falling off?
Pat the chicken completely dry before breading, and let the coated rings rest for 5-10 minutes before frying. This helps the coating adhere better.
What dipping sauces pair well?
Classic choices include honey mustard, ranch, and barbecue sauce. For a twist, try sriracha mayo or a tangy yogurt-based dip.
Can I use chicken tenders instead of breasts?
Chicken tenders work perfectly and may require slightly less cooking time. Adjust frying to 3-4 minutes per side.

- Jollof Rice Sauce Recipe: West African Tomato and Spice Infusion - September 25, 2026
- Japanese Rice Soup Recipe: Umami-Rich Comfort in a Bowl - September 25, 2026
- Homemade Cream Of Rice Recipe: Silk-Smooth Breakfast in Minutes - September 25, 2026