
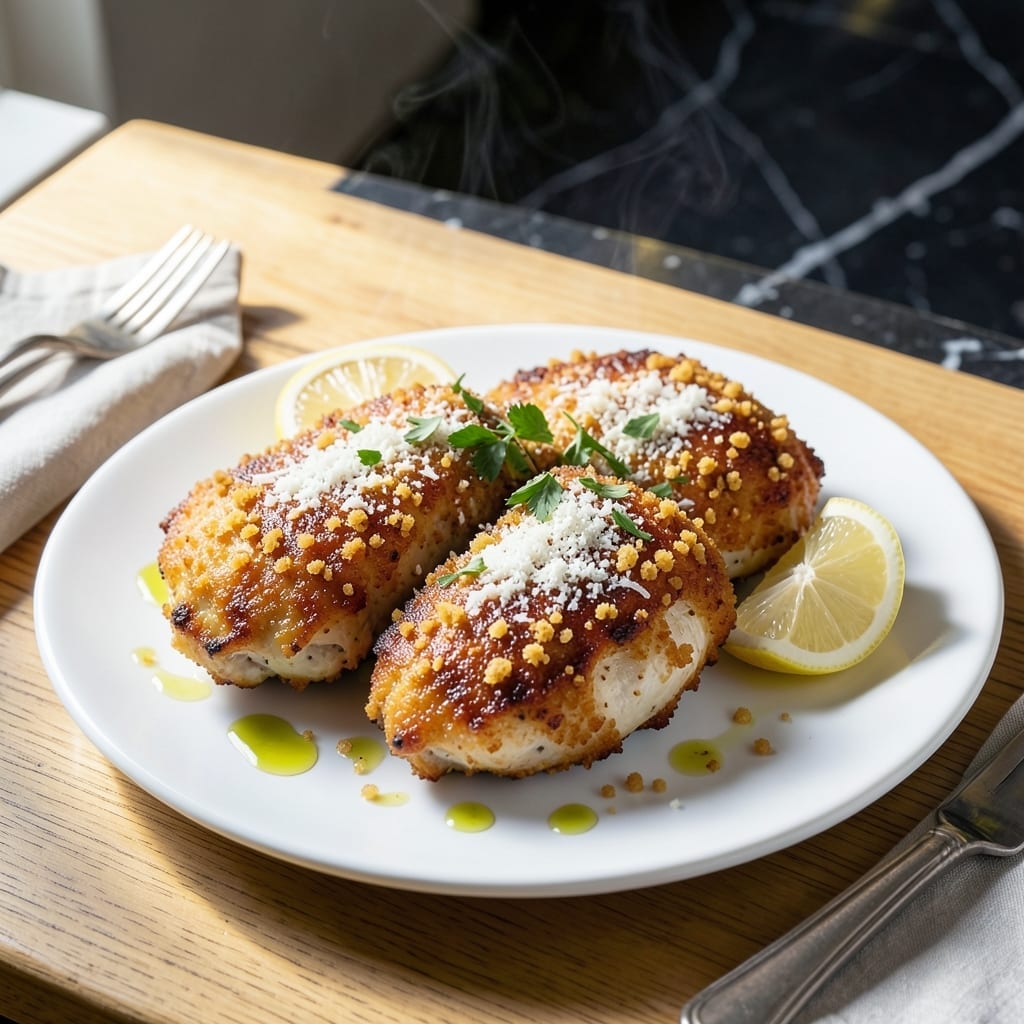
This recipe transforms ordinary chicken into an Italian-inspired masterpiece with a crispy parmesan crust. The secret lies in a simple breading technique that guarantees golden, crunchy results every time.
A light, tangy lemon butter sauce complements the savory crust perfectly. The sauce comes together in minutes while the chicken bakes, making this dish both impressive and approachable.
You’ll achieve restaurant-quality texture with basic pantry ingredients and standard kitchen tools. The parmesan crust stays crispy even after baking, while the chicken remains juicy inside.
Serve with pasta, roasted vegetables, or a simple salad for a complete meal. This technique works for both weeknight dinners and special occasions.
Ingredients for Chicken Romano
Pantry staples plus fresh lemon and Parmesan create this restaurant-quality dish with a crispy crust.
| Ingredient | Amount | Notes |
|---|---|---|
| Chicken Breasts 🍗 | 1 ½ lb | Boneless, skinless, pounded to 1/2-inch thickness |
| All-Purpose Flour 🌾 | ½ cup | For initial dredging |
| Large Eggs 🥚 | 2 whole | Beaten for egg wash |
| Parmesan Cheese 🧀 | 1 cup | Freshly grated from wedge |
| Panko Breadcrumbs 🍞 | 1 ½ cups | Japanese-style for extra crispiness |
| Garlic Powder 🧄 | 1 tsp | For seasoning breading |
| Dried Oregano 🍃 | 1 tsp | Mediterranean variety preferred |
| Salt 🧂 | 1 tsp | Diamond Crystal kosher preferred |
| Black Pepper 🌶️ | ½ tsp | Freshly ground for best flavor |
| Unsalted Butter 🧈 | ½ cup | For lemon butter sauce |
| Fresh Lemon Juice 🍋 | 3 tbsp | About 1 large lemon |
| Lemon Zest 🍋 | 1 tsp | Finely grated for brightness |
| Fresh Parsley 🌿 | 2 tbsp | Chopped, for garnish |
| Olive Oil 🫒 | 2 tbsp | For cooking chicken |
The Parmesan must be freshly grated from a wedge—pre-shredded contains anti-caking agents that prevent proper melting and browning. Panko breadcrumbs are non-negotiable for that signature crunch (regular breadcrumbs won’t deliver the same texture). For the chicken, use evenly pounded breasts to ensure consistent cooking. Most supermarkets carry all these ingredients, though Whole Foods often has superior Parmesan selection.
No fresh lemon? Bottled juice at half the amount (it’s more concentrated), though you’ll lose the zest’s aromatic oils. Panko hard to find? Crushed saltine crackers work in a pinch for texture. For a gluten-free version, substitute gluten-free panko and all-purpose flour blend. The garlic powder can be replaced with fresh minced garlic (use 2 cloves), but the powder adheres better to the breading.
The breaded chicken keeps in the fridge for 1 day before cooking (any longer risks sogginess). Cooked chicken stays crispy when reheated in a 375°F oven for 10 minutes. The lemon butter sauce can be made 2 days ahead and reheated gently—don’t boil or it may separate.
Why You’ll Love This Recipe
- One Pan Meal: That crispy panko-Parmesan crust forms right in the oven while I prep the side salad.
- Crave-Worthy Crunch: The combo of panko and Parmesan gives it that golden, buttery texture I can’t resist.
- Feeds a Crowd: I make a double batch for Sunday dinner and still have leftovers for lunch wraps.
- Budget Stretcher: Chicken breasts and pantry staples—this fancy-tasting dish costs less than takeout.
Step-by-Step Instructions for Chicken Romano
Master this three-part breading process and achieve a golden, crispy crust every time.
Step 1: Dredge and Coat the Chicken
Pat the 1.5 lb chicken breasts completely dry with paper towels—this ensures the breading adheres properly. Season both sides with 1 tsp salt and 0.5 tsp black pepper.
Set up a breading station with three shallow dishes. Place the 0.5 cup all-purpose flour in the first dish. In the second, beat the 2 whole large eggs until uniform. In the third, combine the 1.5 cups panko breadcrumbs, 1 cup parmesan cheese, 1 tsp garlic powder, and 1 tsp dried oregano. The mixture should look like coarse, golden sand.
Dredge each breast in the flour, shaking off excess, then dip in the beaten eggs, letting excess drip off. Press firmly into the panko-parmesan mixture, ensuring full coverage. The coating should look textured and substantial.
Step 2: Pan-Fry to Golden Perfection
Heat the 2 tbsp olive oil in a large skillet over medium heat until it shimmers. Add the breaded chicken breasts, being careful not to overcrowd the pan. Cook for 4-5 minutes per side until the crust is deep golden brown and crisp to the touch.
Resist the urge to move the chicken too soon—you’ll know it’s ready to flip when it releases easily from the pan. The crust should develop a uniform color with no pale spots. Transfer to a paper towel-lined plate to drain excess oil.
Step 3: Prepare the Lemon Butter Sauce
In a small saucepan, melt the 0.5 cup unsalted butter over low heat. Once melted, add the 3 tbsp fresh lemon juice and 1 tsp lemon zest. Whisk constantly for 1-2 minutes until the mixture is smooth and slightly thickened.
The sauce should have a bright, citrusy aroma and a pale yellow hue. Keep it warm over low heat, but do not let it boil—this can cause the butter to separate. Taste and adjust for acidity if needed.
Step 4: Serve with Garnish
Drizzle the warm lemon butter sauce over the crispy chicken, allowing it to pool slightly on the plate. Garnish with the 2 tbsp fresh parsley, finely chopped, for a pop of color and freshness.
Serve immediately while the crust is still crisp. The contrast of the tangy, velvety sauce against the crunchy parmesan-panko coating is what makes this dish exceptional. Each bite should deliver a balance of textures and flavors—savory, cheesy, and bright with citrus.
Pro Tips For Making Chicken Romano
- Pound the Chicken: Use a meat mallet to pound the chicken breasts to an even ½-inch thickness—this guarantees even cooking and prevents dry, overdone edges while the center catches up.
- Double Dredge: After the flour, dip in beaten egg, then back in flour before the final egg and panko coating. I learned this the hard way—it makes the crust stick like glue and stay put through frying.
- Skip Cold Cheese: Grate the parmesan fresh and let it sit at room temp for 10 minutes before mixing with panko. Cold cheese doesn’t melt into the crust as well, leaving you with a gummy texture instead of that perfect golden crunch.
- Rest Before Frying: Give the breaded chicken a 5-minute rest on a wire rack before hitting the oil. Sounds weird, but it works: the coating sets up and you’ll get less breading falling off in the pan.
Pro Cooking Tips for Great chicken romano
Perfect Breading Technique
Let the flour-coated chicken rest for 2 minutes before dipping in egg—this helps the flour absorb moisture for better adhesion. Press the panko-parmesan mixture onto the chicken with firm, even pressure to create a thick, textured crust. 💡
Oil Temperature Control
Use a thermometer to maintain oil at 350°F for the crispiest results. If the oil smokes, it’s too hot; if the breading absorbs oil instead of browning, it’s too cool. I recommend a candy thermometer for precision.
Even Cooking
Pound chicken to an even ½-inch thickness to prevent dry spots. Use a meat mallet or rolling pin. This ensures the crust browns uniformly while the interior cooks through without over-drying.
Sauce Emulsion Tip
Whisk the lemon butter sauce vigorously while adding juice to create a stable emulsion. If it separates, remove from heat and whisk in 1 tsp cold water to bring it back together. Keep it warm but never boiling.
Resting Before Serving
Let the cooked chicken rest on a wire rack for 5 minutes before saucing. This prevents the crispy crust from becoming soggy. The rack allows air circulation to maintain crispness on all sides.
Plating Like a Pro
Drizzle sauce in a zigzag pattern under the chicken for an elegant presentation. Sprinkle parsley just before serving to keep its vibrant color. Serve on warm plates to maintain temperature. 🌟
Nutrition Facts
Frequently Asked Questions
Can I use chicken thighs instead of breasts?
Bone-in, skinless thighs work well and often stay juicier. Adjust cooking time to 6-7 minutes per side since thighs are thicker. The crust will be just as crispy.
Why did my breading fall off during cooking?
This usually happens if the chicken wasn’t dry before breading. Pat it thoroughly with paper towels and let the flour coating rest for 2 minutes before dipping in egg. Press firmly into the panko mixture.
Can I bake this instead of pan-frying?
Yes! Bake at 400°F for 20-25 minutes on a wire rack over a baking sheet. Spray the breaded chicken lightly with oil first for extra crispiness.
How do I keep the crust crispy when serving a crowd?
Place cooked chicken on a wire rack in a 200°F oven for up to 30 minutes. This keeps it warm without steaming the crust. Add sauce just before serving.

- Jollof Rice Sauce Recipe: West African Tomato and Spice Infusion - September 25, 2026
- Japanese Rice Soup Recipe: Umami-Rich Comfort in a Bowl - September 25, 2026
- Homemade Cream Of Rice Recipe: Silk-Smooth Breakfast in Minutes - September 25, 2026