
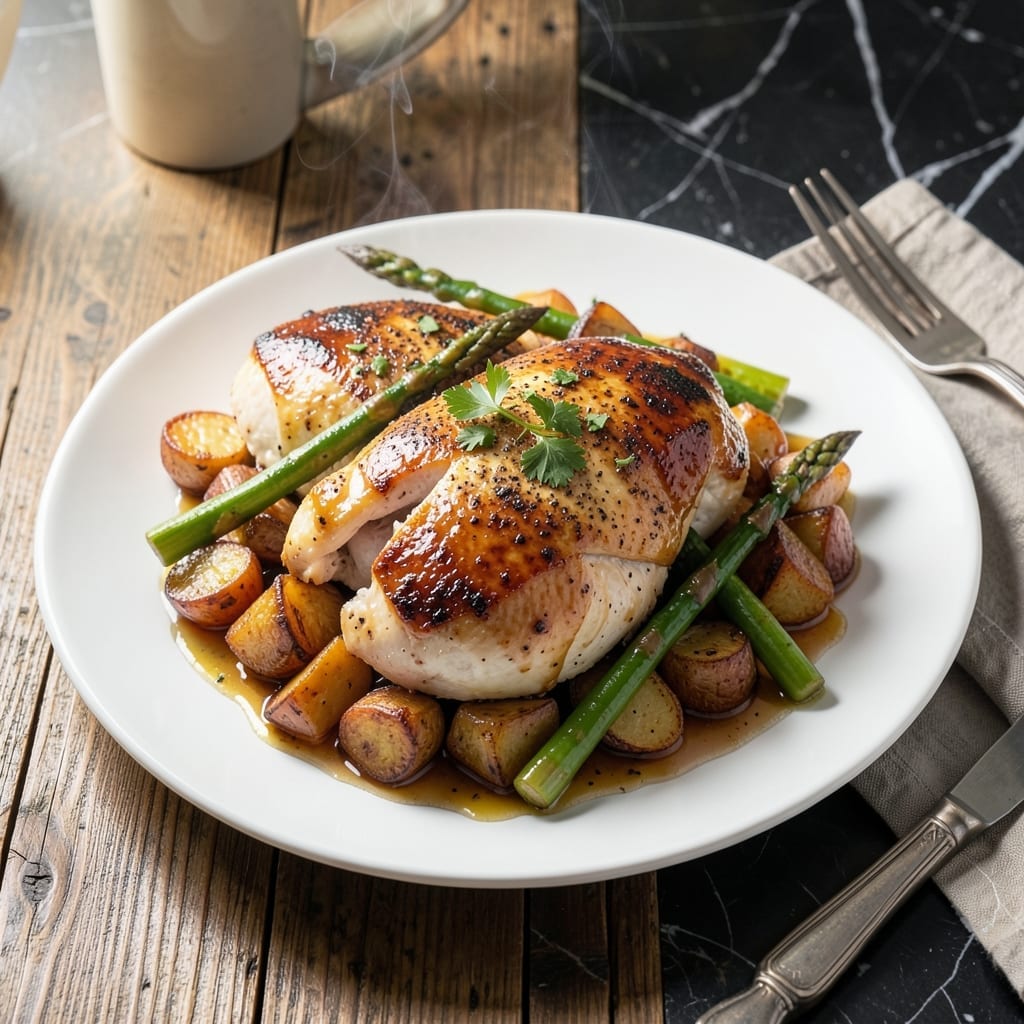
I’ve recreated Red Lobster’s signature maple glazed chicken with a sweet and smoky twist that’s surprisingly simple to make at home.
This copycat version captures the restaurant’s signature balance of sticky-sweet maple and subtle smokiness. The chicken stays juicy while developing a glossy, caramelized glaze that’s impossible to resist.
The secret is searing the chicken first to lock in moisture, then finishing with a maple glaze that reduces into a shiny coating. It’s the kind of dish that feels special but comes together in under 45 minutes.
Serve this with roasted vegetables or mashed potatoes for a meal that tastes like a night out—without leaving your kitchen.
Ingredients for Red Lobster Maple Glazed Chicken
Pantry staples meet a few special touches for this restaurant-quality dish.
| Ingredient | Amount | Notes |
|---|---|---|
| Boneless Skinless Chicken Breasts 🍗 | 1 ½ lb | Pounded to even thickness |
| Pure Maple Syrup 🍁 | ¾ cup | Grade A dark and robust |
| Apple Cider Vinegar 🍏 | 2 tbsp | Balances sweetness |
| Smoked Paprika 🌶️ | 1 tsp | For subtle smokiness |
| Garlic Powder 🧄 | 1 tsp | Not garlic salt |
| Onion Powder 🧅 | 1 tsp | Adds depth of flavor |
| Salt 🧂 | 1 tsp | Diamond Crystal kosher preferred |
| Black Pepper 🌶️ | ½ tsp | Freshly ground for best flavor |
| Olive Oil 🫒 | 2 tbsp | Divided for searing and glaze |
| Unsalted Butter 🧈 | 2 tbsp | For rich glaze finish |
| Dijon Mustard 🟡 | 1 tbsp | Adds tangy depth |
| Brown Sugar 🫙 | 2 tbsp | Light or dark variety |
The chicken is the star here—boneless, skinless breasts work best for even cooking and that perfect sear. Costco has great quality for the price, but any supermarket will do. Pounding them to even thickness (about ½-inch) ensures they cook through without drying out. I use Diamond Crystal kosher salt for seasoning—its coarse texture gives better control. The maple syrup needs to be the real deal (pancake syrup won’t cut it).
No smoked paprika? Regular paprika plus a pinch of cayenne gets you close, but the smoky flavor is key to this copycat. Out of apple cider vinegar? White vinegar or lemon juice works in a pinch. The Dijon mustard adds depth but yellow mustard at half the amount is fine. For the butter, salted works too—just skip the extra salt in the glaze.
The glaze keeps in the fridge for 3-4 days, so you can make it ahead. Leftovers reheat beautifully—just warm gently to avoid drying the chicken. Freezes well for up to 3 months if you want to prep a double batch.
Why You’ll Love This Recipe
- One Pan Wonder: I toss everything in a single skillet—chicken, maple syrup, vinegar—and let the oven do the work.
- Sweet & Smoky: The maple syrup caramelizes with the smoked paprika for that sticky, slightly spicy glaze I can’t resist.
- Meal Prep Hero: I make a double batch on Sunday and it reheats beautifully for lunches all week.
- Budget Friendly: Chicken breasts and pantry staples mean I spend under $10 for a meal that feels restaurant-fancy.
Step-by-Step Instructions for Maple Glazed Chicken
This copycat method delivers that signature sweet-smoky flavor with restaurant-quality results at home.
Step 1: Prep and Season the Chicken
Start by pounding the 1.5 lb boneless skinless chicken breasts to an even ½-inch thickness between plastic wrap. This ensures even cooking and prevents dry spots. Season both sides generously with the 1 tsp salt, 0.5 tsp black pepper, 1 tsp smoked paprika, 1 tsp garlic powder, and 1 tsp onion powder.
Let the seasoned chicken sit at room temperature for 10 minutes while you prepare the glaze. This short rest allows the spices to adhere better and the meat to cook more evenly. The smoked paprika will give it that subtle depth Red Lobster is known for.
Step 2: Sear the Chicken to Golden Perfection
Heat 1 tbsp olive oil in a large skillet over medium-high heat until shimmering. Add the chicken and cook for 5-6 minutes per side until golden brown and the internal temperature reaches 160°F.
Don’t move the pieces around too much—let them develop a proper sear. You’ll see the edges turn white as they cook through. Remove the chicken to a plate and tent with foil to keep warm while you make the glaze.
Step 3: Create the Maple Glaze
In the same skillet, reduce heat to medium and add the remaining 1 tbsp olive oil, 2 tbsp unsalted butter, 0.75 cup pure maple syrup, 2 tbsp apple cider vinegar, 1 tbsp Dijon mustard, and 2 tbsp brown sugar.
Whisk constantly for 3-4 minutes until the mixture thickens slightly and coats the back of a spoon. The vinegar balances the sweetness, while the mustard adds that tangy depth. You’ll know it’s ready when it turns a rich amber color and bubbles evenly.
Step 4: Glaze and Finish
Return the chicken to the skillet and spoon the glaze over each piece, turning to coat evenly. Cook for an additional 1-2 minutes on each side, allowing the glaze to caramelize slightly and adhere to the chicken.
The glaze should become glossy and stick to the chicken in a thin, even layer. If it thickens too much, add a splash of water to loosen. Serve immediately while the glaze is still warm and fluid—it’ll thicken further as it cools.
Pro Tips For Making Red Lobster Maple Glazed Chicken
- Pound the Chicken: Boneless breasts cook unevenly if thick on one end—pound them to an even ½-inch thickness so the maple glaze doesn’t burn before the meat’s done.
- Reduce the Glaze First: Simmer the maple syrup, apple cider vinegar, and spices for 3-4 minutes before adding chicken; it thickens faster and clings better instead of pooling at the bottom.
- Skip the Cold Chicken: I learned this the hard way—let the chicken sit at room temp for 15 minutes before cooking, or the outside will dry out before the inside warms through.
- Double the Spices: Smoked paprika and garlic powder mellow when mixed with syrup, so use a heavy hand—about 1½ teaspoons of each for every ½ cup of maple syrup.
Pro Cooking Tips for red lobster maple glazed chicken
Perfect Searing Technique
Use a heavy-bottomed skillet like Lodge cast iron for even heat distribution. Heat 1 tbsp olive oil until it shimmers but doesn’t smoke—this takes about 2-3 minutes on medium-high heat. I always test by flicking a drop of water—it should sizzle and dance. 💡
Temperature Precision
Invest in an instant-read thermometer—I recommend ThermoWorks. Pull the chicken at 160°F internal temperature; it’ll rise to 165°F while resting. This prevents overcooking and keeps the meat juicy. Never guess with poultry.
Glaze Timing
Start the glaze only after removing the chicken from the skillet. The 3-4 minute reduction is critical—less time and it’ll be watery, more time and it’ll burn. Whisk constantly and watch for the color to deepen to amber. The vinegar helps prevent crystallization of the sugar.
Rest Before Serving
Let the glazed chicken rest for 5 minutes before serving. This allows the juices to redistribute and the glaze to set slightly. Tent loosely with foil to keep warm. I learned this the hard way—cutting too soon sends all the juices onto the plate.
Skillet Selection
Avoid nonstick for this recipe—the high heat needed for searing can damage the coating. Stainless steel or cast iron gives the best sear and develops fond for the glaze. Just be sure your pan is oven-safe if you ever want to transfer it.
Glaze Consistency Check
Test the glaze by coating the back of a spoon—it should leave a thin, even layer that doesn’t run off immediately. If too thick, add 1 tsp water and whisk. If too thin, simmer for 1 more minute. This ensures perfect adhesion to the chicken. ✨
Nutrition Facts
Frequently Asked Questions
Can I use chicken thighs instead of breasts?
Boneless, skinless thighs work great and stay even juicier. Reduce cooking time to 4-5 minutes per side since they cook faster. The glaze pairs perfectly with the richer flavor of dark meat.
How do I store leftovers?
Keep in an airtight container in the fridge for up to 3-4 days. Reheat gently in a skillet over low heat to prevent the glaze from burning. Microwaving works but may make the glaze less glossy.
Can I make the glaze ahead of time?
Yes! Prepare and store the glaze separately in the fridge for up to 1 week. Reheat and thin with 1-2 tsp water if needed before using. This saves time on busy nights.

- Jollof Rice Sauce Recipe: West African Tomato and Spice Infusion - September 25, 2026
- Japanese Rice Soup Recipe: Umami-Rich Comfort in a Bowl - September 25, 2026
- Homemade Cream Of Rice Recipe: Silk-Smooth Breakfast in Minutes - September 25, 2026