
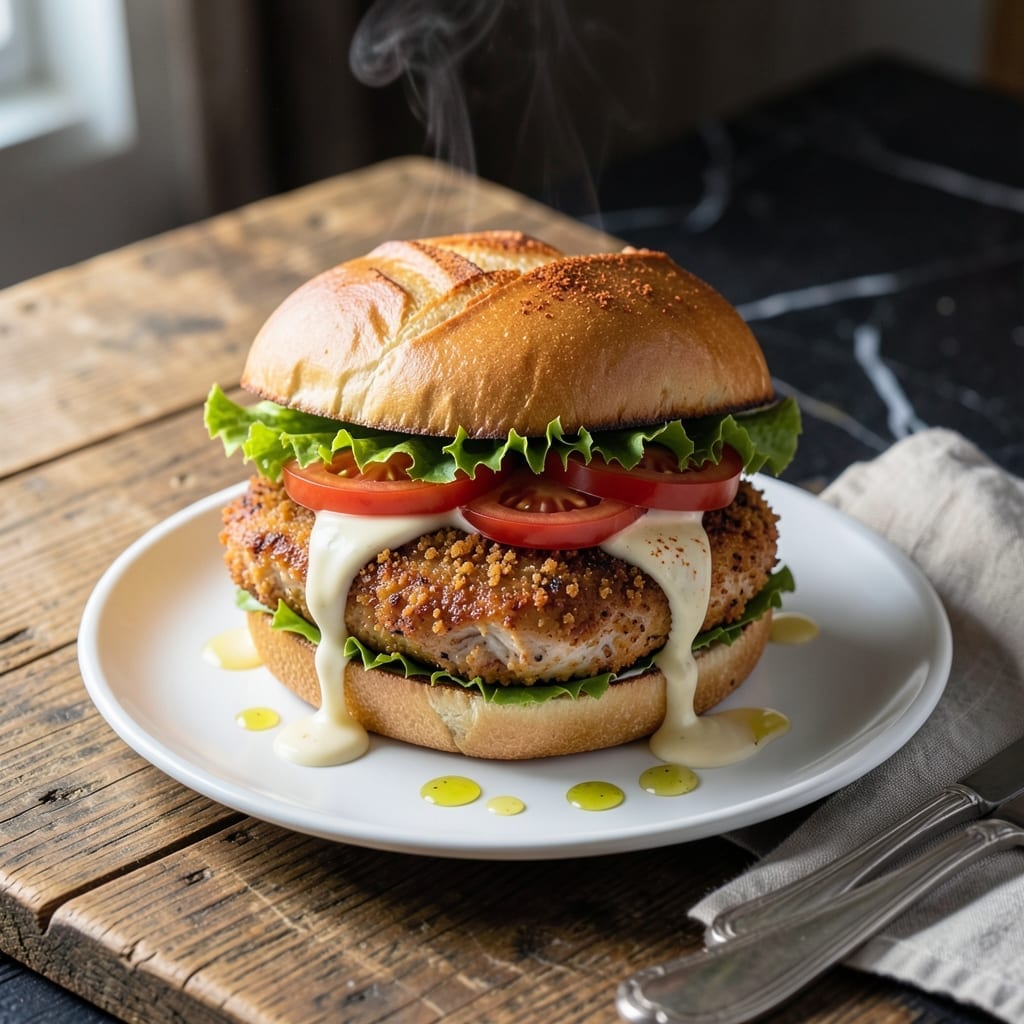
There’s nothing quite like biting into a sandwich with a crispy, golden crust that gives way to tender, juicy chicken inside. This recipe delivers that perfect balance of texture and flavor with a foolproof method for achieving restaurant-quality results at home.
The secret lies in the double-coating technique and precise frying temperature, ensuring every piece of chicken emerges with that coveted crispy exterior. I’ve tested this process repeatedly to guarantee consistent success, even for first-time cooks.
What you’ll get is a sandwich that shatters with each bite, revealing moist chicken beneath its shatteringly crispy shell. The contrast between the outer crunch and inner tenderness makes every mouthful satisfying.
Pair it with your favorite buns and toppings for a meal that feels indulgent yet requires minimal effort. Here’s how to make it right.
Ingredients for Chicken Sandwhich
Pantry staples meet crispy, golden perfection in this satisfying sandwich.
| Ingredient | Amount | Notes |
|---|---|---|
| Boneless Skinless Chicken Breasts 🍗 | 1 ½ lb | Pounded to even thickness |
| All-Purpose Flour 🌾 | 1 ½ cups | For initial coating |
| Large Eggs 🥚 | 2 whole | Beaten for egg wash |
| Buttermilk 🥛 | ½ cup | For marinating chicken |
| Panko Breadcrumbs 🍞 | 2 cups | For crispy outer coating |
| Cornstarch 🌾 | ¼ cup | Mixed with flour for extra crisp |
| Kosher Salt 🧂 | 1 ½ tsp | Divided for seasoning |
| Ground Black Pepper 🌶️ | 1 tsp | Freshly ground preferred |
| Paprika 🌶️ | 1 tsp | For color and flavor |
| Garlic Powder 🧄 | 1 tsp | Enhances flavor depth |
| Onion Powder 🧅 | 1 tsp | Balances seasoning blend |
| Vegetable Oil 🫒 | 2 cups | For deep frying |
| Hamburger Buns 🍔 | 4 whole | Toasted before serving |
| Mayonnaise 🥄 | ½ cup | For spreading on buns |
| Pickle Slices 🥒 | 8 slices | For tangy crunch |
The chicken is everything here. Boneless, skinless breasts pounded to even thickness ensure even cooking and maximum crispiness. I grab mine from Whole Foods or Costco—look for pieces that are uniform in size (the good stuff, not the pre-diced kind). The buttermilk marinade is non-negotiable—it tenderizes and adds that subtle tang that makes the coating cling perfectly.
No buttermilk? Milk plus a tablespoon of vinegar works in a pinch. Out of panko? Crushed cornflakes or saltines give you that crunch (use what’s in the cabinet). The cornstarch in the flour mix is the secret to extra crispiness—don’t skip it. For the oil, peanut oil has a higher smoke point, but vegetable oil is fine too (whatever you’ve got).
Fry in batches—don’t crowd the pan or the temperature drops. Drain on a rack, not paper towels, to keep it crispy. Leftovers? Reheat in the air fryer for 3-4 minutes to revive that crunch. Best eaten fresh, but honestly, they’ll disappear fast.
Why You’ll Love This Recipe
- One Pan Magic: I bread and cook everything in one skillet—no extra dishes, no fuss.
- Crispy Perfection: That buttermilk-Panko combo gives it a crunch that shames fast food.
- Weeknight Hero: I’ve served this for casual dinners and last-minute lunches with zero stress.
- Budget Stretcher: One pound of chicken breasts makes four hearty sandwiches for under ten bucks.
Step-by-Step Instructions for Chicken Sandwich
Here’s the method that guarantees a perfectly crispy, golden crust every single time.
Step 1: Prep and Season the Chicken
Start by pounding the boneless skinless chicken breasts to an even ½-inch thickness using a meat mallet. This ensures they cook evenly and quickly without drying out. Season both sides generously with 1 tsp kosher salt, 1 tsp ground black pepper, 1 tsp paprika, 1 tsp garlic powder, and 1 tsp onion powder.
Place the seasoned chicken in a shallow dish and pour the 0.5 cup buttermilk over it. Let it marinate for at least 15 minutes—this tenderizes the meat and helps the coating adhere. The buttermilk also adds a subtle tang that balances the richness of the final dish.
Step 2: Create the Crispy Coating
In a large bowl, whisk together the 1.5 cups all-purpose flour and 0.25 cup cornstarch along with the remaining 0.5 tsp kosher salt. The cornstarch is key here—it creates an ultra-crispy texture that sets this apart from regular fried chicken.
In another bowl, beat the 2 whole large eggs until smooth. Place the 2 cups panko breadcrumbs in a third bowl. The three-bowl system keeps things organized and prevents cross-contamination. Dip each piece of chicken in the flour mixture first, shaking off excess, then into the egg, and finally into the panko, pressing gently to ensure full coverage.
Step 3: Fry to Golden Perfection
Heat the 2 cups vegetable oil in a deep, heavy-bottomed skillet over medium-high heat until it reaches 350°F. Use a thermometer for accuracy—this temperature ensures the outside crisps before the inside overcooks.
Carefully place the breaded chicken in the hot oil, working in batches to avoid crowding the pan. Fry for 4-5 minutes per side until the coating is deep golden brown and the internal temperature reaches 165°F. Transfer to a wire rack or paper towel-lined plate to drain excess oil.
Step 4: Assemble the Sandwich
Lightly toast the 4 whole hamburger buns to add structure and prevent sogginess. Spread a generous layer of mayonnaise on both the top and bottom buns—this adds creaminess and helps the other ingredients stick.
Place a piece of fried chicken on the bottom bun, then top with 2 slices of pickle slices per sandwich for that essential tangy crunch. Cap with the top bun and press down gently. The contrast of crispy chicken, soft bun, creamy mayo, and sharp pickles is what makes this sandwich unforgettable. Serve immediately while the chicken is still hot and crispy.
Pro Tips For Making Chicken Sandwhich
- Pound the Chicken: Use a meat mallet or rolling pin to flatten the breasts to an even ½-inch thickness—I learned this the hard way after my first batch came out dry on the edges and raw in the middle.
- Double Dip the Breading: Dredge in flour, dip in the buttermilk-egg mix, then back in flour before the final panko coat. Sounds weird, but it works: this creates a crust that actually stays put.
- Skip Cold Chicken: Let the breasts sit at room temp for 15-20 minutes before frying. After burning three batches, I finally figured out cold chicken lowers the oil temp and turns breading greasy.
- Use a Wire Rack: Place breaded chicken on a wire rack (not a plate) before frying—this prevents the crust from getting soggy on one side while you finish prepping. My grandmother swore by this, and she was right.
Make-Ahead Tips for This Recipe
Marinate Ahead
Prepare the buttermilk marinade up to 24 hours in advance. I mix 0.5 cup buttermilk with seasonings in a ziplock bag, add chicken, and refrigerate. The longer it marinates, the more tender and flavorful your meat becomes. 💡
Bread Early
Complete the full breading process (flour, egg, panko) up to 4 hours before frying. Place breaded pieces on a wire rack in the fridge uncovered—this prevents sogginess while keeping the coating intact.
Prep Toppings
Slice your pickles and measure 0.5 cup mayonnaise the night before. Store in separate airtight containers in the fridge. This small step makes assembly lightning fast when it’s time to eat.
Freeze Uncooked
For true make-ahead magic, bread and freeze uncooked chicken pieces on a baking sheet first, then transfer to a freezer bag. They’ll keep for 1 month. Fry from frozen, adding 1-2 extra minutes per side. ✨
Reheat Smart
Reheat breaded chicken in a 375°F oven on a wire rack for 10-12 minutes to restore crispiness. Microwaving works in a pinch (30-45 seconds), but expect slightly softer results.
Toast Buns Later
Toast your hamburger buns just before serving to maintain their softness. I use a skillet with 1 tbsp butter for 30 seconds per side. Assemble immediately for the best texture contrast.
Nutrition Facts
Frequently Asked Questions
What if I don’t have buttermilk?
Mix ½ cup milk with 1 tbsp vinegar or lemon juice. Let sit for 5 minutes to curdle, then use as directed. The acid mimics buttermilk’s tenderizing effect.
Can I bake instead of frying?
Yes! Place breaded chicken on a rack over a baking sheet. Bake at 400°F for 20-25 minutes, flipping halfway. It won’t be as crispy but still delicious.
Why did my coating fall off?
This usually happens if the chicken wasn’t properly dried before breading or the oil temperature was too low. Pat the chicken dry and ensure oil reaches 350°F before frying.
How do I keep it crispy for leftovers?
Store on a wire rack, not stacked. Reheat in a 375°F oven for 10-12 minutes to revive the crunch. Avoid microwaving for best texture.

- Jollof Rice Sauce Recipe: West African Tomato and Spice Infusion - September 25, 2026
- Japanese Rice Soup Recipe: Umami-Rich Comfort in a Bowl - September 25, 2026
- Homemade Cream Of Rice Recipe: Silk-Smooth Breakfast in Minutes - September 25, 2026