
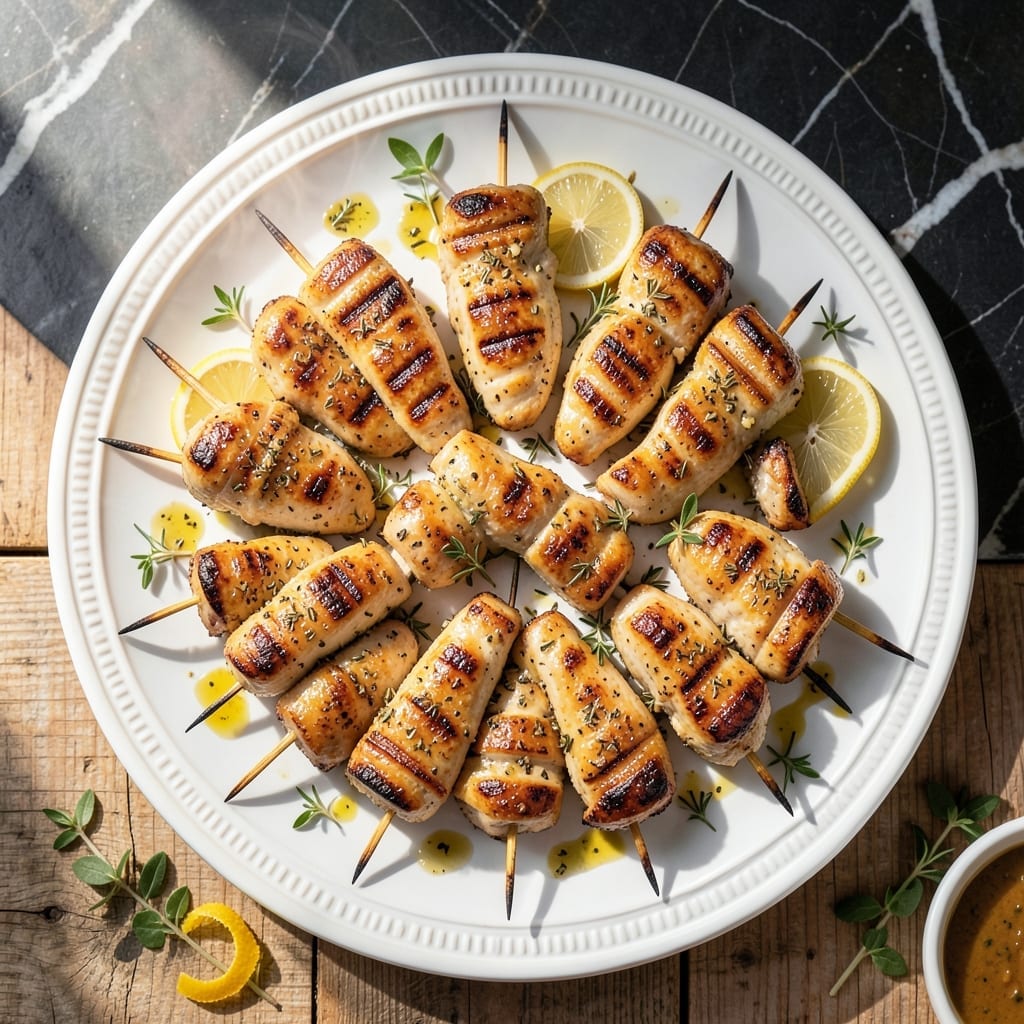
Oven-baked chicken skewers deliver juicy meat with herbed crispness without the grill. This method ensures even cooking and caramelized edges every time.
I developed this after testing multiple techniques to perfect the texture. The key is high heat and proper spacing on the skewers for maximum browning.
You’ll get tender chicken with a flavorful crust, thanks to a simple marinade and strategic oven placement. The result is consistent and restaurant-quality.
Serve these with a cooling yogurt dip or fresh salad for a complete meal. Ready in under 30 minutes.
Ingredients for Chicken Skewers Recipe Oven
Pantry staples and fresh herbs create these oven-baked skewers with juicy, herbed perfection.
| Ingredient | Amount | Notes |
|---|---|---|
| Boneless Skinless Chicken Thighs 🍗 | 1 ½ lb | Cut into 1-inch cubes |
| Extra-Virgin Olive Oil 🫒 | ¼ cup | For marinade and brushing |
| Fresh Lemon Juice 🍋 | 2 tbsp | About 1 lemon |
| Garlic Cloves 🧄 | 4 cloves | Minced finely |
| Dried Oregano 🌿 | 1 tbsp | Mediterranean variety preferred |
| Dried Thyme 🍃 | 1 tsp | Crushed between fingers |
| Smoked Paprika 🌶️ | 1 tsp | For depth and color |
| Kosher Salt 🧂 | 1 tsp | Diamond Crystal preferred |
| Freshly Ground Black Pepper 🌶️ | ½ tsp | Coarse grind ideal |
| Wooden Skewers 🪵 | 12 pieces | Soaked in water 30 minutes |
| Plain Greek Yogurt 🥛 | ½ cup | For dipping sauce |
| Fresh Dill 🌿 | 2 tbsp | Chopped, for garnish |
The chicken thighs are non-negotiable here—they stay juicy where breasts would dry out. Costco has great pre-cut thighs, but any grocery store works. Look for skinless, boneless to save prep time. The wooden skewers must soak (30 minutes minimum) or they’ll burn—metal works too if that’s what you’ve got. Trader Joe’s has affordable skewers if you don’t have any on hand.
No fresh herbs? Dried dill at half the amount works, but fresh really shines. Missing smoked paprika? Regular paprika plus a pinch of cayenne gets you close. The Greek yogurt dip can swap to sour cream (or vegan yogurt if needed). Lemon juice is key for brightness—bottled works, but fresh is worth the squeeze.
Marinate the chicken up to 24 hours ahead (it actually gets better). Skewers keep 3-4 days refrigerated—reheat in the oven to maintain crispness. The yogurt dip stays fresh for 5 days in the fridge (stir before serving).
Why You’ll Love This Recipe
- Minimal Chopping Required: I just toss the chicken with olive oil, lemon, garlic, and oregano—no fancy prep or knife skills needed.
- That Garlic-Oregano Punch: The combo of fresh lemon and dried oregano makes every bite so bright and savory, I end up licking my fingers.
- Weeknight Lifesaver: Between us, this is my go-to for busy evenings when I need something fast but still crave-worthy.
- Leftovers? Even Better: Honestly, the flavors deepen overnight, so I make extra for next-day lunches.
Step-by-Step Instructions for Chicken Skewers Oven
Here’s the method. Straightforward, tested, works every time.
Step 1: Marinate the Chicken for Maximum Flavor
In a large bowl, whisk together the 0.25 cup extra-virgin olive oil, 2 tbsp fresh lemon juice, minced 4 cloves garlic cloves, 1 tbsp dried oregano, 1 tsp dried thyme, 1 tsp smoked paprika, 1 tsp kosher salt, and 0.5 tsp freshly ground black pepper. I crush the thyme between my fingers to release its aroma.
Add the 1.5 lb boneless skinless chicken thighs cut into 1-inch cubes and toss to coat evenly. Cover and refrigerate for at least 30 minutes (I prefer 2 hours for deeper flavor). The acid in the lemon juice will start breaking down the proteins, ensuring tender, juicy results.
Step 2: Prepare Skewers and Preheat Oven
Soak the 12 pieces wooden skewers in warm water for 30 minutes to prevent burning. This is non-negotiable—dry skewers will char in the oven. Meanwhile, preheat your oven to 425°F and position a rack in the upper third for optimal browning.
After soaking, drain the skewers and pat dry. Thread 4-5 chicken cubes onto each skewer, leaving a little space between pieces for even cooking. Arrange them on a baking sheet lined with parchment paper. Brush any remaining marinade over the threaded chicken.
Step 3: Roast to Perfection
Place the baking sheet in the preheated oven and roast for 15 minutes. Then, flip each skewer and brush with a little more extra-virgin olive oil if needed. Roast for another 10-12 minutes until the chicken is golden brown and reaches an internal temperature of 165°F.
Watch for the edges to crisp slightly—that’s the smoked paprika working its magic. The chicken is done when it’s opaque throughout and the juices run clear. Don’t overcrowd the skewers on the tray; give them space so they roast rather than steam.
Step 4: Rest and Serve with Yogurt Dipping Sauce
Remove the skewers from the oven and let them rest for 5 minutes. This allows the juices to redistribute, keeping every bite moist. While they rest, mix the 0.5 cup plain Greek yogurt with the 2 tbsp fresh dill in a small bowl. The cool, creamy sauce balances the warm, herby chicken perfectly.
Serve the skewers hot with the dipping sauce on the side. Garnish with extra chopped dill if you like. The contrast of crisp edges and tender interior, paired with the tangy yogurt, makes these skewers irresistible.
Pro Tips For Making Chicken Skewers Recipe Oven
- Preheat the Oven: Crank it to 425°F—any lower and the chicken steams instead of browning, and nobody wants pale, soggy skewers.
- Cut Evenly: Slice the thighs into 1-inch chunks so they cook through at the same rate; I learned this the hard way after pulling out half-raw, half-dry pieces.
- Soak the Skewers: If using wooden ones, let them soak in water for 30 minutes first—I skipped this once and ended up with charred sticks and a smoke alarm concert.
- Double the Marinade: Use half for marinating and reserve the other half for basting; sounds like extra work, but it actually changes the outcome and keeps things safe.
Pro Cooking Tips for Great chicken skewers recipe oven
Oven Positioning Matters
Always use the upper third rack for these skewers. At 425°F, this placement ensures the tops brown beautifully while the bottoms cook through without burning. I learned this the hard way after a batch came out unevenly cooked on the middle rack. 🌡️
Space for Crispiness
Leave ½ inch between chicken cubes on each skewer. Crowding causes steaming instead of roasting, and you’ll lose that coveted crispness. I use 12-inch skewers to give each piece room to caramelize properly.
Flip with Precision
After the first 15 minutes, flip each skewer carefully and brush with a touch of extra-virgin olive oil. This mid-cook flip ensures even browning on both sides. A pair of tongs works better than your hands for this step.
Temperature Check
Use an instant-read thermometer to confirm the chicken reaches 165°F internally. I aim for the thickest cube on each skewer. The juices should run clear when pierced, with no pink remaining.
Rest Before Serving
Let the skewers rest for 5 minutes after removing from the oven. This step is non-negotiable—it keeps the juices inside the meat. Pickles usually starts meowing at this point, sensing dinner is ready. 💪
Broiler Boost Option
For extra crispiness, switch the oven to broil for the final 2-3 minutes. Watch closely to prevent burning. This trick mimics grill marks and adds depth to the flavor profile.
Nutrition Facts
Frequently Asked Questions
Can I use chicken breasts instead of thighs?
You can, but thighs stay juicier. Breasts dry out faster, so reduce cooking time to 12-15 minutes total and monitor closely. Brining them first helps maintain moisture.
How do I prevent the skewers from sticking to the pan?
Use parchment paper or a silicone mat on the baking sheet. Lightly oil the surface before arranging skewers. Avoid non-stick sprays with wooden skewers.
What if I don’t have wooden skewers?
Metal skewers work perfectly and don’t require soaking. If using none at all, arrange chicken in a single layer with space between pieces. Cooking time remains the same.
Can I make these ahead of time?
Marinate chicken up to 24 hours ahead. Assemble skewers 4 hours before cooking and refrigerate. Bake just before serving for best texture.

- Jollof Rice Sauce Recipe: West African Tomato and Spice Infusion - September 25, 2026
- Japanese Rice Soup Recipe: Umami-Rich Comfort in a Bowl - September 25, 2026
- Homemade Cream Of Rice Recipe: Silk-Smooth Breakfast in Minutes - September 25, 2026