
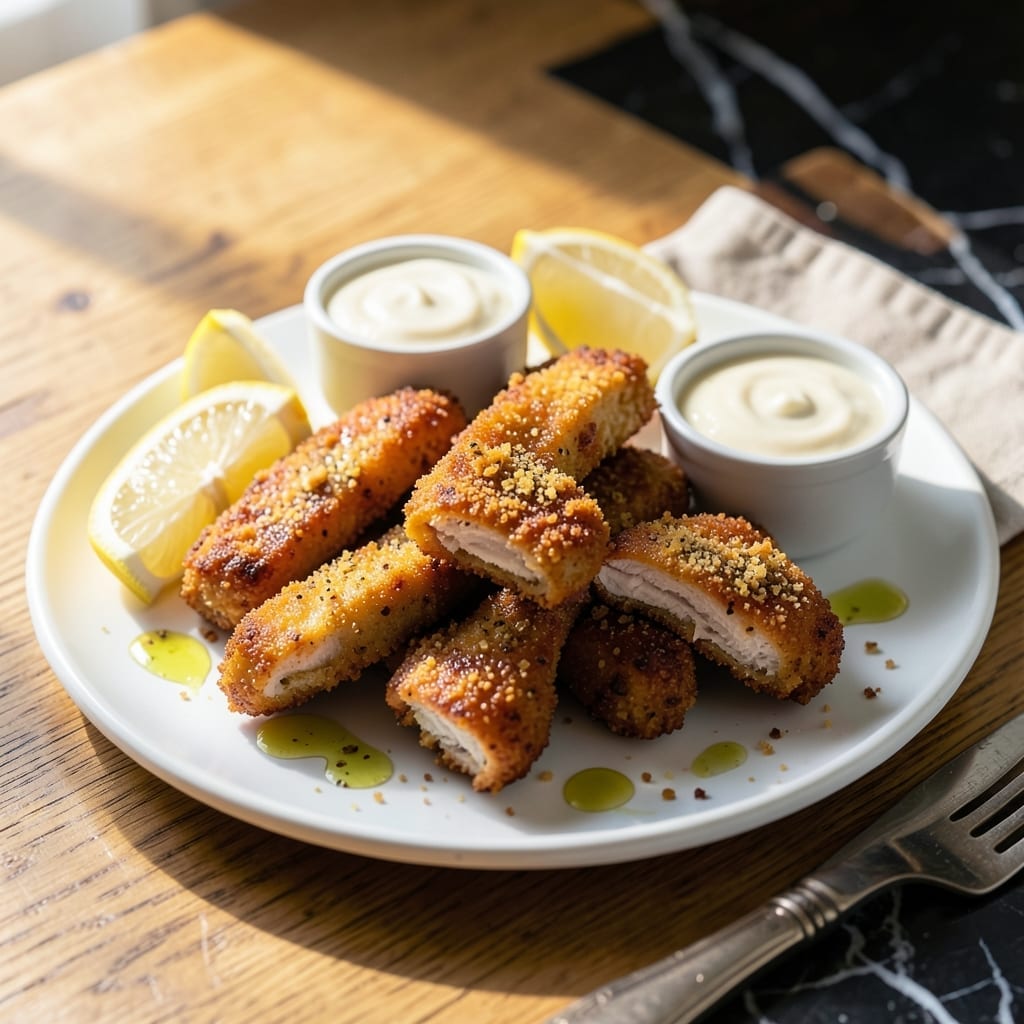
I’ve refined this homemade method after countless tests to achieve the ideal balance of crispy exterior and tender juice inside every strip.
Using a simple two-step coating process and a hot oven, you’ll get results that rival deep-frying without the mess or grease.
The key is a well-seasoned flour mixture and maintaining high heat to ensure even browning and maximum crunch.
These strips stay crispy long after baking, making them perfect for meals, snacks, or meal prep throughout the week.
Ingredients for Chicken Strips Homemade
A few pantry staples and fresh chicken transform into these irresistibly crispy oven-baked strips.
| Ingredient | Amount | Notes |
|---|---|---|
| Boneless Skinless Chicken Breasts 🍗 | 1 ½ lb | Cut into 1-inch strips |
| All-Purpose Flour 🌾 | 1 ½ cups | Divided for dredging and breading |
| Kosher Salt 🧂 | 1 ½ tsp | Diamond Crystal preferred |
| Freshly Ground Black Pepper 🌶️ | 1 tsp | Coarse grind recommended |
| Garlic Powder 🧄 | 1 tsp | Not garlic salt |
| Onion Powder 🧅 | 1 tsp | Fine grind for even coating |
| Paprika 🌶️ | 1 tsp | Sweet or smoked variety |
| Large Eggs 🥚 | 2 whole | Beaten for egg wash |
| Buttermilk 🥛 | ½ cup | Full-fat for tanginess |
| Panko Breadcrumbs 🍞 | 2 cups | Japanese-style for extra crunch |
| Neutral-Flavor Cooking Oil 🫒 | 3 tbsp | Avocado or vegetable oil |
| Baking Powder 🧂 | ½ tsp | Enhances crispiness in coating |
The chicken quality matters—look for uniformly thick breasts (about 6 oz each) at Whole Foods or your trusted butcher for even cooking. For the flour mixture, King Arthur all-purpose is my go-to for its consistent texture. The panko is non-negotiable for that signature crunch; Kikkoman brand is widely available and reliable. Freshly ground black pepper makes a noticeable difference in the seasoning blend.
No buttermilk? Whole milk with 1 tbsp lemon juice per cup works in a pinch. Swap panko for regular breadcrumbs if needed, but expect less crunch. For a spicier kick, add half the amount of cayenne to the flour mixture. If avoiding gluten, use a 1:1 gluten-free flour blend with xanthan gum. The egg wash can be replaced with a cornstarch slurry for a vegan option.
Breaded chicken strips are best eaten fresh but will keep in an airtight container for up to 3 days. Re-crisp in a 400°F oven for 5-8 minutes before serving. Freeze uncooked breaded strips on a tray first, then transfer to a bag—they’ll keep for 2 months.
Why You’ll Love This Recipe
- Under 30 Minutes: I can have crispy chicken strips on the table faster than delivery arrives.
- Garlicky Crunch: The garlic powder in the flour coating gives every bite that savory kick I crave.
- Kid-Approved Meal: Honestly, it’s the only thing my picky nephew will eat without complaint.
- Budget Stretcher: A pound of chicken breasts makes enough for two meals, and the pantry staples cost pennies.
Step-by-Step Instructions for Chicken Strips
This method guarantees extra-crispy results without frying, using a simple three-step breading process.
Step 1: Prepare the Chicken and Seasoned Flour
Cut the 1.5 lb Boneless Skinless Chicken Breasts into 1-inch strips. Pat them thoroughly dry with paper towels—this is crucial for the coating to adhere properly and achieve maximum crispiness. Any moisture left on the surface will create steam, causing the breading to fall off during cooking.
In a shallow dish, combine 1 cup of the 1.5 cups All-Purpose Flour with 1.5 tsp Kosher Salt, 1 tsp Freshly Ground Black Pepper, 1 tsp Garlic Powder, 1 tsp Onion Powder, 1 tsp Paprika, and 0.5 tsp Baking Powder. The baking powder creates tiny air pockets in the coating, enhancing the crunch. Whisk until all the spices are evenly distributed throughout the flour.
Step 2: Create the Wet Coating Station
In a second shallow dish, beat the 2 whole Large Eggs with the 0.5 cup Buttermilk until fully combined. This mixture acts as the glue that helps the flour and breadcrumb layers stick to the chicken. The tanginess of the buttermilk also adds subtle flavor depth to your creation.
Place the remaining 0.5 cup All-Purpose Flour in a third shallow dish and the 2 cups Panko Breadcrumbs in a fourth. Arrange all dishes in this order: seasoned flour, egg wash, plain flour, panko. This setup creates a smooth workflow and prevents cross-contamination between the wet and dry ingredients.
Step 3: Bread the Chicken Strips
Working with one piece at a time, dredge each chicken strip in the seasoned flour, shaking off any excess. Then dip it in the egg wash, allowing any excess to drip back into the dish. Coat the strip in the plain flour, followed by a final press into the panko breadcrumbs. Apply gentle pressure to ensure the panko adheres well to all sides.
Place the breaded strips on a wire rack set over a baking sheet. This elevation allows air to circulate around all sides, preventing the coating from becoming soggy. Let them rest for 5 minutes to help the coating set before cooking.
Step 4: Cook Until Golden and Crisp
Heat 3 tbsp Neutral-Flavor Cooking Oil in a large skillet over medium-high heat until it shimmers but doesn’t smoke. Add the breaded chicken strips in a single layer, working in batches if necessary to avoid crowding the pan. Crowding lowers the oil temperature and results in steamed, soggy coating rather than crispy.
Cook for 3-4 minutes per side until the strips are golden brown and the internal temperature reaches 165°F. The panko should form a thick, crisp crust that audibly crunches when bitten. Transfer the cooked strips to a paper towel-lined plate to drain any excess oil before serving.
Pro Tips For Making Chicken Strips Homemade
- Pound Even Thickness: Use a rolling pin or meat mallet to gently pound the chicken breasts to 1/2-inch thickness—I learned this the hard way after too many dry, overcooked ends from uneven pieces.
- Double Dredge: Dip the strips in flour once, shake off the excess, then repeat for a thicker, crispier crust that actually stays put when frying.
- Skip Cold Chicken: Let the chicken sit at room temperature for 15 minutes before cooking; cold meat seizes up and cooks unevenly, leaving you with dry edges and raw centers.
- Season the Flour: Mix the kosher salt, black pepper, and garlic powder right into the flour before dredging—it sticks better than sprinkling it on after and gives every bite consistent flavor.
Flavor Customization for This Dish
Spicy Buffalo Style
Toss cooked strips in ¼ cup Frank’s RedHot mixed with 2 tbsp melted butter for that classic buffalo flavor. I like to add ½ tsp garlic powder to the sauce for extra depth. Serve with ranch or blue cheese dressing and celery sticks.
Honey Mustard Glaze
Whisk together 3 tbsp honey, 2 tbsp Dijon mustard, and 1 tbsp whole-grain mustard. Brush this glaze over the strips during the last 2 minutes of cooking. The sweetness caramelizes beautifully in the pan. 💛
Lemon Pepper Twist
Add 1 tbsp lemon zest and 1 tsp coarsely cracked black pepper to your panko mixture before breading. The citrus brightens the flavor, while the pepper adds a subtle kick. I find this version pairs perfectly with a creamy dipping sauce.
Parmesan Garlic
Stir ½ cup grated Parmesan cheese and 1 tsp garlic powder into your panko breadcrumbs. This creates an irresistibly savory crust. Sprinkle extra Parmesan over the strips right after cooking for a melty, cheesy finish.
Cajun Spice Blend
Replace the paprika in your flour mixture with 1 tbsp Cajun seasoning. I use Tony Chachere’s for an authentic Louisiana flavor. This gives the strips a smoky, slightly spicy character that’s perfect with remoulade sauce. 🔥
Herb Garden Fresh
Finely chop 2 tbsp fresh parsley, 1 tbsp fresh thyme, and 1 tbsp fresh rosemary. Mix these herbs into your panko for a fragrant, garden-fresh coating. The aroma while cooking is absolutely divine.
Nutrition Facts
Frequently Asked Questions
Can I use chicken tenders instead of breasts?
Yes! Chicken tenders work perfectly and often cook more evenly. Just adjust the cooking time to 2-3 minutes per side since they’re thinner.
Why did my coating fall off during cooking?
This usually happens if the chicken wasn’t dry before breading or if the oil wasn’t hot enough. Pat the strips very dry and ensure oil shimmers before adding.
How do I keep them crispy for meal prep?
Store on a wire rack in the fridge to prevent steam buildup. Reheat in a 400°F oven for 5-8 minutes to restore crunch.
Can I bake these instead of pan-frying?
Bake at 425°F for 12-15 minutes, flipping halfway. Use a wire rack on a baking sheet for best results.

- Jollof Rice Sauce Recipe: West African Tomato and Spice Infusion - September 25, 2026
- Japanese Rice Soup Recipe: Umami-Rich Comfort in a Bowl - September 25, 2026
- Homemade Cream Of Rice Recipe: Silk-Smooth Breakfast in Minutes - September 25, 2026