
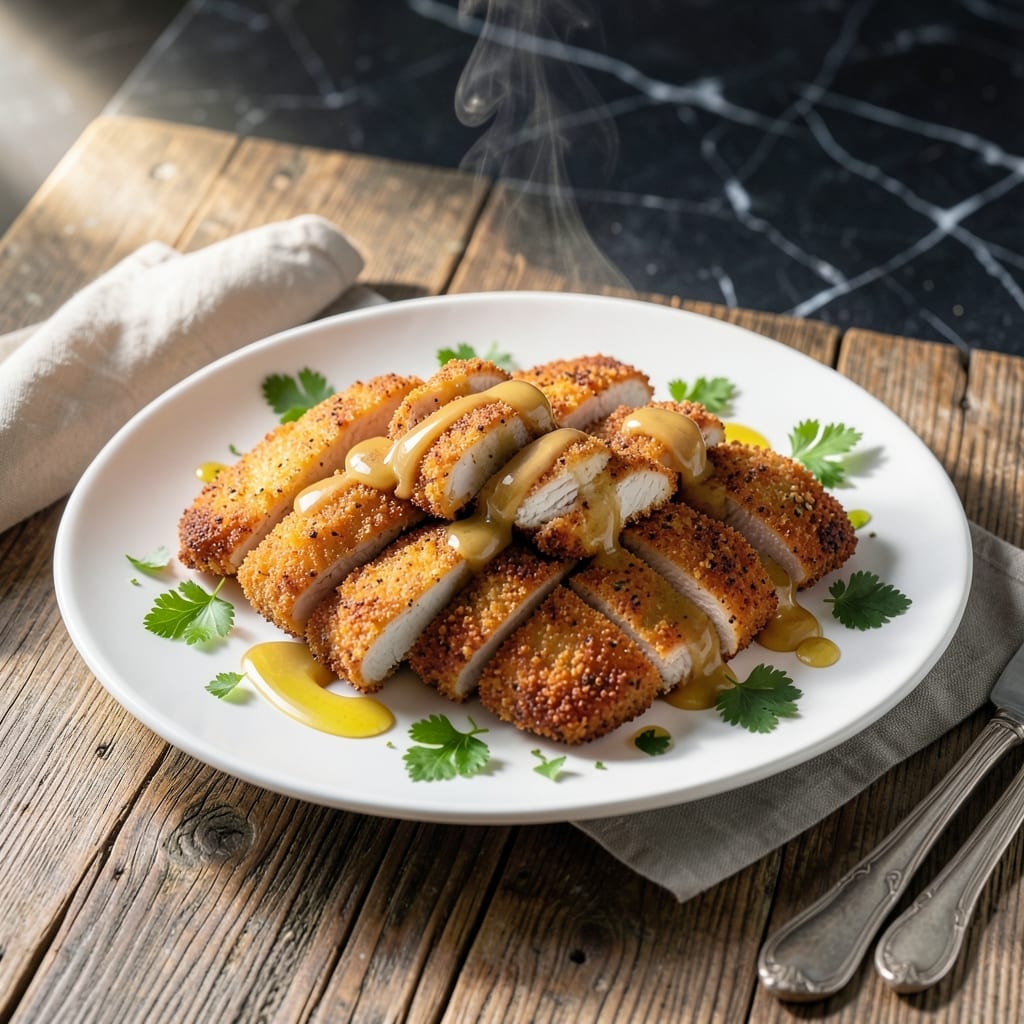
Achieving crispy chicken strips at home requires the right technique and a well-balanced spice blend. This method delivers restaurant-quality results with a golden, crunchy exterior and juicy interior.
The secret lies in a double-coating process using flour and egg wash, followed by a precise frying temperature. Each strip emerges perfectly crispy without being greasy, while the seasoning adds depth to every bite.
These strips maintain their texture even when served with dipping sauces, making them ideal for meals or appetizers. The process is straightforward yet yields professional results every time.
Perfect for family dinners or casual gatherings, this recipe ensures consistently crispy chicken with minimal effort. The spice blend elevates the flavor beyond basic seasoning.
Ingredients for Chicken Strips
Restaurant-quality crispy chicken strips start with these twelve carefully selected ingredients for perfect texture and flavor.
| Ingredient | Amount | Notes |
|---|---|---|
| Boneless Skinless Chicken Breasts 🍗 | 1 ½ lb | Cut into 1-inch strips |
| All-Purpose Flour 🌾 | 1 ½ cups | For initial dredging |
| Large Eggs 🥚 | 2 whole | Beaten for egg wash |
| Panko Breadcrumbs 🍞 | 2 cups | Japanese-style for extra crunch |
| Paprika 🌶️ | 1 tbsp | Sweet or smoked variety |
| Garlic Powder 🧄 | 1 tsp | Not garlic salt |
| Onion Powder 🧅 | 1 tsp | Fresh ground preferred |
| Dried Oregano 🍃 | 1 tsp | Mediterranean oregano ideal |
| Salt 🧂 | 1 tsp | Diamond Crystal kosher preferred |
| Black Pepper 🌶️ | ½ tsp | Freshly ground preferred |
| Cayenne Pepper 🔥 | ¼ tsp | Adjust for heat preference |
| Vegetable Oil 🫒 | 2 cups | For deep frying, high smoke point |
| Buttermilk 🥛 | ½ cup | For tenderizing chicken |
The chicken quality is paramount for optimal texture. Boneless skinless chicken breasts yield the most consistent strips—avoid pre-cut tenders as they often contain rib meat. For the coating, Panko breadcrumbs (found at Whole Foods or any Asian market) provide superior crunch compared to standard breadcrumbs. The buttermilk should be full-fat for maximum tenderizing effect (the extra richness makes a noticeable difference).
No buttermilk? Whole milk with 1 tbsp lemon juice works in a pinch. For gluten-free, swap the flour and Panko for rice flour and gluten-free breadcrumbs. The paprika can be smoked for deeper flavor, but sweet paprika maintains the classic profile. If avoiding spice entirely, omit the cayenne—it won’t affect the crispiness. The egg wash can be replaced with aquafaba for vegan preparation.
Marinate the chicken in buttermilk for up to 12 hours for maximum tenderness. Store unused breadcrumbs in an airtight container for 3 months. The spice blend keeps indefinitely in a cool, dark place. For food safety, discard any leftover egg wash or buttermilk marinade that has touched raw chicken.
Why You’ll Love This Recipe
- 20-Minute Meal: I can get these from prep to plate faster than takeout arrives. Honestly, the panko-paprika combo does all the heavy lifting.
- Crispy Perfection: That golden panko crust with a hint of smoky paprika? My kids beg for seconds before they even hit the table.
- Freezer Friendly: Double the batch and freeze half—future me thanks present me every time I pull out a stash for busy nights.
- Budget Stretcher: One pound of chicken breasts turns into a meal that feeds four, and the pantry staples keep the cost way down.
Step-by-Step Instructions for Chicken Strips
Master the technique for achieving that ideal crispy texture with a well-seasoned coating.
Step 1: Prepare and Season the Chicken
Begin by cutting the 1.5 lb Boneless Skinless Chicken Breasts into uniform 1-inch strips. This ensures even cooking and consistent texture in every piece. I find that slicing against the grain also makes the finished strips more tender.
Pat the chicken completely dry with paper towels—this is crucial for the coating to adhere properly. Any moisture will prevent the flour and breadcrumbs from sticking, resulting in patchy coverage. Season the strips lightly with 1 tsp Salt at this stage to enhance flavor from the start.
Step 2: Set Up the Breading Station
Create a breading assembly line with three shallow dishes. Place the 1.5 cups All-Purpose Flour mixed with 1 tbsp Paprika, 1 tsp Garlic Powder, 1 tsp Onion Powder, 1 tsp Dried Oregano, 0.5 tsp Black Pepper, and 0.25 tsp Cayenne Pepper in the first dish.
Beat the 2 whole Large Eggs with 0.5 cup Buttermilk in the second dish. The buttermilk not only adds richness but also tenderizes the chicken. Place the 2 cups Panko Breadcrumbs in the third dish. Panko’s coarse texture creates superior crunch compared to regular breadcrumbs.
Step 3: Bread the Chicken Strips
Working with one piece at a time, dredge each strip in the seasoned flour, pressing gently to ensure full coverage. Shake off any excess—too much flour will create a thick, pasty coating rather than a crisp one. Next, dip the floured strip into the egg and buttermilk mixture, allowing any excess to drip off.
Finally, press the strip into the Panko Breadcrumbs, turning to coat all sides completely. The pressure helps the crumbs adhere tightly, which prevents them from falling off during frying. Place the breaded strips on a wire rack to rest for 5-10 minutes—this gives the coating time to set.
Step 4: Fry to Golden Perfection
Heat the 2 cups Vegetable Oil in a deep, heavy-bottomed skillet over medium-high heat to 350°F. Use a deep-fry or candy thermometer to monitor the temperature accurately. If the oil is too cool, the chicken will absorb oil and become greasy; if too hot, the outside will burn before the inside cooks.
Fry the strips in batches to avoid overcrowding the pan, which would lower the oil temperature. Cook for 4-5 minutes per side until the coating is golden brown and the internal temperature reaches 165°F. Drain on a wire rack or paper towels to preserve crispiness.
Pro Tips For Making Chicken Strips
- Dry the Chicken: Pat the boneless skinless chicken breasts completely dry with paper towels before dredging—I learned this the hard way after my first batch turned out soggy instead of crispy.
- Chill Before Frying: Let the breaded strips rest in the fridge for 15-20 minutes after coating. This keeps the panko from falling off in the pan and actually changes the outcome.
- Skip the Overcrowding: Fry in small batches with about 1/2 inch of oil between each strip, or they’ll steam instead of crisp. My grandmother swore by this, and she was right.
- Double-Coat for Crunch: After the first egg and panko coating, dip again in egg then panko for extra crunch. Sounds weird, but it works.
Pro Cooking Tips for chicken strips
Oil Temperature Control
Maintaining 350°F oil temperature is non-negotiable for perfect results. I use a Taylor digital deep-fry thermometer for accuracy. If the temperature drops below 340°F, the coating absorbs oil and turns soggy. 🌡️
Double-Coating Secret
For extra-crispy strips, double-dip in the egg wash and Panko after the first coat sets. This adds 30% more crunch without making them heavy. Let each layer rest for 5 minutes before frying to prevent breadcrumb loss.
Batch Frying Strategy
Never overcrowd your pan—fry in batches with 2-3 inches between pieces. This prevents temperature drops that lead to greasy strips. I use a Lodge cast iron skillet for even heat distribution. Keep a paper towel handy to blot excess oil between batches.
Resting for Crispiness
After frying, drain on a wire rack (not paper towels) to maintain airflow. This keeps the coating crispy on all sides. I rest mine for 2-3 minutes before serving—just enough time to prep dipping sauces. 🔥
Spice Blend Pro Tip
Toast your Panko breadcrumbs in a dry pan with 1 tsp paprika for 2 minutes before breading. This deepens the flavor. For extra zing, add ½ tsp onion powder to the flour mix.
Internal Temp Check
Always verify doneness with a meat thermometer—165°F is the safe minimum. The juices should run clear when pierced. Undercooked chicken ruins the texture, even if the outside looks perfect.
Nutrition Facts
Frequently Asked Questions
Can I bake instead of fry?
Yes! Bake at 400°F for 15-20 minutes, flipping halfway. Use a wire rack on a baking sheet for even air circulation to maintain crispiness.
How do I keep them crispy longer?
Drain on a wire rack, not paper towels, to prevent steam buildup. Store in a single layer in an oven set to 200°F until serving. This keeps them warm and crisp for up to 30 minutes.
Why does the coating fall off?
This usually happens if the chicken is wet or the oil temperature is too low. Pat the chicken dry and maintain 350°F oil for best adhesion. Let breaded strips rest for 5-10 minutes before frying.

- Jollof Rice Sauce Recipe: West African Tomato and Spice Infusion - September 25, 2026
- Japanese Rice Soup Recipe: Umami-Rich Comfort in a Bowl - September 25, 2026
- Homemade Cream Of Rice Recipe: Silk-Smooth Breakfast in Minutes - September 25, 2026