
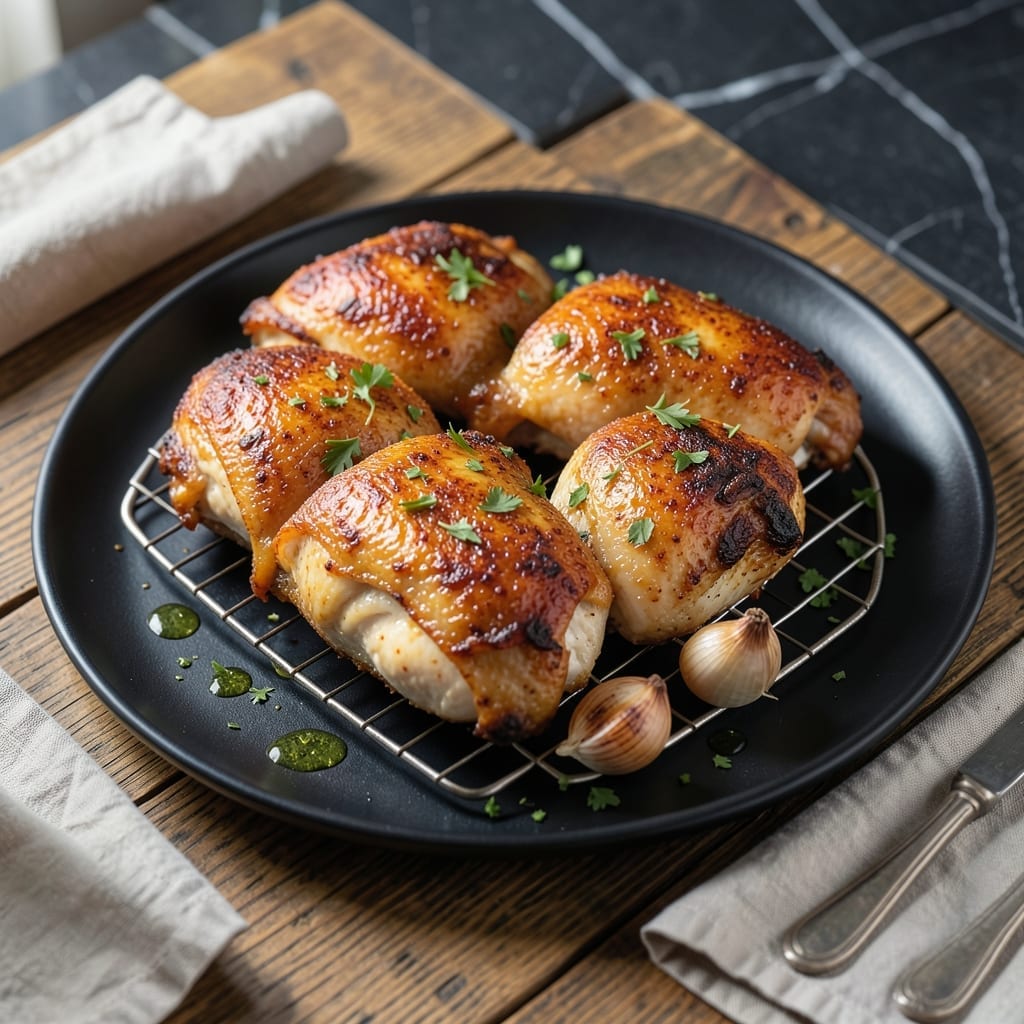
Achieving crispy skin on oven-baked chicken requires precise technique and timing. This method delivers consistent results without frying or complicated equipment.
The secret lies in drying the chicken thoroughly before seasoning and using high heat to render the fat. A simple spice rub enhances flavor without overpowering the natural taste of the meat.
What emerges from the oven is juicy chicken with shatteringly crispy, golden-brown skin that stays intact. The meat remains tender while the exterior develops the perfect texture.
Serve this dish with roasted vegetables or a fresh salad for a complete meal. The technique works with any chicken parts you prefer.
Ingredients for Bake Chicken
Bone-in chicken thighs and a precise spice rub create perfectly crispy oven-baked results every time.
| Ingredient | Amount | Notes |
|---|---|---|
| Chicken Thighs 🍗 | 4 whole | Bone-in, skin-on for crispiness |
| Kosher Salt 🧂 | 1 ½ tsp | Diamond Crystal preferred |
| Black Pepper 🌶️ | 1 tsp | Freshly ground for best flavor |
| Garlic Powder 🧄 | 1 tsp | Not garlic salt |
| Smoked Paprika 🌶️ | 1 tsp | Adds depth and color |
| Onion Powder 🧅 | 1 tsp | Complements the garlic |
| Dried Thyme 🌿 | ½ tsp | Crushed between fingers |
| Baking Powder 🧂 | ½ tsp | For extra crispiness |
| Extra-Virgin Olive Oil 🫒 | 2 tbsp | High smoke point variety |
| Lemon 🍋 | 1 whole | Zested and juiced |
| Fresh Rosemary 🌿 | 2 slices | Sprigs, optional garnish |
The chicken thighs are non-negotiable for this method. Bone-in, skin-on ensures the fat renders properly, creating that shatteringly crisp texture. Source from Whole Foods or a trusted butcher for consistent quality. Pat them extremely dry with paper towels—any moisture prevents the skin from crisping. If using breasts, opt for skin-on, bone-in to avoid drying out.
No smoked paprika? Regular paprika plus a pinch of cayenne works in a pinch. Fresh garlic can replace the powder at a 3:1 ratio, but powder adheres better to the skin. The baking powder might seem odd, but it’s a professional trick for extra crunch (trust the science). If avoiding additives, skip it—the skin will still crisp, just less dramatically.
Store raw chicken in the coldest part of your fridge for up to 2 days. Once cooked, leftovers keep for 4-5 days and reheat surprisingly well in a toaster oven to revive the skin. Freeze for up to 3 months, though texture may soften slightly.
Why You’ll Love This Recipe
- One Pan Wonder: I toss everything on a sheet pan, season, and let the oven do the work.
- Smoky Depth: That smoked paprika gives the chicken thighs a rich, almost barbecue-like flavor.
- Meal Prep Star: I make a big batch on Sunday and it reheats beautifully for lunches all week.
- Budget Friendly: Chicken thighs are cheap, and a little garlic powder and paprika go a long way.
Step-by-Step Instructions for Oven-Baked Chicken
This method delivers exceptionally crispy skin while keeping the meat juicy and flavorful.
Step 1: Prepare and Season the Chicken Thighs
Pat the 4 whole Chicken Thighs completely dry with paper towels—this is non-negotiable for achieving maximum crispiness. Any moisture will steam the skin instead of allowing it to brown properly.
In a small bowl, combine the 1.5 tsp Kosher Salt, 1 tsp Black Pepper, 1 tsp Garlic Powder, 1 tsp Smoked Paprika, 1 tsp Onion Powder, 0.5 tsp Dried Thyme, and 0.5 tsp Baking Powder. The baking powder is the secret to extra-crispy skin by increasing surface area for browning.
Rub this spice mixture evenly over all sides of the chicken thighs, pressing gently so it adheres well.
Step 2: Rest and Preheat for Optimal Results
Arrange the seasoned chicken thighs skin-side up on a wire rack set over a baking sheet. This setup allows air to circulate around the entire piece, ensuring even crisping. Let them sit at room temperature for 15 minutes while you preheat the oven to 425°F.
During this rest, the salt begins to penetrate the meat while the skin dries further. Preheating is critical—starting with a hot oven gives you that initial burst of heat needed to render the fat and crisp the skin quickly before the meat overcooks.
Step 3: Bake and Crisp the Skin
Drizzle the 2 tbsp Extra-Virgin Olive Oil over the chicken thighs, making sure the skin is well-coated. This fat helps conduct heat and enhances browning. Place the baking sheet on the middle rack of your preheated oven.
Bake for 35-40 minutes without flipping. You’ll know it’s done when the skin is deep golden brown and crispy and the internal temperature reaches 175°F at the thickest part of the thigh (not touching bone). The high heat renders the fat while cooking the meat through perfectly.
Step 4: Finish with Citrus and Herbs
While the chicken bakes, zest the 1 whole Lemon and set the zest aside. After removing the chicken from the oven, immediately squeeze the lemon juice over the hot thighs. The acidity brightens the rich flavors and cuts through the fat.
Garnish with the lemon zest and 2 slices Fresh Rosemary for a fragrant, visually appealing finish. Let the chicken rest for 5 minutes before serving—this allows the juices to redistribute, ensuring moist, tender meat with every bite.
Pro Tips For Making Bake Chicken
- Preheat the Pan: I learned this the hard way—start with a screaming-hot pan (425°F oven) to get that skin crisp before the fat renders. Chicken thighs need that initial heat blast to avoid soggy results.
- Pat Thighs Dry: Sounds tedious, but it works: blot the thighs with paper towels before seasoning. Wet skin steams instead of browning, and you’ll lose that smoky paprika crust.
- Don’t Overcrowd: Skip the urge to cram all thighs on one tray. Give them space—about an inch apart—so they roast, not steam. My first few batches were pale and sad before I figured this out.
- Season Twice: Hit the thighs with salt, pepper, garlic powder, and smoked paprika before baking, then dust with a little more paprika when they come out. The second sprinkle adds a fresh, vibrant layer of flavor.
Essential Equipment for This Recipe
Baking Sheet Essentials
A sturdy half-sheet pan (18×13 inches) is your foundation. I recommend Nordic Ware for even heating. The wire rack is non-negotiable—it elevates the chicken for 360-degree airflow. A stainless steel rack from OXO fits perfectly and won’t warp. 💡
Temperature Tools
An oven thermometer is critical—many ovens run 10-15°F off. I use a Taylor oven thermometer for $10. An instant-read thermometer like ThermoWorks ThermoPop ensures perfect doneness at 175°F.
Prep Gear
Paper towels are your secret weapon for drying the skin. A mixing bowl for the rub and tongs for handling hot chicken are must-haves. I keep a silicone brush nearby for oiling the skin evenly.
Optional Upgrades
A cast iron skillet can replace the baking sheet for even better heat retention. If you love crispy skin, a broiler pan with a slotted top mimics a rotisserie effect. Both are worth the investment for chicken lovers.
Cleanup Helpers
Parchment paper under the rack catches drippings for easy cleanup. A fat separator lets you save the rendered chicken fat for cooking. I always keep aluminum foil on hand for quick coverage if the skin browns too fast.
Nutrition Facts
Frequently Asked Questions
Why pat the chicken dry before baking?
Drying removes moisture that would steam the skin instead of crisping it. Even a little water prevents the 425°F heat from creating that perfect golden-brown texture.
Can I use boneless thighs instead?
Not recommended. Bone-in, skin-on thighs have more fat for crisping and stay juicier. Boneless versions tend to dry out and won’t achieve the same crunch.
What if my oven runs hot?
Check with an oven thermometer. If it runs hot, reduce temperature to 400°F and monitor closely. The 35-40 minutes timing may need adjustment.
Can I skip the wire rack?
You can, but the skin won’t crisp as evenly. The rack allows air circulation for 360-degree browning. Without it, the bottom may stay soggy.

- Jollof Rice Sauce Recipe: West African Tomato and Spice Infusion - September 25, 2026
- Japanese Rice Soup Recipe: Umami-Rich Comfort in a Bowl - September 25, 2026
- Homemade Cream Of Rice Recipe: Silk-Smooth Breakfast in Minutes - September 25, 2026