
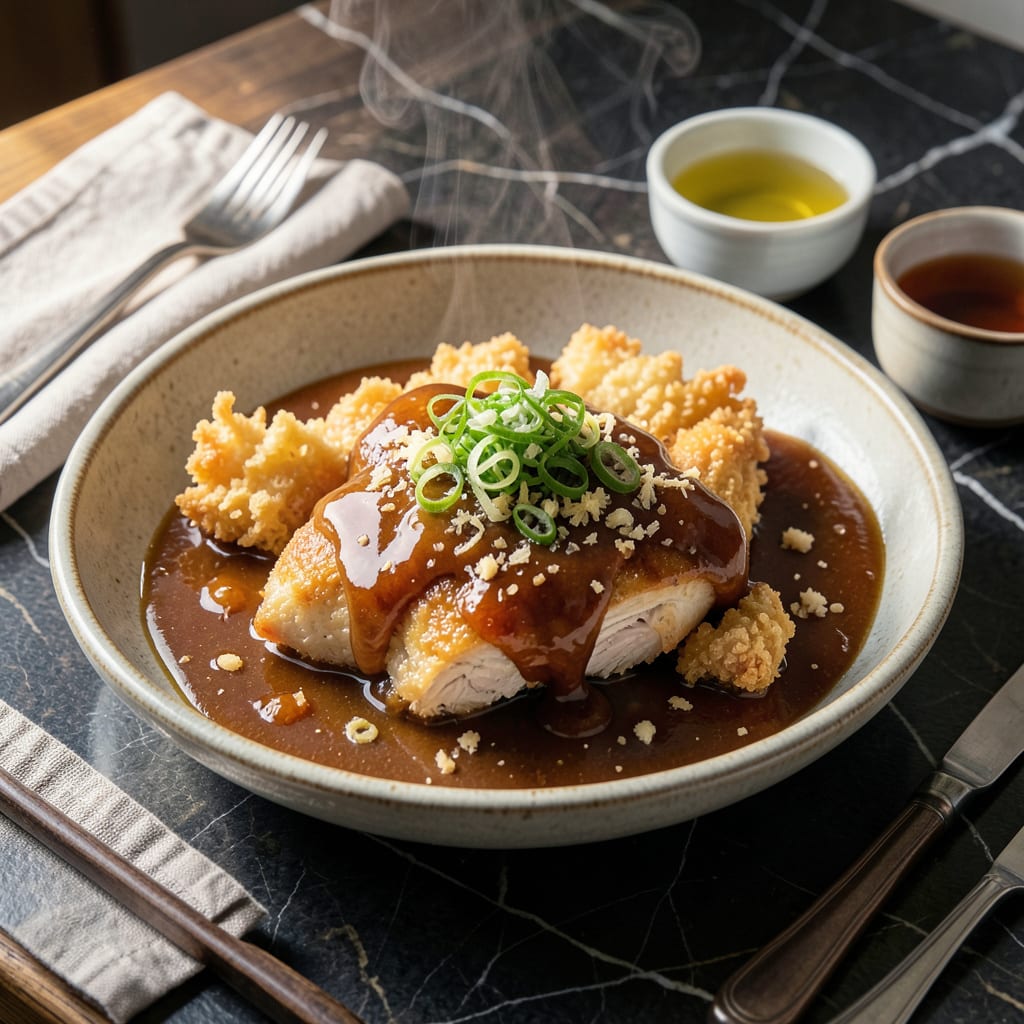
This sauce transforms crispy tempura into an unforgettable experience with its perfect balance of sweet and tangy flavors. I’ve refined this recipe to complement the light, airy texture of tempura without overpowering it.
With just a few simple ingredients and 5 minutes of prep, you’ll have a restaurant-quality dipping sauce that elevates every bite. The key is letting the flavors meld for the best results.
Ingredients for Chicken Tempura Sauce
Nine ingredients create this restaurant-quality dipping sauce with perfect sweet-tangy balance.
| Ingredient | Amount | Notes |
|---|---|---|
| Soy Sauce 🥢 | ½ cup | Low-sodium preferred for balance |
| Rice Vinegar 🍚 | ¼ cup | Unseasoned for clean tang |
| Mirin 🍶 | 2 tbsp | Sweet rice wine essential |
| Granulated Sugar 🍚 | 2 tbsp | Dissolves evenly in liquid |
| Dashi Stock 🍲 | ¼ cup | Or substitute chicken stock |
| Grated Fresh Ginger 🌿 | 1 tsp | Peeled and finely grated |
| Minced Garlic 🧄 | 1 tsp | Fresh for best aroma |
| Cornstarch 🌾 | 1 tsp | Slurry thickens perfectly |
| Water 💧 | 2 tbsp | For cornstarch slurry |
[recipeingredientscaler]
The dashi stock is non-negotiable for authentic depth—find it at Asian markets or the international aisle at Whole Foods. Mirin (in the same section) adds sweetness and gloss; avoid cooking wine substitutes. For the soy sauce, Kikkoman low-sodium strikes the ideal balance between salt and umami without overwhelming the other flavors.
No mirin? Dry sherry plus 1 tsp sugar works in a pinch. Vegetable stock can replace dashi if needed, though the flavor profile shifts slightly. Short on rice vinegar? Apple cider vinegar at half the amount gets you close. The cornstarch slurry is key for that silky consistency—mix it cold to avoid lumps when adding to the hot sauce.
Sauce keeps 5 days refrigerated in an airtight container. The flavors deepen overnight, so make it ahead if possible. For longer storage, freeze in ice cube trays—perfect for portioning out as needed. Stir well before using as separation is natural.
Why You’ll Love This Recipe
- 5-Minute Magic: I just stir together soy sauce, mirin, and a splash of dashi—no cooking, no fuss.
- Umami Bomb: The dashi and soy sauce create that deep, savory-sweet flavor I crave with every bite of tempura.
- Dinner’s Secret Weapon: Honestly, I drizzle this over rice bowls, noodles, even roasted veggies—it works everywhere.
- Pantry Staples: I always have these ingredients on hand, so I can make it without a last-minute grocery run.
Step-by-Step Instructions for Chicken Tempura Sauce
This method ensures a glossy, balanced sauce that complements crispy tempura beautifully.
Step 1: Combine the Liquid Base
In a small saucepan, whisk together the 0.5 cup Soy Sauce, 0.25 cup Rice Vinegar, 2 tbsp Mirin, and 2 tbsp Granulated Sugar over medium heat. The sugar should begin dissolving immediately as you stir.
Continue stirring until the mixture comes to a gentle simmer. You’ll see small bubbles forming around the edges of the pan and the sugar fully incorporated. This usually takes 2-3 minutes. The liquid should look slightly syrupy but not reduced yet.
Step 2: Infuse with Aromatics
Add the 1 tsp Grated Fresh Ginger and 1 tsp Minced Garlic to the simmering liquid. Stir well and let it cook for exactly 1 minute—just long enough to soften the raw edge of the garlic and ginger without letting them turn bitter.
Watch for the aroma to become fragrant and the ginger to lose its sharpness. The sauce should take on a deeper color as the aromatics infuse. Don’t let it boil vigorously at this stage, as that can make the ginger and garlic overpower the delicate balance of flavors.
Step 3: Add Dashi and Prepare Thickening Slurry
Pour in the 0.25 cup Dashi Stock and stir to combine. The sauce will thin out temporarily, but this is normal. In a small bowl, whisk together the 1 tsp Cornstarch and 2 tbsp Water until smooth to create a slurry.
The dashi adds a subtle umami depth that complements the soy and vinegar perfectly. Keep the sauce at a gentle simmer as you prepare the slurry—this maintains the temperature needed to activate the cornstarch properly.
Step 4: Thicken to Desired Consistency
Slowly pour the cornstarch slurry into the simmering sauce while whisking constantly. The mixture will begin to thicken almost immediately. Continue cooking for 1-2 minutes until the sauce coats the back of a spoon and has a glossy, syrup-like consistency.
You’ll know it’s ready when the sauce leaves a clear path on the spoon that holds for a second before running together. This consistency is perfect for clinging to crispy tempura without being so thick that it overpowers the delicate batter.
Remove from heat and let it cool slightly before using. The sauce will thicken a bit more as it cools, reaching the ideal dipping consistency.
Pro Tips For Making Chicken Tempura Sauce
- Simmer, Don’t Boil: Keep the sauce at a gentle simmer—boiling hard will make the sugar crystallize and the mirin lose its delicate sweetness. I learned this the hard way after my first batch turned grainy.
- Bloom the Dashi: Let the dashi stock come to a near boil before adding it to the sauce; this wakes up the umami. Sounds weird, but it actually changes the outcome.
- Skip the Substitutes: Use real mirin, not the aji-mirin with added salt—it throws off the balance and makes the sauce taste flat. After burning three batches with the wrong stuff, I finally figured out why.
- Dissolve Sugar First: Mix the granulated sugar with just a splash of warm water before adding to the pot. My grandmother swore by this, and she was right: no clumps, just smooth sauce every time.
Pro Cooking Tips for chicken tempura sauce
Heat Control
Keep your sauce at a gentle simmer, never a rolling boil. I use medium-low heat on my gas stove to prevent scorching the sugars. A heavy-bottomed saucepan distributes heat evenly.
Slurry Technique
Always mix your cornstarch and water in a separate bowl before adding. I whisk until completely smooth to avoid lumps. Pour slowly while stirring to prevent clumping.
Timing the Aromatics
Add your ginger and garlic only after the base simmers. Cook for exactly 1 minute to extract flavor without bitterness. The aroma will tell you when it’s ready. 💡
Consistency Check
Test your sauce by coating the back of a spoon. It should leave a clear path that holds for a second. If too thin, simmer 1 more minute with extra slurry.
Cooling Properly
Let the sauce cool for 5-10 minutes before using. It thickens slightly as it cools. I transfer mine to a glass jar for easy pouring.
Flavor Balancing
Taste before serving. Need more tang? Add ½ tsp rice vinegar. Want it sweeter? Stir in 1 tsp mirin. Adjust in small increments. 🔥
Nutrition Facts
Frequently Asked Questions
Can I make this sauce ahead of time?
Yes! The flavors deepen after 24 hours in the fridge. Store in an airtight container for up to 5 days. Stir before using as separation is natural.
What can I use instead of mirin?
Substitute 1 tbsp dry sherry + 1 tsp sugar per 1 tbsp mirin. Or use honey for sweetness, though the flavor profile changes slightly.
Why is my sauce too thin?
Simmer 1-2 minutes longer with extra cornstarch slurry (½ tsp cornstarch + 1 tbsp water). Avoid boiling vigorously to prevent scorching.
Is dashi stock necessary?
It adds authentic umami depth, but chicken or vegetable stock works in a pinch. Skip it entirely for a simpler version, though flavor will be less complex.

- Jollof Rice Sauce Recipe: West African Tomato and Spice Infusion - September 25, 2026
- Japanese Rice Soup Recipe: Umami-Rich Comfort in a Bowl - September 25, 2026
- Homemade Cream Of Rice Recipe: Silk-Smooth Breakfast in Minutes - September 25, 2026