
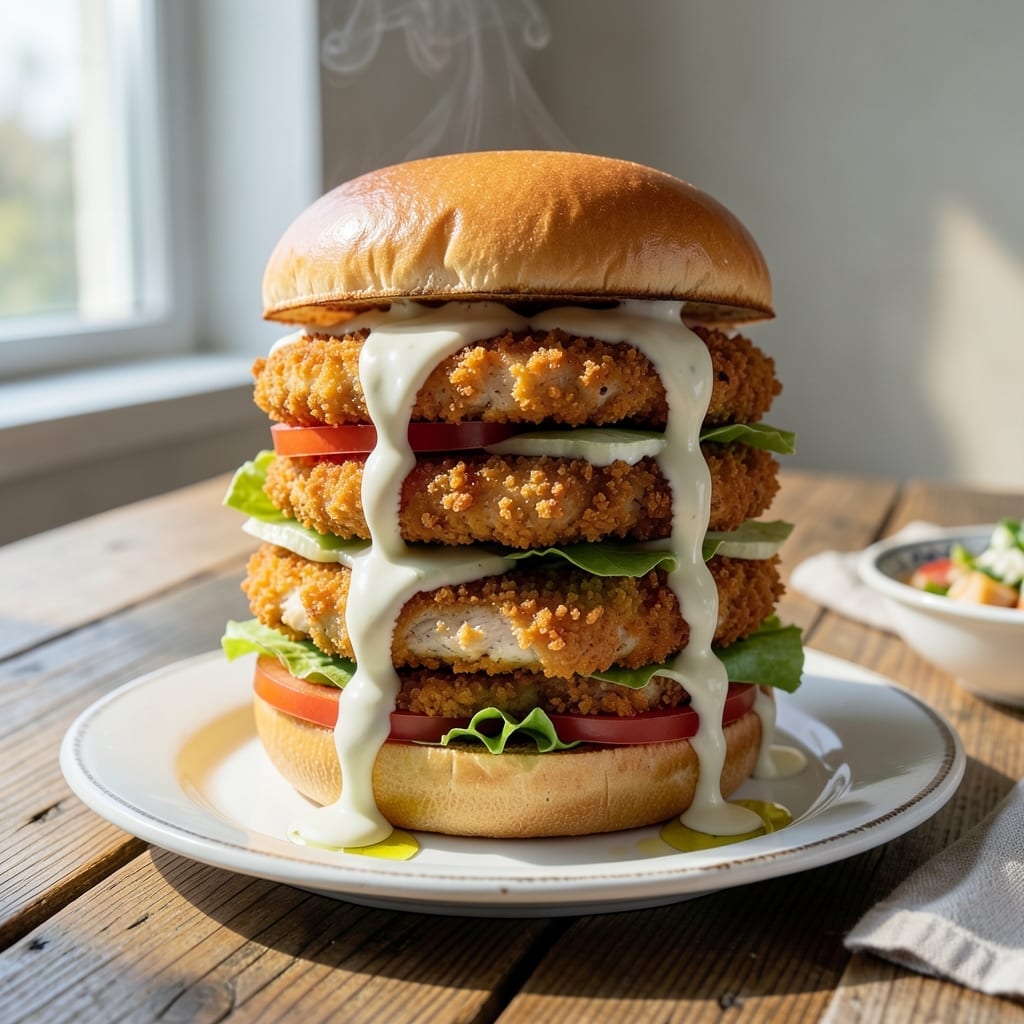
This sandwich delivers the crispy, golden perfection of classic diner fare with a homemade touch. I developed this method after years of testing to ensure the chicken stays tender inside while achieving that shatteringly crisp exterior.
The key lies in a double-dredging technique and hot oil that seals in juices. Each bite offers the ideal contrast between the crunchy breading and the moist, flavorful chicken. The tangy sauce cuts through the richness beautifully.
Assembly is simple: pile the hot fillets onto soft toasted buns with your favorite toppings. The result is a sandwich that rivals any restaurant version, with every element working in harmony.
Perfect for lunch, dinner, or game day gatherings. This recipe never fails to satisfy.
Ingredients for Chicken Tenderloin Sandwich
Simple pantry staples and fresh chicken come together for golden, crispy perfection on a bun.
| Ingredient | Amount | Notes |
|---|---|---|
| Chicken Tenderloins 🍗 | 1 ½ lb | Pounded to even thickness |
| All-Purpose Flour 🌾 | 1 ½ cups | For initial dredging |
| Large Eggs 🥚 | 2 whole | Beaten for egg wash |
| Buttermilk 🥛 | 1 cup | For marinating chicken |
| Panko Breadcrumbs 🍞 | 2 cups | For crispy coating |
| Cornstarch 🌾 | ¼ cup | Mixed with flour for crunch |
| Salt 🧂 | 1 ½ tsp | Divided for seasoning |
| Black Pepper 🌶️ | 1 tsp | Freshly ground preferred |
| Paprika 🌶️ | 1 tsp | For color and flavor |
| Garlic Powder 🧄 | 1 tsp | For seasoning breading |
| Onion Powder 🧅 | 1 tsp | For depth of flavor |
| Vegetable Oil 🫒 | 4 cups | For deep frying |
| Hamburger Buns 🍔 | 4 whole | Soft, lightly toasted |
| Mayonnaise 🥛 | ½ cup | For tangy sauce base |
| Honey Mustard 🍯 | 2 tbsp | For sauce flavor |
The chicken tenderloins are the foundation. Look for uniform size (about 1.5 pounds total) at your butcher or grocery store—this ensures even cooking. I prefer air-chilled chicken from Whole Foods or Costco for better texture. The buttermilk marinade is non-negotiable for tenderness (don’t skip it). Panko breadcrumbs, found in the Asian aisle, give that restaurant-style crunch.
No buttermilk? Whole milk with 1 tbsp vinegar or lemon juice works in a pinch. Short on panko? Crushed cornflakes or regular breadcrumbs can substitute (though the texture won’t be as crispy). For a spicier kick, add cayenne to the breading mix. The sauce can be adjusted—swap honey mustard for Dijon or BBQ sauce depending on preference.
Fry in batches to avoid crowding the pan—this keeps the oil hot and the coating crisp. Leftovers? They reheat surprisingly well in a toaster oven at 375°F for 5-6 minutes. Store cooked chicken in the fridge for up to 3 days.
Why You’ll Love This Recipe
- Weeknight Hero: I can bread these tenders while the oil heats—no fancy steps, just dip in buttermilk, coat in panko, and fry.
- Crispy Perfection: That panko crust stays shatteringly crisp while the chicken stays juicy. Honestly, it’s the buttermilk that makes the difference.
- Crowd Pleaser: I’ve served these at picnics, packed them for lunches, and even made a double batch for game day. Works every time.
- Budget Stretcher: Chicken tenderloins are cheaper than breasts, and one batch makes enough for leftovers. I’ll be real: my wallet notices.
Step-by-Step Instructions for Chicken Tenderloin Sandwiches
Here’s the method to achieve a crisp, golden exterior with juicy, tender chicken every time.
Step 1: Marinate and Season the Chicken
In a large bowl, combine the chicken tenderloins with the buttermilk, 1 tsp salt, 1 tsp black pepper, 1 tsp paprika, 1 tsp garlic powder, and 1 tsp onion powder. Stir to coat evenly. I let this marinate for 15-20 minutes—this tenderizes the meat and infuses it with flavor.
While the chicken marinates, place the all-purpose flour and cornstarch in a shallow dish and whisk to combine. This blend creates a lighter, crispier initial coating. Pat each tenderloin dry with paper towels before dredging—excess moisture prevents the flour from adhering properly.
Step 2: Bread the Chicken for Maximum Crunch
Set up a breading station with three shallow dishes. Place the flour-cornstarch mixture in the first, beat the large eggs in the second, and put the panko breadcrumbs in the third. The panko’s coarse texture is what gives these tenders their signature crunch.
Dredge each tenderloin in the flour mixture, shaking off excess, then dip into the beaten eggs, letting any excess drip off. Finally, press into the panko breadcrumbs, coating thoroughly on all sides. For extra crispiness, I double-dip: repeat the egg and panko steps once more.
Step 3: Fry to Golden Perfection
Heat the vegetable oil in a large, heavy-bottomed pot or Dutch oven over medium-high heat until it reaches 350°F. Use a deep-fry or candy thermometer for accuracy—oil that’s too cool results in greasy chicken, while oil that’s too hot burns the outside before the inside cooks.
Carefully lower 2-3 breaded tenderloins into the hot oil, ensuring they’re not crowded. Fry for 4-5 minutes per side until they’re deep golden brown and the internal temperature reaches 165°F. Drain on a wire rack set over a baking sheet to keep them crispy, not soggy.
Step 4: Prepare the Tangy Sauce and Assemble
In a small bowl, whisk together the mayonnaise and honey mustard until smooth. This simple but flavorful sauce balances the richness of the fried chicken with a tangy, slightly sweet kick.
Lightly toast the hamburger buns if desired. Spread a generous layer of the sauce on both the top and bottom buns. Place a hot, crispy chicken tenderloin on the bottom bun, then top with the remaining bun half. Serve immediately while the chicken is still hot and at its crispiest.
Pro Tips For Making Chicken Tenderloin Sandwich
- Use cold buttermilk: Soak the chicken tenderloins in buttermilk straight from the fridge for at least 30 minutes—it keeps the coating from sliding off and adds real tang.
- Double coat the chicken: After the buttermilk dip, roll the tenders in flour, then egg, then panko, and repeat the egg and panko for a thicker, crunchier crust that holds up to sauces.
- Rest the breaded chicken: Let the breaded tenders sit for 10 minutes before frying—it helps the coating set so you don’t end up with bare spots in the pan.
- Press the panko hard: When breading, press the panko into the chicken with your palms so it sticks better and doesn’t flake off when you bite into the sandwich.
Common Mistakes When Making This Dish
Overcrowding the Pan
Frying too many tenderloins at once lowers the oil temperature, resulting in greasy, soggy breading instead of crispy. I fried in batches of 2-3 pieces in my Lodge Dutch oven with 4 cups oil. Maintain 350°F throughout. 🔥
Skipping the Marinade
Buttermilk isn’t just for flavor—it tenderizes the chicken and helps the breading adhere. Even 15 minutes makes a difference. I learned this the hard way during my first BBQ competition in Charleston.
Incorrect Oil Temperature
Oil that’s too cool creates greasy chicken; too hot burns the outside before cooking through. Use a thermometer and adjust heat as needed. 350°F is the sweet spot for even cooking and crispy results.
Uneven Chicken Thickness
Pound tenderloins to ½-inch thickness for consistent cooking. Thicker pieces cook unevenly, leaving some bites dry while others are underdone. I use a meat mallet for even results.
Poor Draining Technique
Draining on paper towels can make the breading soggy. Use a wire rack over a baking sheet to allow air circulation. This keeps the coating crispy while excess oil drips away.
Rushing the Assembly
Let fried chicken rest 2-3 minutes before assembling. This allows the juices to redistribute, preventing a soggy bun. I always toast my buns lightly for extra texture contrast. ✨
Nutrition Facts
Frequently Asked Questions
Can I bake the chicken instead of frying?
Yes! Bake at 400°F for 15-20 minutes, flipping halfway. Spray with oil first for crispiness. Baking works but frying gives better crunch.
What’s the best way to keep the breading crispy?
Drain on a wire rack, not paper towels. Keep cooked pieces warm in a 200°F oven on a rack to maintain crispness while frying batches.
Can I make this ahead of time?
Bread the chicken up to 2 hours ahead and refrigerate. Fry just before serving for best texture. Reheat leftovers in a toaster oven at 375°F for 5-6 minutes.

- Rice Mix Recipe: Fluffy Grains With Customizable Flavor Boost - September 25, 2026
- Soupy Rice Recipe: Broth-Soaked Grains With Rustic Depth - September 25, 2026
- Rice Paper Pancakes Recipe: Crispy Vietnamese Breakfast Delight - September 25, 2026