
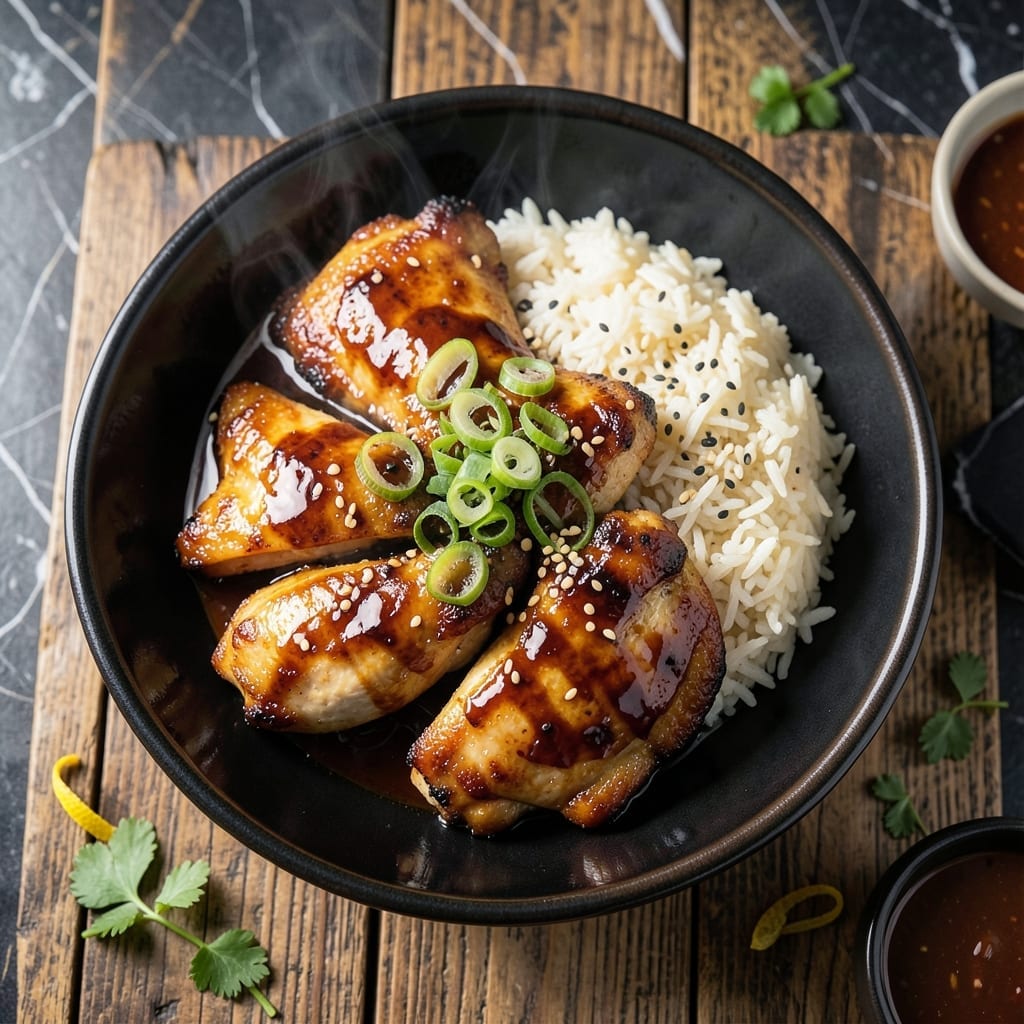
I’ve perfected this teriyaki chicken to deliver restaurant-quality results at home with minimal effort. The key is balancing sweet, salty, and umami flavors in the glaze while achieving perfectly cooked chicken every time.
This method ensures juicy, tender chicken coated in a thick, sticky teriyaki glaze that caramelizes beautifully. A simple pan-searing technique creates depth of flavor without complicated steps.
The sauce comes together in minutes using pantry staples, then reduces to a glossy finish that clings to each piece. Serve it over rice with steamed vegetables for a complete meal.
What you get is a dish that’s both impressive and approachable, with that signature teriyaki shine and richness. The process is streamlined but never cuts corners on flavor.
Ingredients for Chicken Teriyake
Restaurant-quality chicken teriyaki starts with these carefully balanced ingredients for that perfect sweet-salty glaze.
| Ingredient | Amount | Notes |
|---|---|---|
| Boneless Skinless Chicken Thighs 🍗 | 1 ½ lb | Trimmed of excess fat |
| Soy Sauce 🫒 | ½ cup | Low-sodium preferred for balance |
| Brown Sugar 🍚 | ⅓ cup | Packed, light or dark |
| Mirin 🍶 | ¼ cup | Sweet rice wine essential |
| Sake 🍶 | 2 tbsp | Dry variety for depth |
| Fresh Garlic Cloves 🧄 | 3 cloves | Minced finely for even distribution |
| Fresh Ginger Root 🌿 | 1 tbsp | Grated, peeled before using |
| Cornstarch 🌾 | 1 tbsp | For thickening the glaze |
| Water 💧 | 2 tbsp | Cold, for slurry |
| Vegetable Oil 🫒 | 1 tbsp | High smoke point for searing |
| Toasted Sesame Seeds 🌰 | 1 tsp | For garnish and crunch |
| Green Onions 🧅 | 3 whole | Thinly sliced for garnish |
| Jasmine Rice 🍚 | 1 ½ cups | Uncooked, for serving |
The chicken thighs are non-negotiable for that juicy, tender texture—they hold up to the bold teriyaki glaze better than breasts. Look for skinless, boneless at Whole Foods or your butcher for consistent sizing. The mirin and sake are the secret to authentic depth; Kikkoman makes reliable versions widely available. Fresh ginger and garlic are essential—dried just won’t deliver the same brightness.
No mirin? Substitute 2 tbsp rice vinegar plus 1 tsp sugar. Sake can be replaced with dry sherry or white wine. For gluten-free, swap soy sauce for tamari (use San-J brand). Brown sugar can be coconut sugar at a 1:1 ratio. The chicken can be breasts if you prefer, but reduce cooking time by 2-3 minutes to avoid dryness.
The cooked chicken keeps beautifully for 4-5 days in the fridge—store it in the glaze to maintain moisture. Freeze for up to 3 months in airtight containers. Reheat gently to avoid breaking the caramelized glaze. The rice is best served fresh, but leftovers make great fried rice the next day.
Why You’ll Love This Recipe
- One Pan Wonder: I toss everything in a skillet and let the soy sauce, mirin, and sake work their magic—minimal cleanup, maximum flavor.
- Sticky Sweet Goodness: The brown sugar caramelizes into this glossy glaze that clings to the thighs. Honestly, I could drink the sauce.
- Weeknight Hero: Between us, this is my 30-minute dinner lifesaver when the kids have practice at 6.
- Feeds Two Meals: I always double the batch—the leftovers taste even better the next day over rice.
Step-by-Step Instructions for Chicken Teriyaki
Master this technique for sticky, glossy chicken that delivers restaurant-quality flavor at home.
Step 1: Prepare the Teriyaki Glaze
In a medium saucepan, combine the 0.5 cup soy sauce, 0.33 cup brown sugar, 0.25 cup mirin, and 2 tbsp sake. Bring to a gentle simmer over medium heat, stirring until the brown sugar fully dissolves—this takes about 2-3 minutes.
Add the 3 cloves fresh garlic cloves and 1 tbsp fresh ginger root to the saucepan. Let the mixture simmer for an additional 3-4 minutes until it becomes fragrant and the flavors begin to meld. This aromatic base is crucial for depth of flavor.
Step 2: Thicken the Glaze
In a small bowl, whisk together the 1 tbsp cornstarch and 2 tbsp water until smooth. Slowly pour this slurry into the simmering sauce while whisking constantly. The mixture will begin to thicken almost immediately.
Continue cooking for 1-2 minutes until the glaze reaches a syrupy consistency that coats the back of a spoon. Remove the saucepan from heat and set aside. The glaze will thicken further as it cools, so resist the urge to over-reduce it now.
Step 3: Cook the Chicken
Heat the 1 tbsp vegetable oil in a large skillet over medium-high heat until shimmering. Add the 1.5 lb boneless skinless chicken thighs and cook for 5-6 minutes per side until golden brown and cooked through to an internal temperature of 165°F.
Work in batches if necessary to avoid overcrowding the pan, which would steam the chicken instead of searing it. The chicken should develop a light crust while remaining juicy inside. Transfer the cooked chicken to a plate and tent with foil to keep warm.
Step 4: Glaze and Serve
Return the chicken to the skillet over medium heat and pour the prepared teriyaki glaze over the top. Turn the chicken to coat evenly in the sauce, cooking for an additional 1-2 minutes until the glaze becomes sticky and caramelized.
Slice the chicken into strips and arrange over 1.5 cups jasmine rice. Garnish with the 1 tsp toasted sesame seeds and thinly sliced 3 whole green onions for a pop of color and texture. Serve immediately while the glaze is still glossy and warm.
Pro Tips For Making Chicken Teriyake
- Sear First, Glaze Later: Brown the chicken thighs well in a hot pan before adding the sauce—this builds a deep flavor base that plain simmering can’t match. I learned this the hard way after making pale, bland teriyaki for years.
- Trim the Fat: Cut off excess fat from the thighs before cooking to prevent greasy sauce. Sounds tedious, but it keeps your teriyaki glossy instead of oily.
- Reduce the Sauce: After removing the chicken, boil the leftover sauce for 2-3 minutes until it thickens slightly—this turns a thin, watery glaze into a rich, sticky coating that clings to the meat.
- Use Low-Sodium Soy: Regular soy sauce can make the dish too salty, especially when reduced. Low-sodium lets you control the seasoning without sacrificing depth.
Regional Styles of This Dish
Hawaiian Style
In Hawaii, they often use fresh pineapple in the glaze for a tropical twist. Add ½ cup diced pineapple when simmering the sauce, then strain before thickening. The natural enzymes in pineapple tenderize the chicken beautifully. 🌺
Japanese Tradition
Authentic Japanese teriyaki uses only mirin, soy sauce, and sugar—no garlic or ginger. They grill the chicken over binchotan charcoal for a smoky depth. The glaze is brushed on repeatedly during cooking for layers of flavor.
Korean Adaptation
Korean versions often include gochujang for heat. Mix 1 tbsp gochujang into the glaze for a spicy-sweet kick. They also use chicken thighs more than breasts for richer flavor. Garnish with sliced cucumbers for freshness.
American Diner Style
American diners love extra sticky glaze, so they often double the brown sugar and add 1 tbsp honey. The chicken is usually breaded before cooking for extra crunch. Serve with steamed broccoli for a classic combo.
Thai Fusion
Thai-inspired versions add 1 tbsp fish sauce and 1 stalk lemongrass to the glaze. Fresh Thai basil and crushed peanuts make perfect garnishes. The lemongrass infuses a citrusy aroma that pairs wonderfully with the sweet-salty glaze. ✨
Quick Weeknight
For busy nights, I use pre-minced garlic and ginger from jars. The flavor difference is minimal, and it saves 10 minutes of prep. Just reduce the quantities slightly as jarred versions can be more concentrated.
Nutrition Facts
Frequently Asked Questions
What’s the best cut of chicken for this?
Use boneless, skinless thighs for the juiciest results. They stay tender and absorb the glaze better than breasts.
Can I make the glaze ahead?
Yes! The sauce keeps for 1 week in the fridge. Reheat gently before using to thin it to coating consistency.
Why is my glaze too thin?
Simmer it longer and add a cornstarch slurry (1 tsp cornstarch + 1 tbsp water). Cook until it thickens to coat the spoon.
How do I prevent burning the sauce?
Use medium-low heat when reducing. Stir constantly once it starts thickening to avoid scorching.

- Jollof Rice Sauce Recipe: West African Tomato and Spice Infusion - September 25, 2026
- Japanese Rice Soup Recipe: Umami-Rich Comfort in a Bowl - September 25, 2026
- Homemade Cream Of Rice Recipe: Silk-Smooth Breakfast in Minutes - September 25, 2026