
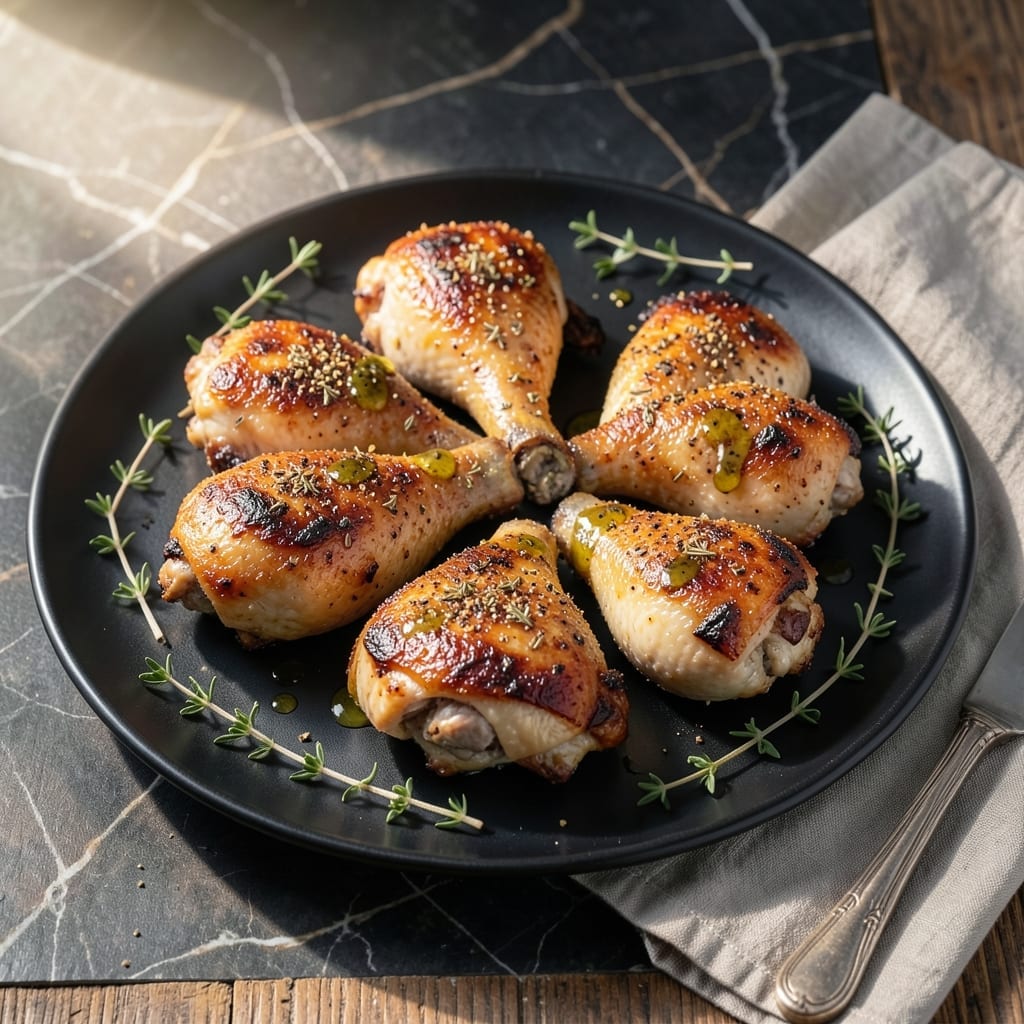
This chicken thigh recipe delivers crispy skin and juicy meat every time. The key is a simple technique that ensures perfect texture without complicated steps.
I’ve tested countless methods, and this approach consistently produces the best results. The skin renders to golden perfection while the meat stays tender and flavorful.
With just a few ingredients and 45 minutes in the oven, you’ll have restaurant-quality thighs at home. The high heat ensures the skin crisps while sealing in moisture.
Serve with your favorite sides for a meal that’s both impressive and effortless. The contrast between the crispy skin and succulent meat is unbeatable.
Ingredients for Chicken Theigh
Short list. Big flavor. Skin so crispy it crackles between your teeth.
| Ingredient | Amount | Notes |
|---|---|---|
| Bone-In Chicken Thighs 🍗 | 2 ½ lb | Skin-on for crispiness |
| Kosher Salt 🧂 | 1 ½ tsp | Diamond Crystal preferred |
| Freshly Ground Black Pepper 🌶️ | 1 tsp | Coarse grind recommended |
| Garlic Powder 🧄 | 1 tsp | Not garlic salt |
| Smoked Paprika 🌶️ | 1 tsp | Adds depth of flavor |
| Dried Thyme 🍃 | ½ tsp | Rubbed between fingers |
| Olive Oil 🫒 | 1 tbsp | Extra-virgin for richness |
| Lemon 🍋 | 1 whole | Zested and juiced |
| Fresh Rosemary 🌿 | 2 sprigs | Finely chopped |
| Baking Powder 🧂 | ½ tsp | For extra-crispy skin |
The chicken is everything here. Bone-in, skin-on thighs are non-negotiable for that crispy texture—boneless just won’t cut it. I grab mine from Whole Foods or Costco (their organic thighs are stellar). Look for plump pieces with smooth, unbroken skin. If they’re on sale, buy extra and freeze—they’ll keep for 9 months.
No smoked paprika? Regular paprika plus a pinch of cayenne works in a pinch. Fresh out of rosemary? Dried at half the amount, but rehydrate it in warm water first. The baking powder might seem weird, but trust me on this—it’s the secret to that restaurant-level crunch. Olive oil can be swapped for avocado oil if that’s what you’ve got.
Thighs stay juicy for 4 days in the fridge—great for meal prep. Freeze cooked pieces for up to 3 months, but reheat in the oven to keep the skin crispy. Pro tip: save the leftover fat from the pan. It’s liquid gold for roasting potatoes later.
Why You’ll Love This Recipe
- One Pan Wonder: I toss the thighs with salt, pepper, garlic powder, and smoked paprika, then roast—no flipping, no fuss.
- Smoky Depth: That smoked paprika gives the skin a deep, almost barbecue-like richness with zero extra effort.
- Meal Prep Hero: I make a double batch on Sunday and the leftovers reheat beautifully for lunches all week.
- Budget Friendly: Bone-in thighs cost half what breasts do, and honestly, they taste twice as good.
Step-by-Step Instructions for Chicken Thighs
Here’s the method that guarantees crispy skin and juicy meat every time.
Step 1: Season and Prep the Chicken Thighs
Pat the 2.5 lb bone-in chicken thighs completely dry with paper towels. I can’t stress this enough—moisture is the enemy of crispy skin. Place them skin-side up on a clean surface.
In a small bowl, combine the 1.5 tsp kosher salt, 1 tsp freshly ground black pepper, 1 tsp garlic powder, 1 tsp smoked paprika, 0.5 tsp dried thyme, and 0.5 tsp baking powder. The baking powder is my secret weapon—it helps break down proteins for extra-crispiness. Rub this mixture all over the chicken, including under the skin.
Zest the 1 whole lemon directly over the thighs, then juice half of it and drizzle the juice over the top. Finely chop the 2 sprigs fresh rosemary and sprinkle evenly. Let the chicken sit at room temperature for 15-20 minutes while your oven preheats.
Step 2: Preheat and Prepare the Cooking Surface
Position a rack in the upper third of your oven and preheat to 425°F. This high heat is crucial for achieving that perfect crisp. Place a wire rack on a rimmed baking sheet—this allows hot air to circulate underneath the chicken, crisping the skin on all sides.
Drizzle the 1 tbsp olive oil over the wire rack and rub it around with your fingers or a paper towel. This prevents sticking and adds a subtle richness. The rack should be lightly coated but not swimming in oil.
Step 3: Roast Until Golden and Crisp
Arrange the chicken thighs skin-side up on the wire rack, leaving a little space between each piece for even air circulation. Slide the baking sheet into the oven and roast undisturbed for 25 minutes.
After 25 minutes, flip the thighs skin-side down and roast for another 10 minutes. This direct heat on the skin ensures it gets ultra-crispy. Then flip them back skin-side up and roast for a final 10-15 minutes until the skin is deep golden brown and the thickest part of the meat reaches 195°F on an instant-read thermometer.
The skin should be blistered and crackling, and the juices should run clear when you pierce the thickest part. If it’s browning too quickly, move the pan to a lower rack.
Step 4: Rest and Serve
Transfer the chicken to a serving platter and let it rest for 5-10 minutes. This allows the juices to redistribute, so every bite is moist and flavorful. Tent loosely with foil if you need to keep it warm.
Serve the thighs whole or with the skin intact for maximum crispiness. The meat should pull away from the bone easily, and the skin should shatter slightly when you cut into it. Squeeze a little of the remaining lemon half over the top just before serving for a bright finish.
Pro Tips For Making Chicken Theigh
- Pat Thighs Dry: I learned this the hard way—wet skin steams instead of crisps. Blot the thighs with paper towels before seasoning to guarantee that golden crust.
- Season Overnight: Sounds like overkill, but salting the thighs 12 hours ahead (even just with kosher salt) actually changes the outcome. The meat stays juicier and the flavor goes deeper.
- Skip the Crowding: After burning three batches, I finally figured out that cramming the pan drops the temperature. Give each thigh 2 inches of space so they sear, not steam.
- Rest Under Foil: My grandmother swore by this, and she was right: let them rest 5-10 minutes under foil after cooking. It locks in the juices—yes, even if you’re impatient like me.
Essential Equipment for This Recipe
Oven Thermometer
An in-oven thermometer is non-negotiable for perfect results. I use the ThermoWorks ChefAlarm because it tracks both oven and internal meat temps simultaneously. Your oven’s built-in gauge is often off by 25°F or more. 🌡️
Wire Rack
A sturdy wire rack placed on a baking sheet allows hot air to circulate under the thighs, ensuring crispy skin all around. I prefer the Nordic Ware brand—it’s durable and won’t warp at 425°F. Avoid nonstick racks; they can’t handle the high heat.
Instant-Read Thermometer
For checking the internal temperature, I swear by the ThermoWorks Mk4. It gives accurate readings in 2-3 seconds. Aim for 195°F in the thickest part of the meat for juicy, fully cooked thighs. Don’t rely on visual cues alone.
Heavy-Duty Baking Sheet
A half-sheet pan with a 1-inch rim catches drippings and prevents messes. I use the USA Pan—it’s built to last and distributes heat evenly. Avoid thin, flimsy pans that can warp under high heat.
Paper Towels
Pat the thighs completely dry before seasoning—this is critical for crispy skin. Use high-quality Brawny or Viva paper towels. They’re more absorbent and won’t leave lint behind. Moisture is the enemy of crispiness.
Mixing Bowls
For combining the dry rub, a medium mixing bowl works best. I like the Pyrex glass set because it’s easy to clean and won’t absorb odors. A 1-cup measure doubles as a mixing vessel in a pinch. 💡
Nutrition Facts
Frequently Asked Questions
Can I use boneless thighs instead?
Not recommended. Bone-in, skin-on thighs stay juicier and crisp up better. Boneless versions dry out faster and lack that satisfying crunch.
Why is the internal temp 195°F instead of 165°F?
Dark meat benefits from higher temps. 195°F renders fat and collagen for fall-off-the-bone tenderness while keeping moisture locked in.
How do I keep the skin crispy when serving?
Rest on a wire rack, not a plate. This prevents steam from softening the skin. Serve immediately for maximum crunch.
Can I skip the baking powder?
You can, but the skin won’t be as crispy. Baking powder breaks down proteins for extra crunch—it’s worth the effort!

- Jollof Rice Sauce Recipe: West African Tomato and Spice Infusion - September 25, 2026
- Japanese Rice Soup Recipe: Umami-Rich Comfort in a Bowl - September 25, 2026
- Homemade Cream Of Rice Recipe: Silk-Smooth Breakfast in Minutes - September 25, 2026