
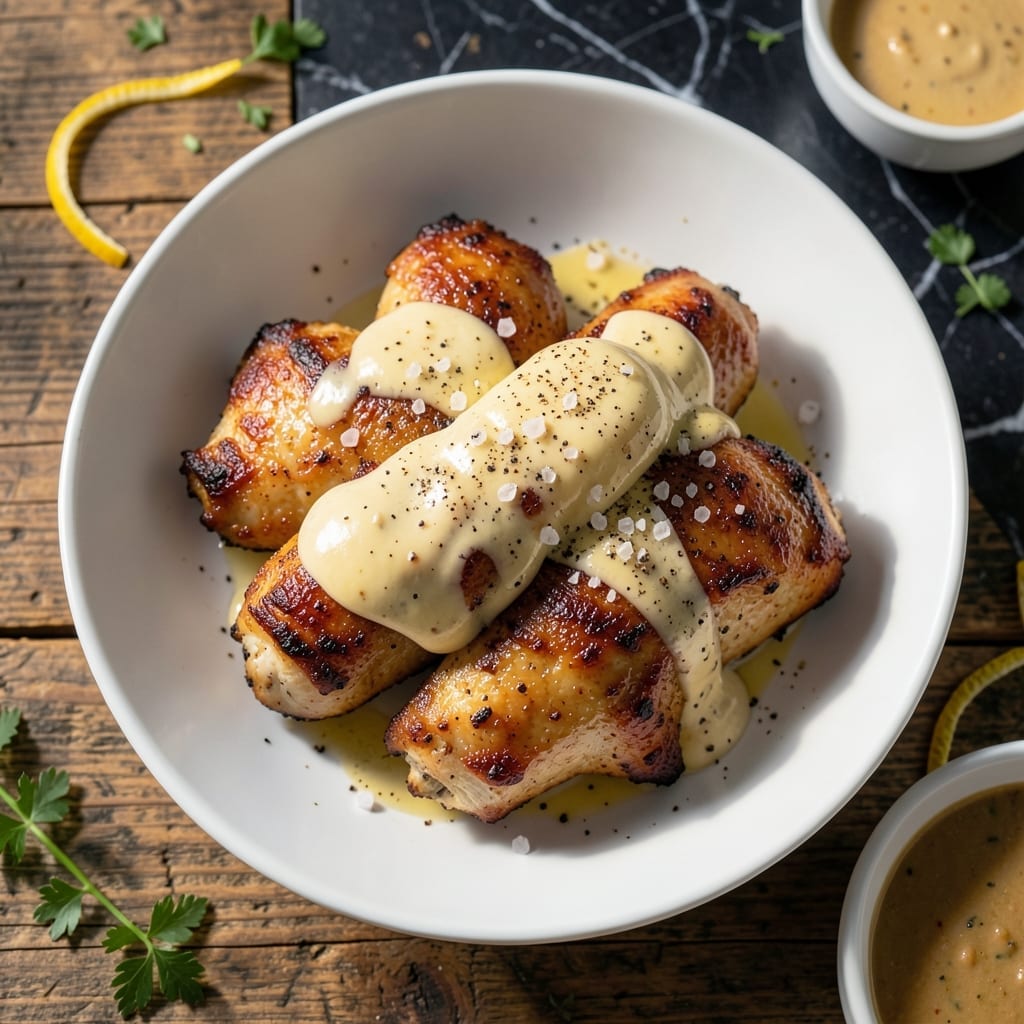
This method transforms chicken thighs into a masterpiece of texture and flavor. The mayo coating creates an incredibly crispy skin while keeping the meat juicy.
I developed this technique after years of experimenting with different ways to achieve perfect chicken. The key is applying mayo directly to the skin before cooking, which browns beautifully in the oven.
You’ll end up with thighs that have shatteringly crispy skin and moist, tender meat underneath. The mayo also forms the base for a creamy sauce that clings to every bite.
Ready in under 45 minutes, this dish proves that simple ingredients can create extraordinary results. The contrast between the crisp exterior and creamy coating is irresistible.
Ingredients for Chicken Thigh Mayo
Transform bone-in thighs with a mayo coating for crispy skin and juicy meat underneath.
| Ingredient | Amount | Notes |
|---|---|---|
| Bone-In, Skin-On Chicken Thighs 🍗 | 2 lb | Pat dry before coating |
| Mayonnaise 🥄 | ½ cup | Full-fat for best browning |
| Kosher Salt 🧂 | 1 ½ tsp | Diamond Crystal preferred |
| Freshly Ground Black Pepper 🌶️ | 1 tsp | Coarse grind recommended |
| Garlic Powder 🧄 | 1 tsp | Not garlic salt |
| Onion Powder 🧅 | 1 tsp | Enhances depth of flavor |
| Smoked Paprika 🌶️ | 1 tsp | Adds subtle smokiness |
| Dried Thyme 🌿 | ½ tsp | Crushed between fingers |
| Dried Rosemary 🌿 | ½ tsp | Finely chopped before measuring |
| Lemon Juice 🍋 | 1 tbsp | Freshly squeezed preferred |
| Olive Oil 🫒 | 1 tbsp | For high-heat cooking |
| Fresh Parsley 🌿 | ¼ cup | Chopped, for garnish |
The chicken thighs are the foundation here. Bone-in, skin-on delivers the best texture—skinless won’t crisp properly, boneless dries out. Source from Whole Foods or a trusted butcher for consistent sizing. Pat them completely dry before coating; moisture is the enemy of crispiness. Look for thighs with smooth, unbroken skin for even browning.
No smoked paprika? Regular paprika plus a pinch of cayenne mimics the depth. Fresh herbs can replace dried at three times the amount, but dried are more reliable here. The mayo must be full-fat—light versions lack the fat content needed for proper browning. In a pinch, Greek yogurt works, though the flavor differs slightly. Always check that your spices aren’t stale; old paprika loses its vibrancy.
Cooked thighs keep 3-4 days refrigerated in an airtight container. Reheat in a 400°F oven for 10 minutes to revive the crispiness. The sauce base thickens as it cools—stir in a splash of water when reheating. Freezes well for up to 3 months, though texture changes slightly.
Why You’ll Love This Recipe
- One Pan Wonder: I coat the thighs in mayo, sprinkle the seasonings, and let the oven do the rest.
- That Crispy Edge: The mayo turns golden and crisp while keeping the meat juicy—garlic powder in every bite.
- Weeknight Hero: Honestly, it’s my go-to when I need dinner fast but still want it to taste like I tried.
- Stretches Further: Bone-in thighs are cheap, and leftovers make killer sandwiches the next day.
Step-by-Step Instructions for Chicken Thigh Mayo
This method ensures perfectly crispy skin with a rich, creamy coating every time.
Step 1: Prepare and Season the Chicken Thighs
Pat all 2 lb Bone-In, Skin-On Chicken Thighs completely dry with paper towels. This is crucial for achieving crispy skin, as any moisture will cause steaming instead of browning. Place the thighs in a large mixing bowl.
Add the 1.5 tsp Kosher Salt, 1 tsp Freshly Ground Black Pepper, 1 tsp Garlic Powder, 1 tsp Onion Powder, 1 tsp Smoked Paprika, 0.5 tsp Dried Thyme, and 0.5 tsp Dried Rosemary to the bowl. Toss the thighs with the seasoning until evenly coated.
Step 2: Create the Mayonnaise Coating
In a separate bowl, whisk together the 0.5 cup Mayonnaise and 1 tbsp Lemon Juice until smooth. The acidity from the lemon juice brightens the flavor and balances the richness of the mayonnaise.
Pour the mayonnaise mixture over the seasoned chicken thighs. Use your hands to thoroughly coat each thigh, ensuring the mixture adheres to all surfaces, including under the skin. This layer will create a golden, flavorful crust as it cooks.
Step 3: Sear the Chicken for Crispy Skin
Heat the 1 tbsp Olive Oil in a large, heavy skillet over medium-high heat until shimmering. Carefully place the chicken thighs skin-side down in the skillet. Avoid crowding the pan to allow for even browning.
Cook undisturbed for 6-8 minutes until the skin is deep golden brown and crispy. Resist the urge to move the thighs—this ensures a proper sear. Flip the thighs and cook for an additional 5-6 minutes until the internal temperature reaches 165°F.
Step 4: Rest and Garnish
Transfer the cooked chicken thighs to a wire rack set over a baking sheet. Let them rest for 5-10 minutes to allow the juices to redistribute. This resting period ensures moist, tender meat.
Sprinkle with the 0.25 cup Fresh Parsley just before serving. The parsley adds a fresh, vibrant contrast to the rich, savory flavors of the dish. Serve immediately while the skin is still crispy.
Pro Tips For Making Chicken Thigh Mayo
- Pat Thighs Dry: sounds weird, but it works—drying the skin with paper towels before coating with mayo guarantees that golden, crackly crust instead of steamed skin
- Season Under Skin: I learned this the hard way—slip a pinch of salt, pepper, and garlic powder under the skin so the meat stays juicy while the mayo crisp up
- Start Skin-Side Down: After burning three batches, I finally figured out starting the thighs skin-side down in a hot pan renders the fat and keeps the mayo from scorching
- Use Full-Fat Mayo: Skip the light stuff; full-fat mayo browns better and clings to the skin, giving you that rich, savory finish that lower-fat versions just can’t match
Make-Ahead Tips for Leftovers
Prep the Chicken Ahead
You can season and coat the thighs with the mayo mixture up to 12 hours before cooking. Store them uncovered in the fridge to dry the skin further, which enhances crispiness. I often do this in the morning for an easy dinner.
Store Cooked Thighs
Let the thighs cool completely before storing in an airtight container. They’ll keep in the fridge for 3-4 days. The mayo coating thickens as it chills, making it even richer when reheated. 💡
Freeze for Later
Freeze cooked thighs in a single layer on a tray first, then transfer to a freezer bag. They’ll stay fresh for up to 3 months. This prevents them from sticking together, so you can grab just what you need.
Reheat in the Oven
For best results, reheat at 400°F for 10-12 minutes on a wire rack. This revives the crispy skin better than the microwave. Add a splash of water to the pan to prevent drying out.
Reheat in the Microwave
If you’re in a hurry, microwave on 70% power for 1-2 minutes, covered with a damp paper towel. The skin won’t be as crispy, but the meat stays juicy.
Sauce Revival Tip
If the sauce thickens too much, stir in 1-2 tbsp water or chicken broth before reheating. This restores the creamy consistency without diluting the flavor. 🔥
Nutrition Facts
Frequently Asked Questions
Can I use boneless chicken thighs?
Boneless thighs will work, but they won’t crisp as well. Use skin-on for best results.
Why does the mayo help crisp the skin?
The fat in mayo browns beautifully, creating a golden crust. It also locks in moisture.
Can I bake instead of sear?
Yes! Bake at 400°F for 25-30 minutes, flipping halfway.
What if the skin isn’t crispy enough?
Pat the thighs drier before cooking or finish under the broiler for 2-3 minutes.

- Jollof Rice Sauce Recipe: West African Tomato and Spice Infusion - September 25, 2026
- Japanese Rice Soup Recipe: Umami-Rich Comfort in a Bowl - September 25, 2026
- Homemade Cream Of Rice Recipe: Silk-Smooth Breakfast in Minutes - September 25, 2026