
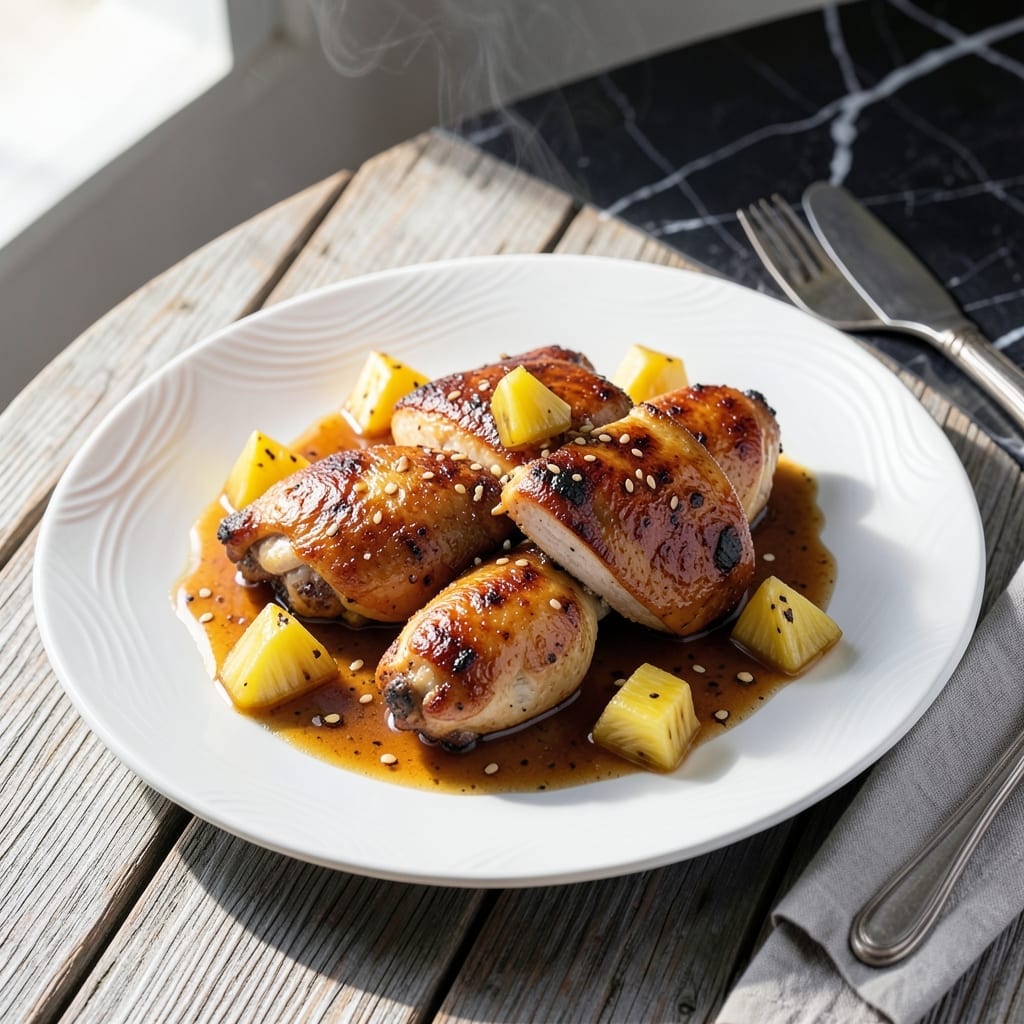
This island-inspired chicken dish brings the flavors of Waikiki to your kitchen with a sweet and tangy pineapple glaze. The combination of juicy chicken and caramelized pineapple creates a tropical experience in every bite.
I developed this recipe to capture the essence of Hawaiian cooking—simple ingredients with bold, balanced flavors. The glaze comes together quickly while the chicken bakes, making it perfect for a weeknight dinner.
What you’ll get is tender chicken with a sticky, golden-brown coating that’s both sweet and slightly tangy. The pineapple adds natural sweetness without overpowering the dish.
Serve with rice and steamed vegetables for a complete meal that tastes like a beachside vacation.
Ingredients for Chicken Waikiki Beach
Sweet pineapple and juicy chicken meet bold island flavors. Probably have most already.
| Ingredient | Amount | Notes |
|---|---|---|
| Boneless Skinless Chicken Thighs 🍗 | 1 ½ lb | Patted dry for crispiness |
| Fresh Pineapple Chunks 🍍 | 2 cups | Fresh preferred, canned works |
| Brown Sugar 🍚 | ½ cup | Packed, light or dark |
| Soy Sauce 🫒 | ¼ cup | Low-sodium for balance |
| Rice Vinegar 💧 | 2 tbsp | Adds tangy brightness |
| Garlic Cloves 🧄 | 3 cloves | Minced for even flavor |
| Fresh Ginger 🌿 | 1 tbsp | Grated, no fibers |
| Cornstarch 🌾 | 1 tbsp | For glaze thickening |
| Olive Oil 🫒 | 2 tbsp | For searing chicken |
| Green Onions 🧅 | ¼ cup | Thinly sliced for garnish |
| Sesame Seeds 🌰 | 1 tsp | Toasted for aroma |
| Red Pepper Flakes 🌶️ | ¼ tsp | Optional for heat |
| Lime 🍈 | 1 whole | Juiced and zested |
The chicken matters most here. Thighs stay juicier than breasts—look for skinless, boneless at Costco or your regular market. Fresh pineapple is ideal (that bright, sweet smell), but canned chunks in juice work fine in a pinch. The brown sugar should be soft and fresh—if it’s hard as a rock, microwave it briefly with a damp paper towel. Ginger and garlic? Grab them fresh from the produce section.
No fresh pineapple? Frozen works too—just thaw and drain well. Swap soy sauce for tamari if gluten-free. Missing rice vinegar? Apple cider vinegar at the same amount gets you close. The cornstarch can be replaced with arrowroot powder, but don’t skip it entirely—the glaze needs that thickness. Green onions can be subbed with chives (use half the amount).
Leftovers keep 4-5 days in the fridge, though the pineapple flavor intensifies. Freezes beautifully for 3 months—portion into containers for easy meals. The glaze thickens as it cools, so reheat gently with a splash of water.
Why You’ll Love This Recipe
- One Pan Wonder: Honestly, it’s just chicken, pineapple, and a quick sauce—everything cooks together in one pan.
- Sweet-Tangy Magic: The brown sugar and rice vinegar create this ridiculous glaze that clings to the chicken and pineapple.
- Weeknight Hero: I throw it together after work and it’s ready before the rice finishes cooking.
- Leftovers? Yes Please: Tastes even better the next day—if it lasts that long in my house.
Step-by-Step Instructions for Chicken Waikiki Beach
Here’s the method. Straightforward, tested, works every time.
Step 1: Sear the Chicken Thighs
Pat the 1.5 lb boneless skinless chicken thighs completely dry with paper towels. This ensures the skin will crisp up properly when seared. Season both sides generously with salt and pepper—don’t be shy, the glaze will balance it.
Heat the 2 tbsp olive oil in a large skillet over medium-high heat until it shimmers. Add the chicken thighs in a single layer, being careful not to crowd the pan. Sear for 5-6 minutes per side until golden brown and cooked through. The internal temperature should reach 165°F.
Remove the chicken from the skillet and set aside on a plate. Don’t wipe out the pan—those browned bits are packed with flavor for the glaze.
Step 2: Create the Pineapple Glaze
In the same skillet, add the 2 cups fresh pineapple chunks, 0.5 cup brown sugar, 0.25 cup soy sauce, 2 tbsp rice vinegar, minced 3 cloves garlic cloves, and grated 1 tbsp fresh ginger. Stir to combine and bring to a simmer.
Let the mixture bubble away for 5-7 minutes until the pineapple softens and the liquid reduces slightly. The brown sugar will melt into the sauce, creating a glossy, caramelized base. Stir occasionally to prevent burning.
Step 3: Thicken the Glaze and Finish
In a small bowl, mix the 1 tbsp cornstarch with 1 tbsp of cold water to create a slurry. Pour this into the simmering pineapple mixture and stir constantly. Within 1-2 minutes, the glaze will thicken into a luscious, syrup-like consistency that coats the back of a spoon.
Return the seared chicken thighs to the skillet, spooning the glaze over them to coat completely. Simmer for an additional 2-3 minutes to let the flavors meld. If using, sprinkle in the 0.25 tsp red pepper flakes for a subtle heat.
Step 4: Garnish and Serve
Squeeze the juice from the 1 whole lime over the dish and stir to brighten the flavors. Transfer the glazed chicken to a serving platter and sprinkle with the 0.25 cup green onions and 1 tsp sesame seeds for a fresh, aromatic finish.
Let the chicken rest for 5 minutes before serving to allow the glaze to set slightly. This dish pairs perfectly with steamed rice or a simple green salad to soak up every last bit of that island-inspired sauce.
Pro Tips For Making Chicken Waikiki Beach
- Sear Chicken First: Brown the chicken thighs in a hot pan for 3-4 minutes per side before adding the sauce—I learned this the hard way after ending up with pale, steamed meat instead of caramelized edges.
- Use Ripe Pineapple: Fresh pineapple chunks should be fragrant and slightly soft; underripe ones stay hard and sour, even after cooking. I skip the pre-cut stuff—it never tastes as bright.
- Reduce the Sauce: After adding soy sauce, brown sugar, and rice vinegar, let it simmer for 5-7 minutes until it thickens slightly—this keeps it from being watery and clinging better to the chicken.
- Marinate 30 Minutes: Tossing the chicken in half the soy-brown sugar mix for just 30 minutes before cooking adds depth without turning the meat mushy like longer soaks can.
Common Mistakes When Making chicken waikiki beach
Overcrowding the Pan
When searing the 1.5 lb chicken thighs, resist the urge to fit them all in at once. Crowding the pan steams the chicken instead of browning it. I cook in 2 batches if needed. 🔥
Skipping the Dry Step
Always pat the thighs completely dry before searing. Wet chicken creates steam, preventing that gorgeous golden crust. I use 3-4 paper towels to ensure they’re bone-dry.
Burning the Glaze
Keep the heat at medium when simmering the pineapple mixture. High heat can scorch the brown sugar, making the glaze bitter. Stir frequently for 5-7 minutes until thickened.
Undercooked Cornstarch
Mix the 1 tbsp cornstarch with cold water first to avoid lumps. Pour it slowly into the simmering glaze while stirring. It needs 1-2 minutes of constant heat to fully activate.
Skipping the Rest
Let the chicken rest for 5 minutes after glazing. This lets the sauce cling better and keeps the juices inside. Serve immediately for the best texture.
Over-Salting Early
The soy sauce in the glaze adds saltiness, so go light on seasoning the chicken initially. I taste the glaze before adding extra salt to the dish. ✨
Nutrition Facts
Frequently Asked Questions
Can I use chicken breasts instead of thighs?
Yes, but they dry out faster. Reduce cooking to 4-5 minutes per side and monitor internal temperature closely. Thighs stay juicier and hold up better to the glaze.
What can I substitute for fresh pineapple?
Canned pineapple in juice works well—just drain it first. Frozen chunks are fine too, but thaw and pat dry to prevent excess liquid in the glaze.
How do I know when the glaze is thick enough?
It should coat the back of a spoon and leave a clear trail when you run your finger through it. This takes about 1-2 minutes after adding the cornstarch slurry.
Can I make this gluten-free?
Replace soy sauce with tamari or coconut aminos. Ensure all other ingredients are certified gluten-free. The cornstarch is naturally gluten-free.

- Jollof Rice Sauce Recipe: West African Tomato and Spice Infusion - September 25, 2026
- Japanese Rice Soup Recipe: Umami-Rich Comfort in a Bowl - September 25, 2026
- Homemade Cream Of Rice Recipe: Silk-Smooth Breakfast in Minutes - September 25, 2026