
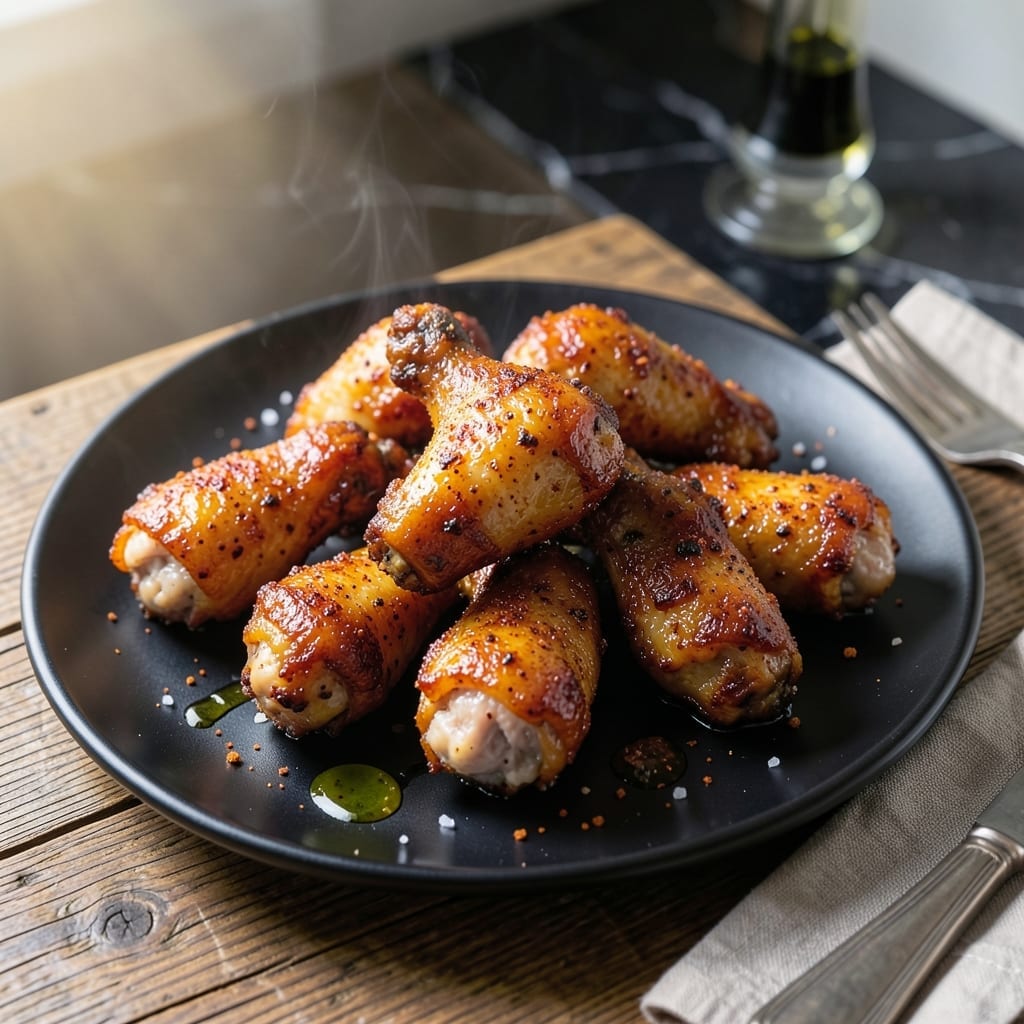
I’ve perfected the method for achieving crispy oven-baked drumettes that rival any deep-fried version. The secret lies in a simple dry rub and high heat to ensure every bite delivers that satisfying crunch.
This technique requires no special equipment—just a baking sheet, a wire rack, and a few pantry staples. The drumettes cook evenly, with the skin transforming into a golden, shatteringly crispy exterior while staying juicy inside.
What you get is a foolproof way to enjoy wings without the mess of frying. The oven does all the work, and the results are consistently impressive, whether for game day or a casual dinner.
Serve with your favorite dipping sauce for a dish that’s sure to disappear fast.
Ingredients for Chicken Wing Drumettes
Pantry staples plus fresh veggies for dipping. Nothing fancy, just good stuff.
| Ingredient | Amount | Notes |
|---|---|---|
| Chicken Drumettes 🍗 | 2 lb | Pat dry thoroughly before seasoning |
| Baking Powder 🧂 | 1 tbsp | Makes the skin extra crispy |
| Kosher Salt 🧂 | 1 ½ tsp | Diamond Crystal preferred for texture |
| Garlic Powder 🧄 | 1 tsp | Not garlic salt |
| Onion Powder 🧅 | 1 tsp | Adds depth to dry rub |
| Smoked Paprika 🌶️ | 1 tsp | Sweet or hot variety works |
| Ground Black Pepper 🌶️ | ½ tsp | Freshly ground for best flavor |
| Olive Oil 🫒 | 1 tbsp | For coating drumettes |
| Cayenne Pepper 🔥 | ¼ tsp | Adjust for heat preference |
| Ranch Dressing 🥣 | ½ cup | For dipping, optional |
| Blue Cheese Dressing 🧀 | ½ cup | For dipping, optional |
| Celery Sticks 🥬 | 4 whole | Cut into sticks for serving |
| Carrot Sticks 🥕 | 4 whole | Cut into sticks for serving |
The drumettes are the star here—look for plump, evenly sized pieces at the store. I grab mine from Costco for bulk savings, but any supermarket works. The baking powder is the secret weapon (don’t skip it—it’s what makes the skin shatteringly crisp). Diamond Crystal kosher salt is my go-to for seasoning; its coarse texture clings better to the chicken.
No smoked paprika? Regular paprika plus a pinch of chipotle powder works. Out of garlic powder? Fresh minced garlic at half the amount, but the dry version blends better into the rub. The dipping sauces are flexible—homemade ranch or blue cheese if you’re feeling fancy, or store-bought for convenience. The veggies can be whatever’s in the crisper (bell peppers work great too).
Drumettes keep in the fridge 1-2 days before cooking. Baked wings are best fresh but reheat well in the oven or air fryer—microwave makes them soggy. Leftovers (if any) stay good for 3-4 days in the fridge.
Why You’ll Love This Recipe
- Minimal Effort: I toss drumettes with just baking powder and spices—no marinating, no fuss.
- That Crispy Bite: Garlic and onion powder make every bite crave-worthy, with a crunch that’s ridiculous.
- Crowd Pleaser: Honestly, these disappear at parties, game nights, or even a solo dinner.
- Pocket Friendly: A bag of drumettes and pantry staples feed a group without breaking the bank.
Step-by-Step Instructions for Oven-Baked Chicken Wing Drumettes
Here’s my method for achieving restaurant-quality crispiness right in your home oven.
Step 1: Prep and Season the Drumettes
Start by patting the 2 lb Chicken Drumettes completely dry with paper towels—this is crucial for crispy skin. I press down firmly to remove every bit of moisture from the surface and inside any crevices.
In a large bowl, combine the 1 tbsp Baking Powder, 1.5 tsp Kosher Salt, 1 tsp Garlic Powder, 1 tsp Onion Powder, 1 tsp Smoked Paprika, 0.5 tsp Ground Black Pepper, and 0.25 tsp Cayenne Pepper. The baking powder is the secret to that extra-crispy texture we’re after.
Add the thoroughly dried drumettes to the bowl and toss to coat evenly with the seasoning mixture. Every piece should be completely covered in the spice blend, with no bare spots visible.
Step 2: Arrange and Coat for Maximum Crispiness
Preheat your oven to 425°F and position the rack in the upper-middle position. Line a baking sheet with parchment paper or use a wire rack set over a baking sheet for better air circulation.
Drizzle the 1 tbsp Olive Oil over the seasoned drumettes and toss again to distribute it evenly. This light coating helps the seasoning adhere and promotes browning.
Arrange the drumettes in a single layer on the prepared baking sheet, leaving a little space between each piece. Crowding them will cause steaming instead of crisping, which defeats our purpose.
Step 3: Bake and Flip for Even Browning
Place the baking sheet in the preheated oven and bake for 20-25 minutes. You’ll know it’s time to flip when the bottoms are golden brown and starting to crisp. Use tongs to flip each piece over carefully.
Return the sheet to the oven and bake for another 20-25 minutes until the drumettes are deep golden brown all over and crispy. The internal temperature should reach 165°F when tested with an instant-read thermometer.
Real talk: Don’t be tempted to open the oven door too often. Every time you do, you lose valuable heat that’s working to crisp up that skin.
Step 4: Rest and Serve with Dipping Sauces
Remove the drumettes from the oven and let them rest on the baking sheet for 5 minutes. This brief rest allows the juices to redistribute, ensuring each bite is flavorful and moist inside with that perfect crispy exterior.
While they’re resting, arrange the 4 whole Celery Sticks and 4 whole Carrot Sticks on a serving platter. Transfer the drumettes to the platter alongside the vegetables.
Serve immediately with 0.5 cup Ranch Dressing and 0.5 cup Blue Cheese Dressing for dipping. The contrast of the cool, creamy dips with the hot, crispy drumettes is what makes this dish so addictive.
Pro Tips For Making Chicken Wing Drumettes
- Dry the Skin: Pat the drumettes very dry with paper towels before seasoning—I learned this the hard way after soggy skin ruined my first three batches.
- Use Baking Powder: Toss the wings with 1 teaspoon of baking powder (yes, not baking soda) to guarantee that extra-crispy texture without frying.
- Skip the Overcrowding: Resist the urge to cram all the drumettes on one tray; give them space so they crisp instead of steam.
- Season Twice: Hit them with salt and spices before baking, then toss with a little more garlic and onion powder right out of the oven for maximum flavor.
Serving Suggestions for This Dish
Classic Presentation
Arrange drumettes on a large wooden board with celery sticks and carrot sticks fanned out around them. I love the rustic look of a bamboo serving tray—it makes the spread feel extra inviting for sharing. 🔥
Dipping Sauce Display
Place ranch dressing and blue cheese dressing in small mason jars or ramekins. Add a sprinkle of chopped chives or crumbled blue cheese on top for color. This little touch elevates the presentation without extra effort.
Game Day Spread
For a crowd, set up a DIY wing bar with the drumettes in a slow cooker on warm setting. Add extra sauces like buffalo or honey mustard for variety. I always include extra napkins—trust me on this one.
Casual Dinner Plating
Serve drumettes over a bed of shredded lettuce with dipping sauces in the center. Add a wedge of lemon for a bright pop of color. This simple plating makes it feel like a complete meal, not just a snack.
Party-Ready Setup
Use a tiered serving stand to create height and visual interest. Place drumettes on the bottom, veggies in the middle, and sauces on top. I found mine at Target for under $20—it’s a game-changer for entertaining. ✨
Nutrition Facts
Frequently Asked Questions
Why use baking powder in the seasoning?
Baking powder raises the skin’s pH, helping it brown faster and crisp up better. It’s the secret to achieving that shatteringly crispy texture without frying.
Can I use fresh drumettes that aren’t thawed?
Always thaw completely first for even cooking. Pat them very dry with paper towels to remove excess moisture. This prevents steaming and ensures maximum crispiness.
How do I know when they’re fully cooked?
Use a meat thermometer to check the internal temperature reaches 165°F. The skin should be deep golden brown and crispy all over. Never rely on color alone.
What if my drumettes aren’t crispy enough?
Try baking at a higher temperature like 450°F or broil for 2-3 minutes at the end. Also, ensure they’re in a single layer with space between pieces.

- Jollof Rice Sauce Recipe: West African Tomato and Spice Infusion - September 25, 2026
- Japanese Rice Soup Recipe: Umami-Rich Comfort in a Bowl - September 25, 2026
- Homemade Cream Of Rice Recipe: Silk-Smooth Breakfast in Minutes - September 25, 2026