
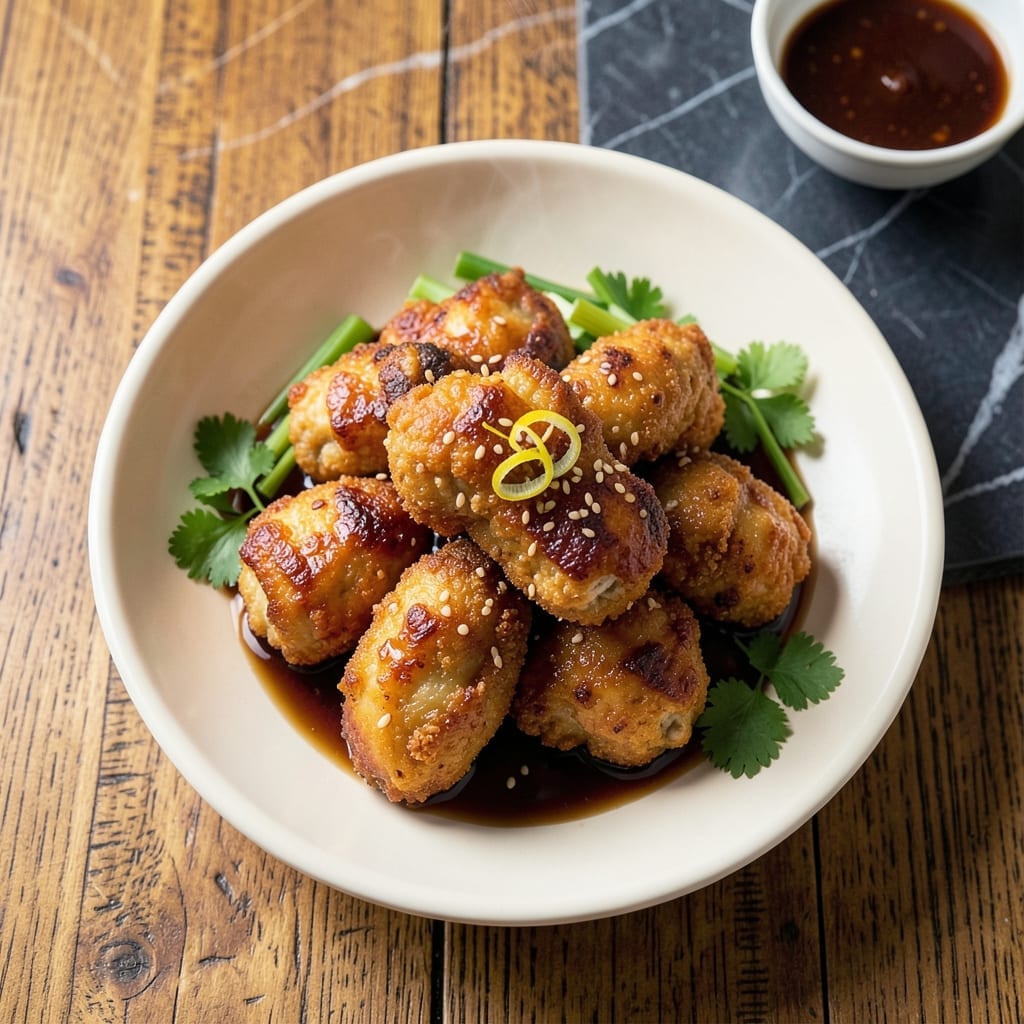
These sesame-crusted chicken fingers deliver crispy perfection with every bite. I developed this recipe to capture that takeout magic at home, using a double-coating method for extra crunch.
The secret is in the cornstarch and egg wash, which creates an ultra-crispy exterior that stays crunchy long after frying. Toasted sesame seeds add nutty depth, while a touch of soy sauce in the marinade infuses each piece with savory flavor.
You’ll achieve golden, shatteringly crispy chicken tenders with a tender interior. The sesame crust adds texture and visual appeal, making these irresistible as an appetizer or main dish.
Serve with sweet chili sauce or your favorite dipping sauce. Here’s how to make them.
Ingredients for Chinese Chicken Fingers
A few pantry staples and fresh ingredients bring takeout magic to your kitchen.
| Ingredient | Amount | Notes |
|---|---|---|
| Chicken Tenders 🍗 | 1 ½ lb | Boneless, skinless, cut into strips |
| Cornstarch 🌾 | ½ cup | For ultra-crispy coating |
| All-Purpose Flour 🌾 | ½ cup | For initial dredging |
| Large Eggs 🥚 | 2 whole | Beaten for egg wash |
| Sesame Seeds 🌰 | ½ cup | Toasted for nutty flavor |
| Soy Sauce 🥢 | 2 tbsp | Low-sodium preferred |
| Garlic Cloves 🧄 | 3 cloves | Minced for marinade |
| Ginger Root 🌿 | 1 tbsp | Freshly grated |
| Salt 🧂 | 1 tsp | Kosher or sea salt |
| Black Pepper 🌶️ | ½ tsp | Freshly ground |
| Vegetable Oil 🫒 | 2 cups | For frying (peanut oil works too) |
| Green Onions 🧅 | 4 whole | Thinly sliced for garnish |
The chicken matters most here. Boneless, skinless tenders save prep time, but you can use breasts cut into strips. Look for thick-cut tenders—they hold up better to frying. I grab mine from Costco for big batches, but any supermarket works. The cornstarch is non-negotiable for that shatteringly crispy texture (the good stuff, not the clumpy old box).
No soy sauce? Coconut aminos work in a pinch, but expect a sweeter flavor. Out of sesame seeds? Crushed peanuts add a similar crunch. The egg wash can be swapped for buttermilk at half the quantity if you want extra tang. Fresh ginger is ideal, but ground ginger at one-quarter the amount gets you close (just add it to the flour mix).
Fry in batches—don’t crowd the pan. Leftovers keep in the fridge for 3-4 days (reheat in the oven to stay crispy). The sesame seeds toast in seconds, so keep an eye on them. That’s it. Simple enough.
Why You’ll Love This Recipe
- Minimal Chopping Required: I just toss the tenders in cornstarch and flour—no knife work beyond opening the package.
- Crispy Meets Savory: That sesame seed coating gives it this nutty crunch that pairs so well with the juicy chicken.
- Feeds a Crowd: Honestly, I make a double batch and they vanish whether it’s game day or a regular Tuesday.
- Budget Stretcher: Chicken tenders are cheap, and a little cornstarch goes a long way for that restaurant-quality texture.
Step-by-Step Instructions for Chinese Chicken Fingers
Here’s my proven method for achieving that irresistible crispy texture with a nutty sesame crunch.
Step 1: Marinate the Chicken Tenders
In a large bowl, combine the 1.5 lb Chicken Tenders with 2 tbsp Soy Sauce, 3 cloves minced Garlic Cloves, 1 tbsp grated Ginger Root, 1 tsp Salt, and 0.5 tsp Black Pepper. I use my hands to really work the marinade into every piece, ensuring every bite is packed with flavor.
Let the chicken marinate for at least 15 minutes at room temperature. This step tenderizes the meat and infuses it with that classic Chinese takeout flavor. Don’t skip this—it makes all the difference in both texture and taste.
Step 2: Create the Double-Coating for Maximum Crisp
Set up your dredging station with three shallow bowls. In the first, place the 0.5 cup All-Purpose Flour. In the second, beat the 2 whole Large Eggs until smooth. In the third, mix the 0.5 cup Cornstarch with the 0.5 cup Sesame Seeds—this combo creates that signature ultra-crispy, nutty coating.
Dredge each marinated chicken tender first in the flour, shaking off excess, then dip in the egg wash, letting any excess drip off. Finally, press each piece into the cornstarch-sesame mixture, ensuring it’s fully coated. The flour helps the egg adhere, while the cornstarch-sesame mix gives that shatteringly crisp texture.
Step 3: Fry to Golden Perfection
Heat the 2 cups Vegetable Oil in a deep, heavy-bottomed pot to 350°F. Use a thermometer for accuracy—this temperature ensures the chicken cooks through without burning the coating. I prefer a Dutch oven for this as it maintains heat well.
Working in batches to avoid crowding (which lowers oil temperature), carefully lower the coated chicken tenders into the hot oil. Fry for 3-4 minutes per side until golden brown and the internal temperature reaches 165°F. The sesame seeds will toast slightly during frying, releasing their nutty aroma.
Step 4: Drain and Garnish
Transfer the fried chicken fingers to a wire rack set over a baking sheet or a paper towel-lined plate. This allows excess oil to drain while keeping the coating crisp. Don’t stack them—this traps steam and makes the coating soggy.
While still hot, sprinkle with a little extra Salt if needed. Thinly slice the 4 whole Green Onions and scatter them over the chicken fingers just before serving. The green onions add a fresh contrast to the rich, crispy chicken.
Serve immediately while hot and crispy. The coating should have an audible crunch when bitten into, with the sesame seeds providing little bursts of nutty flavor throughout.
Pro Tips For Making Chinese Chicken Fingers
- Double-Dredge for Crisp: Dip the tenders in egg first, then flour, back in egg, and finally cornstarch—this extra layer makes the coating cling better and crisp up like takeout.
- Rest the Coated Tenders: Let them sit 10 minutes after dredging so the coating sets; I learned this the hard way after my first batch slid right off in the oil.
- Skip Cold Chicken: Take the tenders out of the fridge 15 minutes before cooking—cold meat lowers the oil temp and gives you a greasy, sad crust.
- Toast the Sesame: Toss the sesame seeds in a dry pan for 30 seconds before sprinkling; sounds weird, but it wakes up their nutty flavor and makes the dish taste way more authentic.
Regional Styles of These Flavors
Sichuan Spicy Style
For a fiery twist, add 1 tbsp Sichuan peppercorns and 2 tsp chili flakes to your cornstarch-sesame mix. The peppercorns create that signature tingling numbness, while chili flakes bring serious heat. I learned this from a Chengdu chef during my travels. 🌶️
Cantonese Sweet Version
Cantonese versions often use a sweet glaze. After frying, toss your chicken in 3 tbsp honey mixed with 1 tbsp rice vinegar and 1 tsp five-spice powder. This creates a sticky, glossy coating that’s both sweet and aromatic.
Shanghai Braised Style
Skip frying entirely for this approach. After coating, bake at 400°F for 15 minutes, then braise in 1 cup soy sauce, ½ cup Shaoxing wine, and 3 tbsp brown sugar for 20 minutes. The result is tender with a rich, savory-sweet sauce.
Taiwanese Popcorn Style
Cut your chicken into 1-inch pieces instead of strips. After frying, toss with 2 tbsp fried basil leaves and 1 tbsp crushed garlic. This street food version is served in a paper bag with a toothpick—perfect for sharing.
Hunan Dry-Fried
Dry-fry the chicken in ½ cup oil over high heat, stirring constantly until crispy. Add 1 tbsp doubanjiang (fermented chili bean paste) and 1 tsp sugar at the end. This creates a crispy exterior with a spicy, slightly sweet coating.
Nutrition Facts
Frequently Asked Questions
Can I bake these instead of frying?
Yes! Bake at 400°F for 15-20 minutes, flipping halfway. For extra crispiness, spray with oil before baking. The texture won’t be identical, but still delicious.
Why use cornstarch in the coating?
Cornstarch creates a lighter, crispier coating than flour alone. It absorbs less oil, staying crunchy longer. This is key for that signature takeout texture.
Can I use chicken breast instead of tenders?
Cut breasts into 1-inch strips for even cooking. Pound thicker pieces to ½-inch thickness to prevent dryness.
How do I keep them crispy for leftovers?
Reheat in a 375°F oven for 10-12 minutes on a wire rack. Avoid microwaving—it’ll make them soggy. Store in a single layer.

- Jollof Rice Sauce Recipe: West African Tomato and Spice Infusion - September 25, 2026
- Japanese Rice Soup Recipe: Umami-Rich Comfort in a Bowl - September 25, 2026
- Homemade Cream Of Rice Recipe: Silk-Smooth Breakfast in Minutes - September 25, 2026