
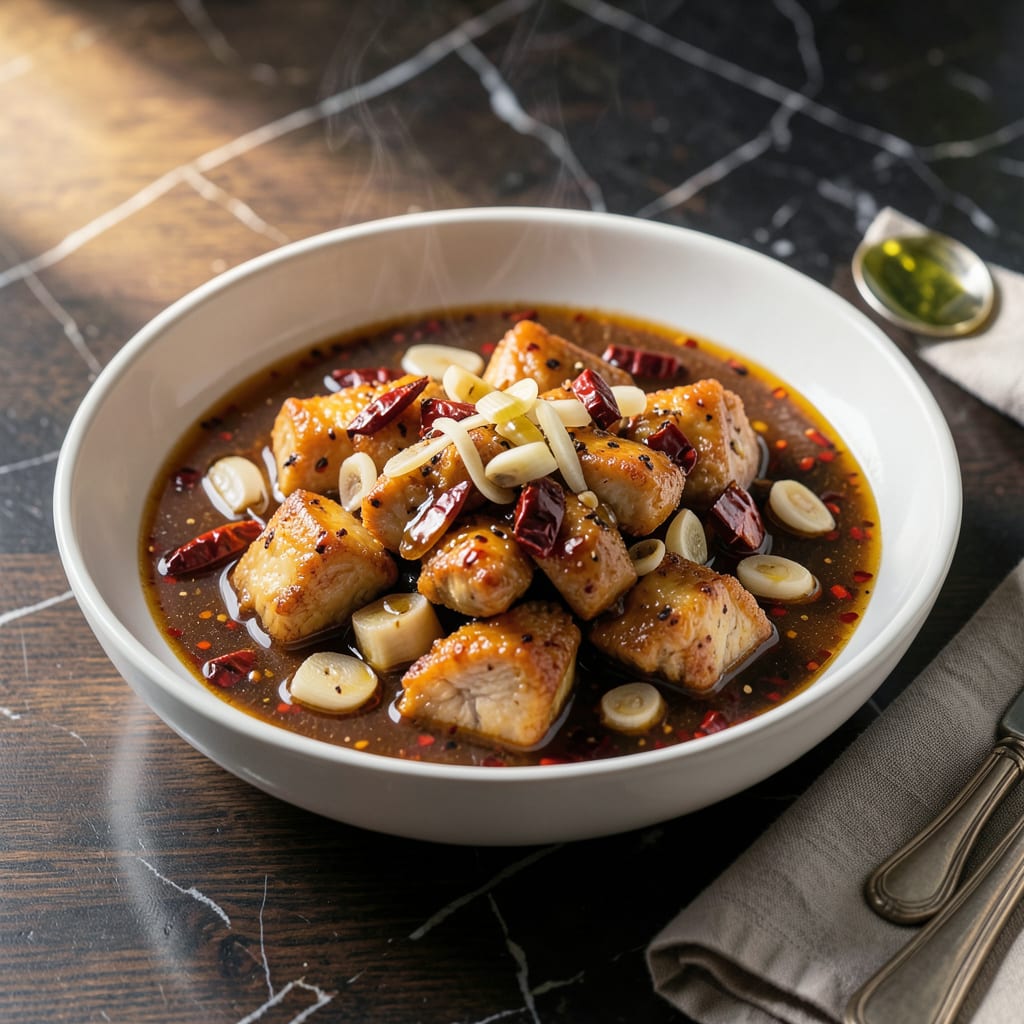
This sauce delivers the perfect balance of heat and sweetness that defines authentic Chinese takeout. The combination of dried chilies, garlic, and soy sauce creates layers of flavor that cling beautifully to chicken.
With just 10 minutes of prep and pantry staples, you’ll have a versatile condiment that transforms simple dishes into restaurant-quality meals. Store in the fridge for up to a week.
Ingredients for Chinese Chilli Chicken Sauce
Pantry staples transform into this bold, sticky sauce with just ten minutes of prep.
| Ingredient | Amount | Notes |
|---|---|---|
| Dried Red Chilies 🌶️ | 10 pieces | Seeds removed for milder heat |
| Garlic Cloves 🧄 | 6 cloves | Minced for maximum flavor |
| Fresh Ginger 🌿 | 1 tbsp | Peeled and finely grated |
| Soy Sauce 🫒 | ½ cup | Low-sodium preferred for balance |
| Rice Vinegar 💧 | ¼ cup | For bright acidity |
| Honey 🍯 | 3 tbsp | Balances heat with sweetness |
| Sesame Oil 🫒 | 1 tbsp | Toasted for depth |
| Cornstarch 🌾 | 1 tbsp | Thickens to sticky consistency |
| Water 💧 | ¼ cup | For slurry with cornstarch |
| Green Onions 🧅 | 3 whole | Thinly sliced for garnish |
[recipeingredientscaler]
The chilies are non-negotiable here. Asian markets have the best selection—look for dried red chilies with vibrant color and no moisture. I grab mine from H Mart when I’m stocking up. The garlic and ginger? Fresh only (those jarred minced versions taste like regret). For soy sauce, Kikkoman or Pearl River Bridge are solid go-tos. Don’t skip the low-sodium—you can always add salt, but you can’t take it out.
Out of honey? Brown sugar dissolved in warm water works in a pinch. No rice vinegar? Apple cider vinegar at the same amount gets you close enough. The cornstarch slurry is key for that glossy, clingy texture—skip it and you’ll have sad, runny sauce. If you want extra umami, a splash of oyster sauce (or vegetarian oyster sauce) deepens the flavor without overpowering.
This keeps 1 week in the fridge—if it lasts that long. The flavors actually get better after a day as everything melds. Freeze for up to 3 months if you double the batch. Just thaw and reheat gently with a splash of water to loosen.
Why You’ll Love This Recipe
- One Pot Wonder: I just toss the dried chilies, garlic, and ginger into a pan with soy sauce and rice vinegar—no fancy steps, no mess.
- Flavor Bomb: That first hit of spicy, tangy, garlicky heat? I make extra just to drizzle on everything.
- Meal Prep Hero: I batch-cook this on Sunday and it brightens up stir-fries, noodles, even plain rice all week long.
- Budget Stretcher: Five cheap pantry staples, one sauce that lasts. Honestly, it costs less than takeout and tastes twice as good.
Step-by-Step Instructions for Chinese Chilli Chicken Sauce
Here’s the method. Straightforward, tested, works every time.
Step 1: Toast and Hydrate the Dried Red Chilies
Remove seeds from all 10 pieces dried red chilies for milder heat, then break them into smaller pieces. Heat a dry skillet over medium heat and toast the chili pieces for 1-2 minutes until fragrant—watch closely, they burn easily.
Immediately transfer the toasted chilies to a heatproof bowl and cover with ½ cup hot water. Let them soak for 15 minutes to soften and release their deep, smoky flavor. This step mellows the heat while extracting maximum color and complexity.
Step 2: Build the Flavor Base with Aromatics
In a saucepan, heat the 1 tbsp sesame oil over medium heat until shimmering. Add the 6 cloves minced garlic and 1 tbsp grated ginger, stirring constantly for 30-45 seconds until fragrant but not browned. Garlic burns quickly, so keep it moving.
Add the ½ cup soy sauce and ¼ cup rice vinegar, then stir in the 3 tbsp honey. Bring to a gentle simmer and cook for 2-3 minutes to meld the flavors. The mixture should smell deeply savory with a bright, tangy edge.
Step 3: Incorporate the Chilies and Thicken
Drain the soaked chilies, reserving the soaking liquid, and add them to the saucepan. Pour in just enough of the reserved chili liquid to thin the sauce slightly—about ¼ cup usually does it. Simmer for 5 minutes to infuse the chili flavor throughout.
In a small bowl, whisk together the 1 tbsp cornstarch and ¼ cup water until smooth. Slowly drizzle the slurry into the simmering sauce while stirring constantly. Cook for 2-3 minutes until it thickens to a glossy, sticky consistency that coats the back of a spoon.
Step 4: Finish and Garnish
Remove the sauce from heat and let it cool for 5 minutes. The sauce will thicken slightly more as it cools. Taste and adjust the balance if needed—though with these proportions, it should hit that perfect sweet-spicy-savory harmony.
Thinly slice all 3 green onions and sprinkle them over the sauce just before serving. The fresh, crisp bite of the green onions cuts through the richness and adds a pop of color. This sauce keeps in the fridge for up to 1 week in an airtight container.
Pro Tips For Making Chinese Chilli Chicken Sauce
- Toast the Chilies: Dry-toast the dried red chilies in a pan for 30 seconds before grinding—I learned this the hard way after my first batch tasted raw and bitter.
- Mince the Aromatics: Finely mince the garlic and ginger together, almost to a paste, so they blend seamlessly into the sauce instead of leaving chunky bits.
- Skip the Boil: Simmer the sauce gently after adding soy sauce and rice vinegar—boiling it hard makes the vinegar evaporate too fast, leaving the flavor unbalanced.
- Bloom in Oil: Cook the garlic and ginger in hot oil for 10-15 seconds until fragrant before adding anything else—this builds the base flavor that defines the dish.
Essential Equipment for Great chinese chilli chicken sauce
Must-Have Tools
Start with a heavy-bottomed saucepan—I use my 3-quart All-Clad for even heat distribution. A dry skillet (cast iron works great) is essential for toasting the chilies without hot spots. 🔥
Precision Measuring
For accurate slurry mixing, use a small whisk and measuring cups. I keep a set of OXO Good Grips in my drawer—they’re durable and easy to read. The 1 tbsp cornstarch to ¼ cup water ratio must be exact for proper thickening.
Heat Control
A gas range gives the best control for medium heat, but an induction burner with precise settings works too. I avoid electric coils—they’re too slow to adjust when toasting chilies or tempering aromatics. 🌡️
Prep Essentials
A microplane makes quick work of the 1 tbsp fresh ginger, and a sharp chef’s knife (I love my Wüsthof 8-inch) handles the garlic and green onions efficiently. Don’t skimp on these—they make prep faster and safer.
Storage Solutions
For storing, glass jars with airtight lids keep the sauce fresh for 1 week in the fridge. I use Ball Mason jars—they’re inexpensive and don’t absorb odors. The sauce’s sticky texture clings less to glass than plastic.
Safety Gear
When handling dried chilies, wear nitrile gloves to protect your hands from oils. I learned this the hard way after touching my face mid-prep. Also, keep a bowl of water nearby in case of chili dust in the air.
Nutrition Facts
Frequently Asked Questions
Can I make this sauce without dried chilies?
Use 2 tbsp chili flakes or 1 tbsp chili oil as substitutes, but dried chilies give the best texture. The soaking step is key for depth, so adjust liquid accordingly.
How spicy is this sauce?
With seeds removed, it’s medium heat. Keep seeds for extra kick or add 1 tsp Sichuan peppercorns for numbing spice. Taste and adjust with more honey if needed.
What can I use instead of honey?
Brown sugar or maple syrup work well. Use 1:1 ratio and dissolve in warm water first. Avoid artificial sweeteners—they lack the needed caramel notes.
Can I freeze this sauce?
Yes! Freeze in ice cube trays, then transfer to a bag. Thaw overnight in the fridge and reheat gently with 1 tbsp water. Lasts 3 months without quality loss.

- Jollof Rice Sauce Recipe: West African Tomato and Spice Infusion - September 25, 2026
- Japanese Rice Soup Recipe: Umami-Rich Comfort in a Bowl - September 25, 2026
- Homemade Cream Of Rice Recipe: Silk-Smooth Breakfast in Minutes - September 25, 2026