
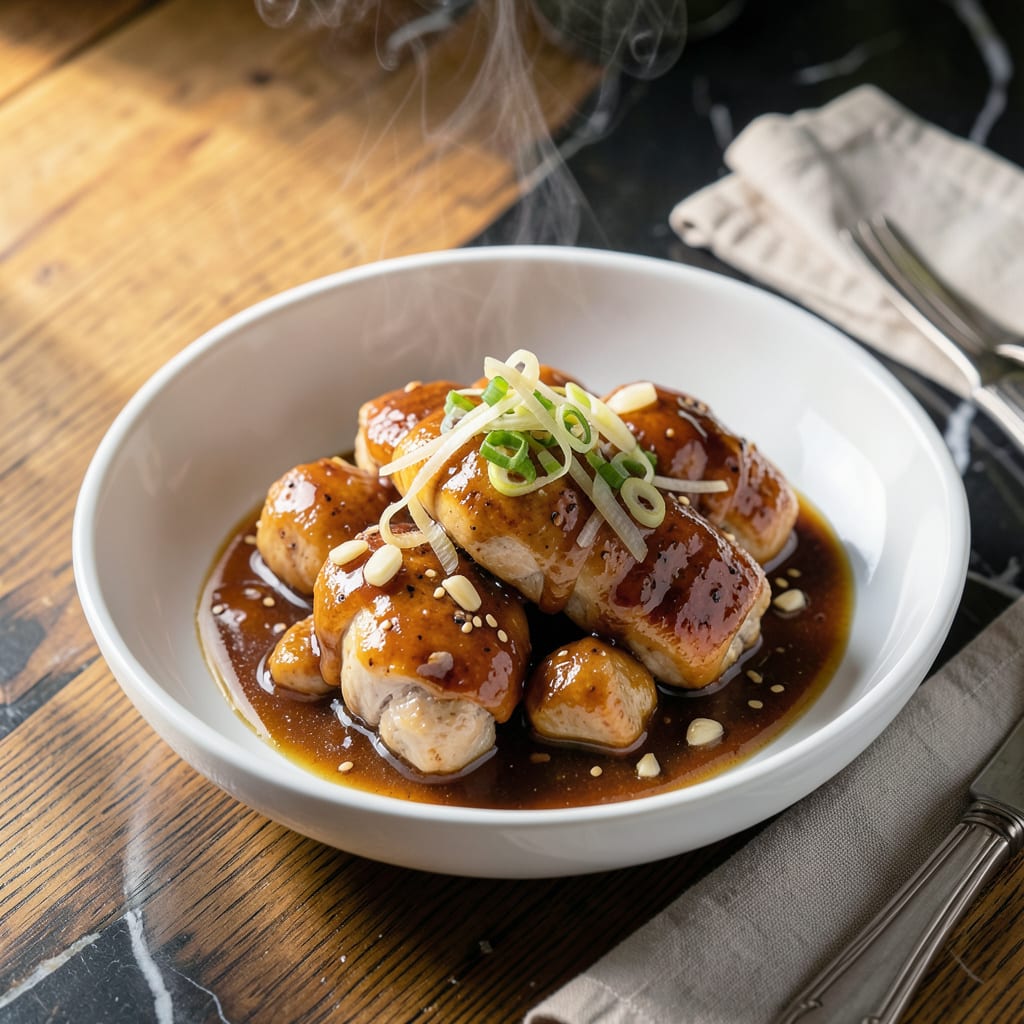
This sauce transforms simple chicken into a restaurant-quality dish with its perfect balance of bold umami and fresh ginger zing. No complicated techniques required.
With just a few pantry staples and 10 minutes of your time, you’ll have a versatile glaze that works for stir-fries, marinades, or dipping. The flavor deepens as it simmers, making it taste like it took hours.
Ingredients for Chinese Ginger Chicken Sauce
Ten simple ingredients for a bold, restaurant-quality glaze with fresh ginger zing.
| Ingredient | Amount | Notes |
|---|---|---|
| Soy Sauce 🥢 | ½ cup | Low-sodium preferred for balance |
| Fresh Ginger Root 🌿 | 3 tbsp | Peeled and finely grated |
| Honey 🍯 | ¼ cup | Substitute with maple syrup if needed |
| Rice Vinegar 🍶 | 2 tbsp | For bright acidity |
| Sesame Oil 🫒 | 1 tbsp | Toasted for depth |
| Garlic Cloves 🧄 | 4 cloves | Minced for maximum flavor |
| Hoisin Sauce 🥢 | 2 tbsp | Adds rich umami depth |
| Red Pepper Flakes 🌶️ | ½ tsp | Adjust for heat preference |
| Cornstarch 🌾 | 1 tbsp | For thickening the sauce |
| Water 💧 | 2 tbsp | For cornstarch slurry |
[recipeingredientscaler]
The ginger is non-negotiable here—fresh only, and look for plump, firm roots at Whole Foods or your local Asian market. Older ginger gets fibrous, so younger is better. The soy sauce base benefits from low-sodium so you control the salt. Hoisin is the secret umami weapon—Koon Chun or Lee Kum Kee are my go-tos (the glass jars, not the squeeze bottles).
No honey? Maple syrup or agave works one-to-one. Out of rice vinegar? Apple cider vinegar in a pinch, but it’s slightly fruitier. Missing hoisin? Oyster sauce plus a pinch of sugar gets close. The red pepper flakes can be swapped for Sichuan peppercorns if you want that numbing heat. Cornstarch slurry is foolproof—just whisk until smooth before adding.
Sauce keeps 1 week sealed in the fridge. Freeze in ice cube trays for up to 3 months—perfect for quick weeknight stir-fries. Let it cool completely before storing (worth the extra minute).
Why You’ll Love This Recipe
- 5-Minute Sauce: I just whisk soy sauce, grated ginger, honey, rice vinegar, and sesame oil—no cooking required.
- Sweet-Spicy Balance: The honey mellows the ginger’s zing while the rice vinegar keeps it bright.
- Stir-Fry to Marinade: I’ve used it on chicken, tofu, even roasted veggies, and it works every time.
- Makes Extra: Honestly, I double it so I have a jar ready for next week’s quick dinners.
Step-by-Step Instructions for Chinese Ginger Chicken Sauce
This glaze comes together quickly with bold flavors that balance sweet, tangy, and umami perfectly.
Step 1: Bloom Aromatics in Oil
Heat the sesame oil in a saucepan over medium heat until it shimmers. Add the 4 cloves garlic cloves and 3 tbsp fresh ginger root, stirring constantly for 1-2 minutes until the mixture becomes fragrant and the garlic turns light golden.
Watch closely—garlic burns easily. The ginger should soften slightly but not brown. This step builds the aromatic foundation for your sauce, releasing the essential oils that create depth of flavor.
Step 2: Build the Sauce Base
Pour in the 0.5 cup soy sauce, 0.25 cup honey, 2 tbsp rice vinegar, and 2 tbsp hoisin sauce. Stir well to combine. Bring the mixture to a gentle simmer over medium-high heat, then reduce to medium-low.
Add the 0.5 tsp red pepper flakes and let it simmer for 3-4 minutes. You’ll notice the sauce begin to thicken slightly and develop a glossy sheen. The honey will mellow the saltiness of the soy sauce while the vinegar adds bright acidity.
Step 3: Thicken to Glaze Consistency
In a small bowl, whisk together the 1 tbsp cornstarch and 2 tbsp water until smooth. Slowly pour the cornstarch slurry into the simmering sauce, stirring constantly to prevent lumps. The sauce will thicken almost immediately.
Continue cooking for 1-2 minutes until it reaches a syrupy consistency that coats the back of a spoon. The sauce should be thick enough to cling to chicken but still pourable. Taste and adjust seasoning if needed, though the balance of flavors should already be spot-on.
Step 4: Finish and Use
Remove the sauce from heat and let it cool slightly. It will thicken further as it cools, so use it while still warm for the best texture. The finished glaze should have a deep amber color with a glossy finish, and you’ll see tiny flecks of ginger and garlic suspended throughout.
Brush generously over grilled, baked, or stir-fried chicken during the last few minutes of cooking. The heat will caramelize the sugars in the honey and hoisin, creating a beautiful, sticky lacquer on the chicken. Serve any extra sauce on the side for dipping.
Pro Tips For Making Chinese Ginger Chicken Sauce
- Grate the Ginger: Use a microplane for the fresh ginger—it releases more juice and blends smoothly into the sauce, avoiding those chewy bits that ruin the texture.
- Bloom the Aromatics: Cook the ginger in a splash of sesame oil for 30 seconds before adding liquids; it mellows the sharpness and deepens the flavor.
- Balance the Sweetness: Taste before adding all the honey—I learned this the hard way after oversweetening a batch; start with half and adjust.
- Finish with Vinegar: Stir in the rice vinegar at the very end so it stays bright and tangy instead of cooking off into the sauce.
Pro Cooking Tips for Perfect Results
Ginger Prep Perfection
Always use fresh ginger root—powdered won’t give that bright, zesty kick. I peel mine with a spoon (easier than a knife) and grate it finely for even distribution. For 3 tbsp, you’ll need about a 2-inch knob of ginger. 🌿
Blooming Aromatics Right
Heat your sesame oil over medium heat until shimmering, then add ginger and garlic. Stir constantly for 1-2 minutes—just until fragrant. If it browns, you’ve gone too far; burnt garlic turns bitter. This step releases essential oils for maximum flavor.
Sauce Consistency Control
After adding the cornstarch slurry, keep the heat at medium-low. If it thickens too fast, add 1-2 tbsp water. The perfect glaze coats the back of a spoon but still drizzles. I test by dragging a finger through it on the spoon—if it holds the line, it’s ready.
Avoiding Cornstarch Lumps
Whisk your 1 tbsp cornstarch and 2 tbsp water until completely smooth before adding. Pour slowly while stirring constantly. If lumps form, don’t panic—just keep stirring over low heat until they dissolve. 💡
Flavor Balancing Tip
Taste before finalizing. Need more tang? Add ½ tsp rice vinegar. Want it sweeter? Drizzle in 1 tsp honey. Too salty? A pinch of sugar balances it. I often adjust with ¼ tsp increments until it’s just right.
Heat Management
Keep your sauce at a gentle simmer, not a rolling boil. Too-high heat can cause honey to burn and soy sauce to reduce too quickly. Use a heavy-bottomed pan for even heat distribution—I swear by my All-Clad stainless steel saucepan.
Nutrition Facts
Frequently Asked Questions
Can I use ground ginger instead of fresh?
No, fresh ginger is essential for that bright, zesty kick. Ground ginger lacks the vibrant flavor and aroma. For 3 tbsp fresh, you’d need about a 2-inch knob.
How do I fix a sauce that’s too thin?
Mix ½ tbsp cornstarch with 1 tbsp water and stir into the simmering sauce. Cook for 1-2 minutes until it thickens to a syrupy consistency.
Can I make this sauce ahead of time?
It keeps for 1 week in the fridge or 3 months in the freezer. Store in an airtight container and reheat gently before using.
What can I substitute for hoisin sauce?
Use oyster sauce plus a pinch of sugar as a close alternative. The sweet-savory depth will be similar, though the flavor profile may vary slightly.

- Jollof Rice Sauce Recipe: West African Tomato and Spice Infusion - September 25, 2026
- Japanese Rice Soup Recipe: Umami-Rich Comfort in a Bowl - September 25, 2026
- Homemade Cream Of Rice Recipe: Silk-Smooth Breakfast in Minutes - September 25, 2026