
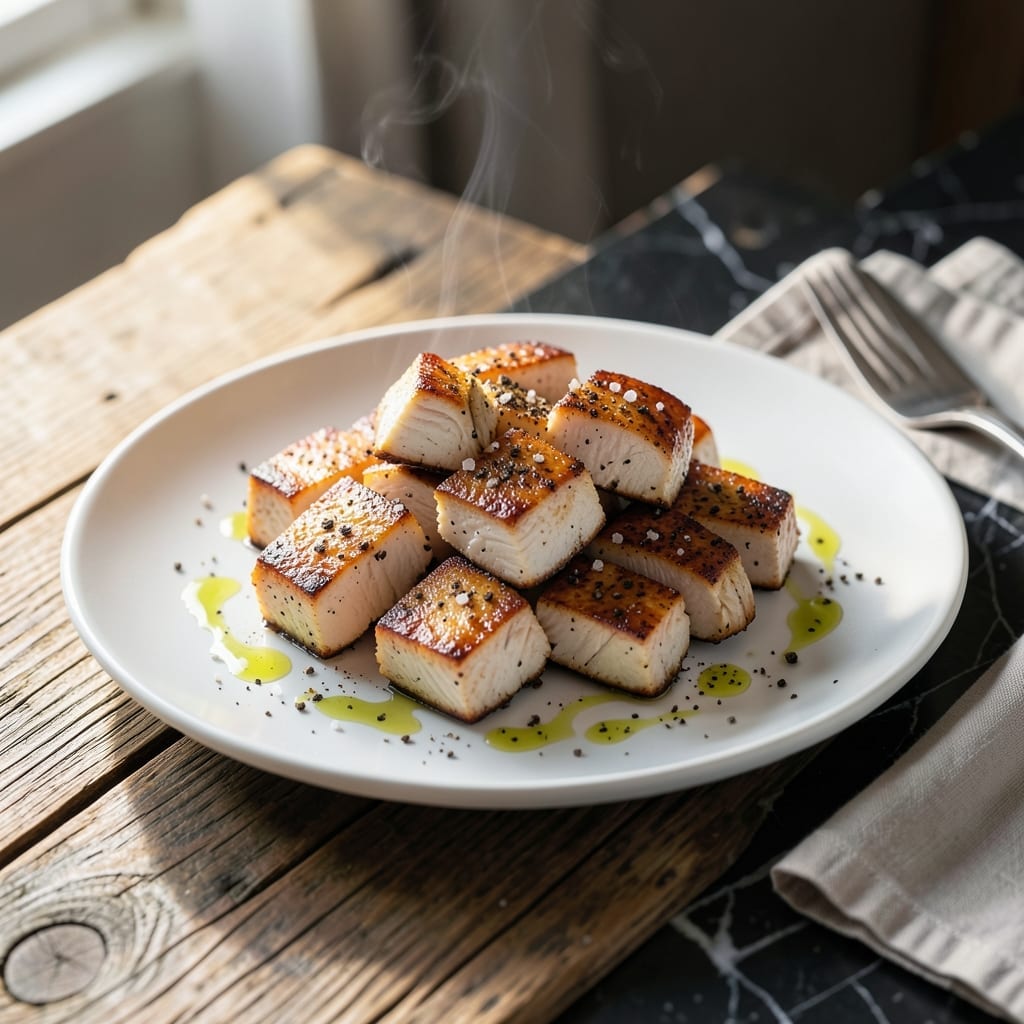
Achieving perfectly moist chunk chicken breast at home is simpler than you think. This proven method ensures tender, flavorful pieces every time without drying out.
I developed this technique after years of overcooked, rubbery chicken. The key lies in precise timing and temperature control, turning ordinary chicken into something extraordinary.
What you’ll get is juicy, succulent chunks that work in salads, stir-fries, or sandwiches. The meat stays moist and packed with flavor, never tough or stringy.
Use this as a base for countless meals throughout the week. The versatility makes it a kitchen staple worth mastering.
Ingredients for Chunk Chicken Breast
Simple ingredients, precise method. Juicy chicken chunks every single time.
| Ingredient | Amount | Notes |
|---|---|---|
| Boneless, Skinless Chicken Breasts 🍗 | 1 ½ lb | Cut into even 1-inch chunks |
| Olive Oil 🫒 | 2 tbsp | Divided for cooking and finishing |
| Kosher Salt 🧂 | 1 tsp | Diamond Crystal preferred |
| Freshly Ground Black Pepper 🌶️ | ½ tsp | Coarse grind for texture |
| Garlic Powder 🧄 | 1 tsp | Not garlic salt |
| Onion Powder 🧅 | 1 tsp | Enhances savory depth |
| Smoked Paprika 🌶️ | ½ tsp | Adds subtle smokiness |
| Dried Thyme 🍃 | ½ tsp | Crushed between fingers |
| Low-Sodium Chicken Broth 🥣 | ½ cup | For deglazing pan |
| Fresh Lemon Juice 🍋 | 1 tbsp | Brightens flavors |
| Unsalted Butter 🧈 | 1 tbsp | Optional for richness |
The chicken quality matters—air-chilled breasts from Whole Foods or Costco stay juicier than water-injected kinds. Cut them into uniform chunks so everything cooks evenly. I always grab boneless, skinless for convenience, but bone-in works too (just adjust timing). Look for pale pink color with no gray streaks, and give it a sniff—should smell clean, not sour.
No smoked paprika? Regular paprika plus a pinch of cayenne gets you close. Short on fresh lemon? Apple cider vinegar at half the amount works in a pinch. The broth can be swapped for water, but you’ll miss the depth. Garlic powder out? Fresh minced at double the quantity—just don’t burn it. And if you’re skipping the butter, add an extra drizzle of olive oil at the end.
Cooked chicken keeps 4-5 days in the fridge, sealed tight. Freeze for 3 months if you’re batching. Reheat gently—microwave on low or warm in a skillet with a splash of broth. Never shock it straight from freezer to high heat (that’s a rubbery disaster).
Why You’ll Love This Recipe
- One Pan Wonder: I toss the chicken chunks with olive oil, salt, and garlic powder, then let the oven do the rest—minimal mess, maximum flavor.
- Garlicky Bite: That first taste of crisp-edged chicken with the warm, savory punch of garlic powder? I make extra just to snack on.
- Meal Prep Hero: I prep a big batch on Sunday and it’s ready for salads, wraps, or pasta all week—no sad desk lunches here.
- Budget Stretcher: Boneless chicken breasts on sale plus pantry staples mean I serve four for the price of takeout. Honestly, it’s my wallet’s favorite recipe.
Step-by-Step Instructions for Chunk Chicken Breast
Here’s how I get perfectly moist, flavorful chicken every single time. Simple and foolproof.
Step 1: Prep and Season the Chicken Chunks
Start by cutting the boneless, skinless chicken breasts into 1-inch chunks. Consistency in size ensures even cooking, so take your time here. I like to hold the knife at a slight angle for cleaner cuts through the breast meat.
In a large bowl, toss the chunks with 1 tsp kosher salt, 0.5 tsp freshly ground black pepper, 1 tsp garlic powder, 1 tsp onion powder, 0.5 tsp smoked paprika, and 0.5 tsp dried thyme. Rub the spices into the meat so every piece is evenly coated. This dry rub creates a flavor base that penetrates as it cooks.
Step 2: Sear the Chicken for Maximum Flavor
Heat 1 tbsp olive oil in a large skillet over medium-high heat until it shimmers but doesn’t smoke. Add half the chicken in a single layer—don’t crowd the pan or it’ll steam instead of sear. Cook undisturbed for 2-3 minutes until the bottoms develop a golden brown crust.
Flip the pieces and cook for another 2-3 minutes until browned all over. The chicken won’t be fully cooked yet, but this searing step locks in juices and builds flavor. Transfer to a plate and repeat with the remaining chicken and 1 tbsp olive oil.
Step 3: Deglaze and Finish Cooking
With the skillet still hot, pour in 0.5 cup low-sodium chicken broth and scrape up all those flavorful browned bits with a wooden spoon. These fond bits are pure flavor—don’t let them go to waste. Let the broth simmer for 1 minute to reduce slightly.
Return all the chicken to the skillet along with any accumulated juices. Reduce heat to medium, cover, and let cook for 5-7 minutes until the chicken reaches 165°F internally. The steam from the broth finishes the cooking while keeping the meat incredibly moist.
Step 4: Add the Final Touches
Remove the skillet from heat. Stir in 1 tbsp fresh lemon juice and 1 tbsp unsalted butter until the butter melts and creates a glossy sauce. The lemon brightens all the savory flavors, while the butter adds a luxurious finish.
Taste and adjust seasoning if needed. I always let the chicken rest in the sauce for 2-3 minutes off heat before serving. This allows the flavors to meld and the juices to redistribute, ensuring every bite is as moist and flavorful as possible.
Pro Tips For Making Chunk Chicken Breast
- Pound the Thickness: I learned this the hard way—pound the chicken breasts to an even 1-inch thickness before cubing so every piece cooks through without the smaller bits turning to rubber.
- Season Twice: Hit the raw cubes with kosher salt and black pepper, then give them another light sprinkle right after they hit the hot olive oil—it makes a real difference in flavor depth.
- Skip the Crowding: Resist the urge to dump all the chunks in at once; cook in batches so they sear instead of steam, or you’ll end up with pale, soggy chicken.
- Rest 5 Minutes: After pulling the chunks from the pan, let them rest on a plate under foil—yes, even for small pieces—so the juices redistribute instead of pooling on the cutting board.
Dietary Considerations for This Dish
Gluten-Free Friendly
This dish naturally contains no gluten ingredients, making it perfect for anyone with celiac disease or gluten sensitivity. All seasonings and broth used are inherently gluten-free. I always double-check my chicken broth label to ensure no additives.
Low-Carb Option
With just 1.5 lb chicken breast and savory seasonings, this serves as an excellent low-carb protein source. Each serving contains approximately 3-4g net carbs, fitting perfectly into keto or Atkins meal plans. The olive oil adds healthy fats without carbs. 💪
Dairy Considerations
The recipe includes 1 tbsp unsalted butter in the final step, which contains dairy. For dairy-free versions, simply substitute with an extra 1 tbsp olive oil or use dairy-free butter alternatives like Earth Balance. The flavor remains just as rich.
Allergen Awareness
This is free from common allergens like nuts, soy, and eggs. The only potential concern is dairy from the butter. For severe allergies, ensure your chicken broth is processed in allergen-free facilities. I recommend Imagine Foods brand for safety.
High-Protein Benefits
Each serving delivers about 40g of protein from the chicken alone. This makes it ideal for athletes, bodybuilders, or anyone looking to increase protein intake. The lean breast meat provides all essential amino acids without excessive saturated fat.
Sodium Control
Using low-sodium chicken broth and kosher salt lets you control sodium levels. The recipe contains approximately 300-400mg sodium per serving. For lower sodium, reduce the salt by half or use a salt-free seasoning blend. 🧂
Nutrition Facts
Frequently Asked Questions
What’s the best way to cut the chicken?
Cut into uniform 1-inch chunks for even cooking. Use a sharp knife and slice against the grain for maximum tenderness. Keeping pieces consistent prevents some from overcooking while others stay raw.
Can I use frozen chicken breasts?
Yes, but thaw completely first in the fridge overnight. Cooking from frozen leads to uneven doneness and dry meat. Pat dry before seasoning to help the spices stick better.
How do I know when it’s fully cooked?
Use a meat thermometer to check for 165°F internally. The juices should run clear, not pink. Overcooking by even 5°F can make the meat dry, so check early.
What if my chicken turns out dry?
This usually means it was overcooked. Next time, pull it off heat at 160°F—it’ll rise to 165°F while resting. Also, avoid crowding the pan during searing.

- Jollof Rice Sauce Recipe: West African Tomato and Spice Infusion - September 25, 2026
- Japanese Rice Soup Recipe: Umami-Rich Comfort in a Bowl - September 25, 2026
- Homemade Cream Of Rice Recipe: Silk-Smooth Breakfast in Minutes - September 25, 2026