
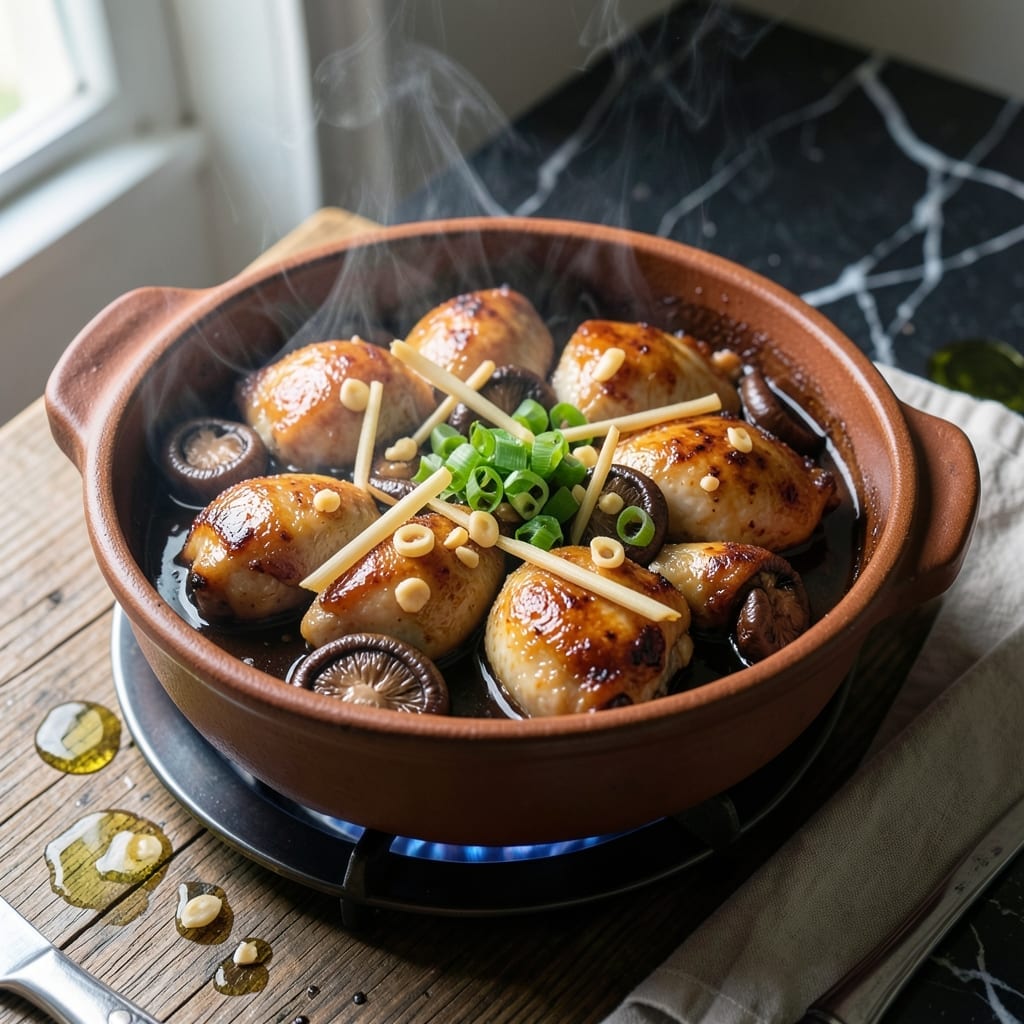
There’s something deeply satisfying about a dish that cooks itself in one pot while filling your kitchen with irresistible aromas. This traditional preparation delivers one-pot convenience with authentic Chinese flavors.
The secret lies in the marinade—a balanced blend of soy, ginger, and Chinese five-spice that tenderizes the chicken while building layers of flavor. I’ve refined this technique over years to ensure every bite is infused with warmth and depth.
As it cooks, the chicken absorbs the savory sauce, becoming tender and succulent. The claypot enhances the process, creating a caramelized crust that locks in moisture and intensifies the taste.
This is comfort food at its finest—rich, aromatic, and effortlessly prepared in a single vessel. The result is a dish that feels both rustic and deeply nourishing.
Ingredients for Claypot Chicken
Traditional Chinese ingredients create aromatic depth in this one-pot wonder with minimal effort.
| Ingredient | Amount | Notes |
|---|---|---|
| Chicken Thighs 🍗 | 2 lb | Boneless, skin-on preferred |
| Light Soy Sauce 🥢 | 3 tbsp | Low-sodium if available |
| Dark Soy Sauce 🥢 | 1 tbsp | For depth and color |
| Shaoxing Wine 🍷 | 2 tbsp | Dry sherry as substitute |
| Fresh Ginger 🌿 | 1 whole | Peeled, sliced thin |
| Garlic Cloves 🧄 | 4 cloves | Minced finely |
| Chinese Five-Spice Powder 🌶️ | 1 tsp | Essential for authenticity |
| Brown Sugar 🍚 | 1 tbsp | Light or dark |
| Oyster Sauce 🥢 | 1 tbsp | Vegan oyster sauce if needed |
| Sesame Oil 🫒 | 1 tsp | Toasted for aroma |
| Green Onions 🧅 | 4 whole | Sliced for garnish |
| Dried Shiitake Mushrooms 🍄 | ½ oz | Rehydrated, sliced |
| Vegetable Oil 🫒 | 2 tbsp | For searing chicken |
| Chicken Stock 🥣 | ½ cup | Low-sodium preferred |
The chicken is non-negotiable here. Thighs (boneless, skin-on) deliver the fat needed for succulence and caramelization. Costco or Whole Foods carry quality options. For the soy sauces, seek out Pearl River Bridge or Lee Kum Kee at Asian markets—they’re the gold standard. Chinese five-spice must be fresh; stale blends lose their complexity. The Shaoxing wine is worth hunting down (check H Mart), but dry sherry works in a pinch.
No Shaoxing wine? Dry sherry at a 1:1 ratio is the closest substitute. Vegan? Swap oyster sauce for mushroom stir-fry sauce. Skipping the mushrooms? Shiitake powder adds umami depth without texture. Brown sugar can be replaced with coconut sugar, but avoid granulated—it lacks the molasses notes. The ginger and garlic should be fresh; jars won’t cut it for this dish’s aromatic demands.
This dish actually improves overnight as flavors meld. Store in an airtight container for up to 4 days in the fridge or 3 months frozen. Reheat gently to avoid drying the chicken—add a splash of stock to revive if needed.
Why You’ll Love This Recipe
- One Pot Magic: I toss everything in the claypot and let the oven do the work—no babysitting required.
- Umami Bomb: The dark soy sauce and Shaoxing wine create this deep, rich flavor that clings to every juicy bite of chicken.
- Feeds the Crew: Honestly, it’s my go-to for Sunday dinner with the family or when friends drop by unannounced.
- Budget Winner: Chicken thighs stay cheap, and a little soy sauce and ginger go a long way.
Step-by-Step Instructions for Claypot Chicken
Master this technique and you’ll deliver authentic, aromatic results with minimal cleanup.
Step 1: Prepare the Aromatics and Mushrooms
Begin by rehydrating the 0.5 oz dried shiitake mushrooms in hot water for 15-20 minutes until softened. Drain, slice thinly, and reserve the soaking liquid. Meanwhile, peel and thinly slice the 1 whole fresh ginger into matchsticks. Mince the 4 cloves garlic cloves finely—the smaller the pieces, the more evenly they’ll infuse the dish.
Slice the 4 whole green onions into 2-inch pieces, separating whites from greens. The whites will cook into the dish, while the greens serve as a fresh garnish. This preparation ensures all aromatics are ready to layer flavors efficiently when cooking begins.
Step 2: Sear the Chicken Thighs
Heat 2 tbsp vegetable oil in a heavy pot or deep skillet over medium-high heat until shimmering. Pat the 2 lb chicken thighs dry to ensure proper browning. Sear the thighs skin-side down first for 5-6 minutes until the skin turns deep golden brown and crispy.
Flip and sear the other side for 3-4 minutes until equally browned. The chicken doesn’t need to cook through at this stage—it will finish in the sauce. Remove the thighs and set aside. The fond left in the pot will form the flavor base for your sauce.
Step 3: Build the Sauce Foundation
In the same pot, reduce heat to medium and add the sliced ginger, minced garlic, and white parts of the green onions. Stir for 1-2 minutes until the aromatics become fragrant but haven’t browned. Add the sliced mushrooms and cook for another 2 minutes until they begin to soften.
Pour in the 2 tbsp Shaoxing wine to deglaze, scraping up all browned bits. Then add the 3 tbsp light soy sauce, 1 tbsp dark soy sauce, 1 tbsp oyster sauce, 1 tbsp brown sugar, and 1 tsp Chinese five-spice powder. Stir to combine and let simmer for 2 minutes.
Step 4: Braise to Perfection
Return the chicken thighs to the pot along with any accumulated juices. Add the 0.5 cup chicken stock and bring to a gentle simmer. Cover and cook on low heat for 25-30 minutes, turning the thighs occasionally to ensure even cooking and coating in the sauce.
The dish is done when the chicken is fall-off-the-bone tender and the sauce has reduced to a glossy, thick consistency that clings to the meat. The sauce should be deeply aromatic, with the five-spice powder providing its characteristic warmth.
Step 5: Finish and Serve
Remove from heat and stir in the 1 tsp sesame oil. Taste and adjust seasoning if needed, though the combination of soy sauces and oyster sauce typically provides perfect balance. Garnish with the reserved green onion greens.
Serve immediately while hot, with the sauce spooned generously over the chicken. The ideal serving temperature allows the aromas to fully express their depth. Each bite should deliver tender chicken infused with the complex, comforting layers of sauce.
Pro Tips For Making Claypot Chicken
- Sear First: Brown the chicken thighs in the claypot before adding liquids—this builds a deep flavor base that simmering alone can’t achieve. I learned this the hard way after making bland versions for years.
- Balance the Soy: Use a 2:1 ratio of light to dark soy sauce to get both saltiness and color without overpowering the dish. Sounds simple, but it actually changes the outcome.
- Deglaze with Wine: After searing, pour in the Shaoxing wine to scrape up those crispy bits—it adds complexity and prevents wasting all that good flavor.
- Ginger Last: Add fresh ginger slices in the last 10 minutes of cooking so it infuses without turning fibrous. My grandmother swore by this, and she was right.
Storing and Reheating This Dish
Refrigerator Storage
Let your claypot chicken cool to room temperature within 2 hours before storing. Transfer to an airtight container—I like using glass ones to preserve flavors. It’ll keep beautifully in the fridge for up to 4 days, and honestly, the flavors deepen overnight. ❄️
Freezer Storage
For longer storage, freeze in portion-sized containers for up to 3 months. I recommend using heavy-duty freezer bags to save space. Leave about 1 inch of headspace for expansion, and label with the date to keep track.
Stovetop Reheating
My go-to method is reheating on the stovetop over medium-low heat. Add a splash of chicken stock or water to prevent drying out, and cover the pot. Heat for 8-10 minutes, stirring occasionally, until the chicken is warmed through. 🔥
Microwave Reheating
For a quick meal, microwave individual portions covered with a damp paper towel. Use 50% power in 1-minute intervals, stirring between each, until heated to 165°F. This prevents the chicken from becoming rubbery.
Reviving the Sauce
If the sauce thickens too much during storage, stir in 1-2 tbsp hot water or stock while reheating. This brings back the glossy consistency that makes the dish so irresistible.
Serving Leftovers
Garnish with fresh green onion greens or a drizzle of sesame oil after reheating. This refreshes the dish and adds a vibrant finish to your leftovers.
Nutrition Facts
Frequently Asked Questions
Do I need a traditional clay pot to make this?
Not at all! A heavy Dutch oven or deep skillet works perfectly. The key is using a pot that retains heat well for even cooking and caramelization.
Can I use chicken breast instead of thighs?
Thighs are ideal for their fat content and tenderness. Breast will work but tends to dry out during the 25-30 minutes braising time. If using, reduce cooking time to 15-20 minutes.
How do I fix sauce that’s too salty?
Add a splash of chicken stock or water and a pinch of brown sugar to balance the flavors. Simmer for 2-3 minutes to let the adjustments meld.
What’s the best way to serve this dish?
Serve hot over steamed rice to soak up the rich sauce. Garnish with fresh green onions for a bright finish.

- Jollof Rice Sauce Recipe: West African Tomato and Spice Infusion - September 25, 2026
- Japanese Rice Soup Recipe: Umami-Rich Comfort in a Bowl - September 25, 2026
- Homemade Cream Of Rice Recipe: Silk-Smooth Breakfast in Minutes - September 25, 2026