
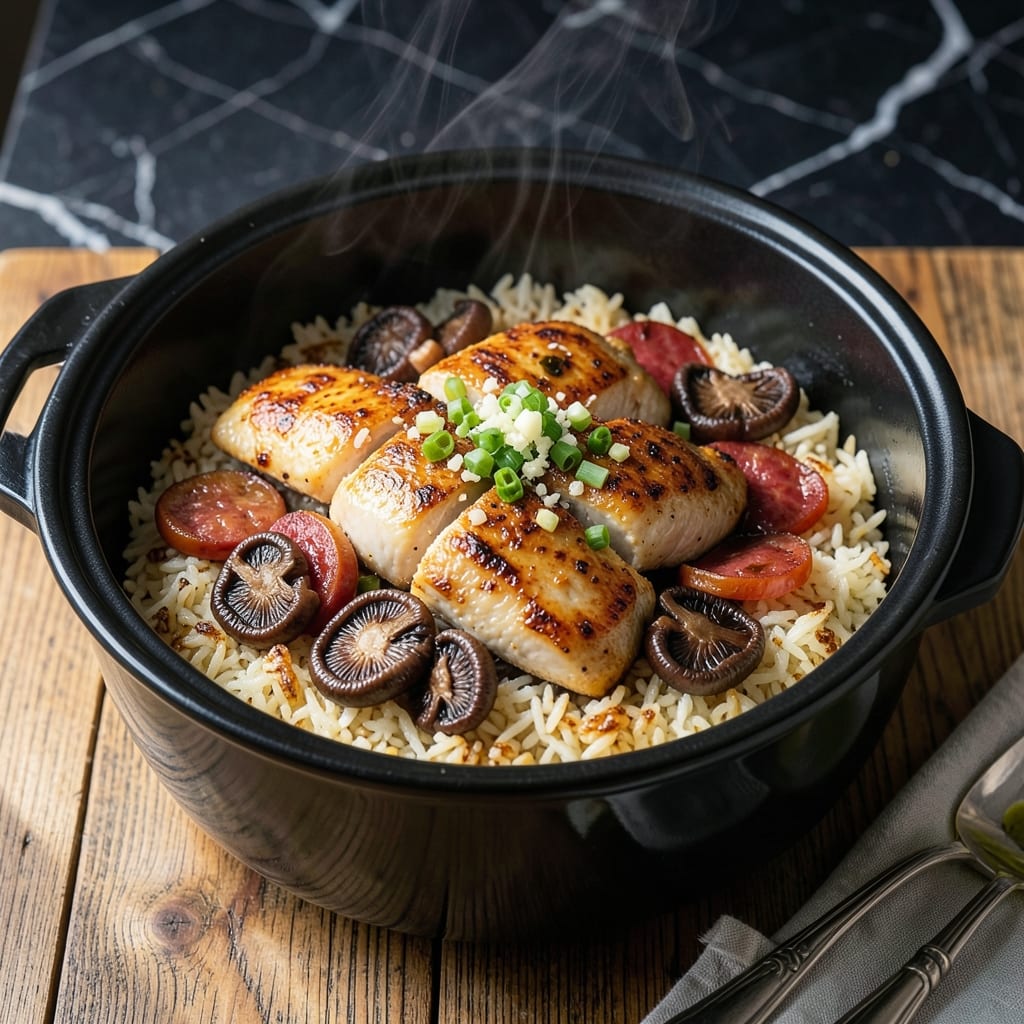
This rice cooker method delivers the signature crispy bottom of traditional claypot rice with minimal effort. I developed this technique to recreate the restaurant experience at home without special equipment.
The key is layering raw rice with savory toppings and letting the cooker work its magic. A final high-heat sear creates that coveted golden crust. The result is perfectly cooked rice with a fragrant, slightly charred base.
You’ll get tender grains topped with your choice of proteins and vegetables, all infused with soy sauce and aromatics. The contrast between the crispy bottom and soft rice above is what makes this dish special.
This approach works with any rice cooker and requires no babysitting. The machine handles the timing while you prepare the toppings.
Ingredients for Claypot Rice in Rice Cooker
Layer raw rice with savory toppings for that signature crispy bottom in your cooker.
| Ingredient | Amount | Notes |
|---|---|---|
| Jasmine Rice 🌾 | 2 cups | Rinsed until water runs clear |
| Chicken Thighs 🍗 | 1 lb | Boneless, skinless, diced |
| Chinese Sausage 🌭 | 2 whole | Lap cheong, sliced thin |
| Dried Shiitake Mushrooms 🍄 | ½ oz | Rehydrated and sliced |
| Garlic Cloves 🧄 | 4 cloves | Minced finely |
| Green Onions 🧅 | 4 whole | Thinly sliced, whites and greens separated |
| Light Soy Sauce 💧 | 3 tbsp | For seasoning layers |
| Dark Soy Sauce 💧 | 1 tbsp | For color and depth |
| Oyster Sauce 🫒 | 1 tbsp | Vegan alternative if needed |
| Sesame Oil 🫒 | 1 tsp | Toasted, for finishing |
| Chicken Stock 🥣 | 1 ½ cups | Low-sodium preferred |
| Frozen Peas 🌱 | ½ cup | Thawed before using |
| Neutral Oil 🫒 | 2 tbsp | For searing proteins |
| Kosher Salt 🧂 | ½ tsp | Adjust to taste |
| White Pepper 🌶️ | ¼ tsp | Ground, for authentic flavor |
The rice is everything here. Jasmine rice gives you that classic sticky texture with a crispy base. I grab mine from Asian markets (better price, fresher stock), but any grocery store works. The Chinese sausage—lap cheong—is key for authentic flavor. Look for it in the refrigerated section at H Mart or 99 Ranch. If you’re making a big batch, Costco sometimes carries it too (worth the drive).
No Chinese sausage? Substitute with diced bacon or ham—not quite the same, but still delicious. Lap cheong is pretty salty, so go light on added salt if swapping. Fresh shiitake mushrooms work if you can’t find dried (just skip the soaking step). Oyster sauce can be swapped for hoisin in a pinch, though the flavor profile changes slightly. For a vegetarian version, mushroom oyster sauce is perfect.
Leftovers keep 3-4 days in the fridge, but that crispy bottom softens. Reheat in a skillet to revive the crust. Best eaten fresh though—this dish doesn’t freeze well. The sausage keeps 1 week in the fridge or 3 months frozen (slice before freezing for easy use).
Why You’ll Love This Recipe
- Set and Forget: I toss everything into the rice cooker and let it do the work—no babysitting, no stirring.
- Crispy Top Magic: That golden, slightly charred rice crust with the tender chicken and umami mushrooms? I’ll fight anyone for the last bite.
- Weeknight Hero: Between us, this feeds my family of four with leftovers for lunch the next day.
- Budget Winner: I use affordable chicken thighs and a few sausage slices to make it taste like a restaurant meal at home.
Step-by-Step Instructions for Claypot Rice in Rice Cooker
Here’s my foolproof method for achieving that signature crispy bottom and tender toppings right in your rice cooker.
Step 1: Prepare the Jasmine Rice and Toppings
Rinse the 2 cups Jasmine Rice until the water runs clear—this removes excess starch that could make your dish gummy. Let it drain completely while you prep the toppings. I’ve found that properly rinsed rice creates the perfect texture for that coveted crispy layer at the bottom.
Combine the 1 lb Chicken Thighs (diced), 2 whole Chinese Sausage (sliced thin), 0.5 oz Dried Shiitake Mushrooms (rehydrated and sliced), 4 cloves Garlic Cloves (minced), and the whites of the 4 whole Green Onions in a bowl. Add 3 tbsp Light Soy Sauce, 1 tbsp Dark Soy Sauce, 1 tbsp Oyster Sauce, 0.5 tsp Kosher Salt, and 0.25 tsp White Pepper. Mix well to ensure every piece is evenly coated.
Step 2: Sear the Protein Mixture for Depth of Flavor
Heat 2 tbsp Neutral Oil in a large skillet over medium-high heat. Add the marinated chicken, sausage, mushrooms, garlic, and green onion whites. Sear for 5-6 minutes until the chicken is cooked through and everything is lightly caramelized.
This step builds the foundational flavors that will infuse into the rice. Don’t skip it—searing enhances the savory notes and gives the dish its characteristic richness. Once done, stir in the 0.5 cup Frozen Peas (thawed) just to warm them through, then remove from heat.
Step 3: Layer and Cook in the Rice Cooker
Add the drained 2 cups Jasmine Rice to your rice cooker pot. Pour in the 1.5 cups Chicken Stock and stir to distribute the rice evenly. Spread the seared chicken and sausage mixture over the top in an even layer. This ensures the flavors meld beautifully as everything cooks together.
Close the lid and start the rice cooker on the standard white rice setting. Here’s the thing—resist the urge to peek. Let it cook undisturbed so steam can build properly, which is crucial for forming that crispy bottom layer.
Step 4: Crisp the Bottom and Finish
Once the rice cooker switches to “keep warm,” let it sit for an additional 10-15 minutes. This extra time allows the bottom layer to crisp up perfectly. I know it seems like a long wait, but patience is key here.
Carefully open the lid and drizzle 1 tsp Sesame Oil over the top. Use a spatula to gently press down on the rice—you should hear a slight crisp sound at the bottom. Let it sit for another 5 minutes to set. Finally, garnish with the green parts of the 4 whole Green Onions and serve immediately, scooping from the bottom to include the crispy bits in every portion.
Pro Tips For Making Claypot Rice In Rice Cooker
- Soak the Shiitakes: Rehydrate dried shiitakes in warm water for at least 30 minutes—I learned this the hard way after ending up with chewy, undercooked mushrooms. Reserve the soaking liquid for the rice; it adds a deep umami flavor.
- Crisp the Chicken First: Sear the chicken thighs in a pan before adding to the rice cooker. This gives you that golden-brown crust and locks in the juices, which the rice absorbs beautifully.
- Skip the Overcrowding: Resist the urge to dump all ingredients in at once. Layer the chicken, sausage, and mushrooms on top of the rice so everything cooks evenly and the flavors meld properly.
- Boost with Garlic Oil: After cooking, drizzle 1-2 tablespoons of garlic-infused oil over the rice and let it sit covered for 10 minutes. Sounds simple, but it actually changes the outcome, giving it that authentic claypot aroma.
Make-Ahead Tips for This claypot rice in rice cooker
Prep Ahead Strategy
Marinate the chicken and sausage mixture the night before—just combine all ingredients in a sealed container. I’ve found the flavors deepen significantly after 8-12 hours in the fridge. The rice can also be rinsed and drained ahead of time, stored in water in the fridge for up to 24 hours. 💡
Rice Cooker Timing
Start cooking the rice 30 minutes before you plan to serve. The cooker takes about 20 minutes to finish, plus the 15-minute crisping time. This gives you a buffer to sear the proteins and assemble everything while the rice cooks.
Chinese Sausage Prep
Slice the lap cheong the day before and store it in an airtight container. It’s salty, so it keeps well for 1 week in the fridge. For even more convenience, buy pre-sliced sausage from H Mart if available.
Mushroom Soaking
Rehydrate the dried shiitakes in hot water for 20 minutes while prepping other ingredients. Drain and slice them just before cooking. The soaking liquid can be reserved and used as part of the chicken stock for extra mushroom flavor.
Reheating Leftovers
To revive leftovers, spread them in a skillet with a splash of water over medium heat for 5-7 minutes. Cover with a lid to steam the rice, then uncover to crisp the bottom. It won’t be as perfect as fresh, but it’s close!
Freezing Components
Freeze cooked chicken and sausage mixture in portions for up to 3 months. Thaw overnight in the fridge before using. The rice itself doesn’t freeze well, so cook it fresh when ready to serve. 📅
Nutrition Facts
Frequently Asked Questions
Can I use a different type of rice?
Jasmine rice works best, but long-grain white rice is a good substitute. Avoid sticky rice varieties as they won’t create the crispy bottom.
Why didn’t my rice get crispy?
Let it sit on keep warm for the full 10-15 minutes. Also, ensure you’re using the right rice-to-liquid ratio and didn’t peek during cooking.
Can I make this vegetarian?
Swap the chicken and sausage for tofu, extra mushrooms, or tempeh. Use mushroom oyster sauce and vegetable stock instead.
How do I prevent the rice from sticking?
Soak your rice cooker pot in warm water for 10 minutes before scrubbing. A non-stick pot makes cleanup easier.

- Jollof Rice Sauce Recipe: West African Tomato and Spice Infusion - September 25, 2026
- Japanese Rice Soup Recipe: Umami-Rich Comfort in a Bowl - September 25, 2026
- Homemade Cream Of Rice Recipe: Silk-Smooth Breakfast in Minutes - September 25, 2026