
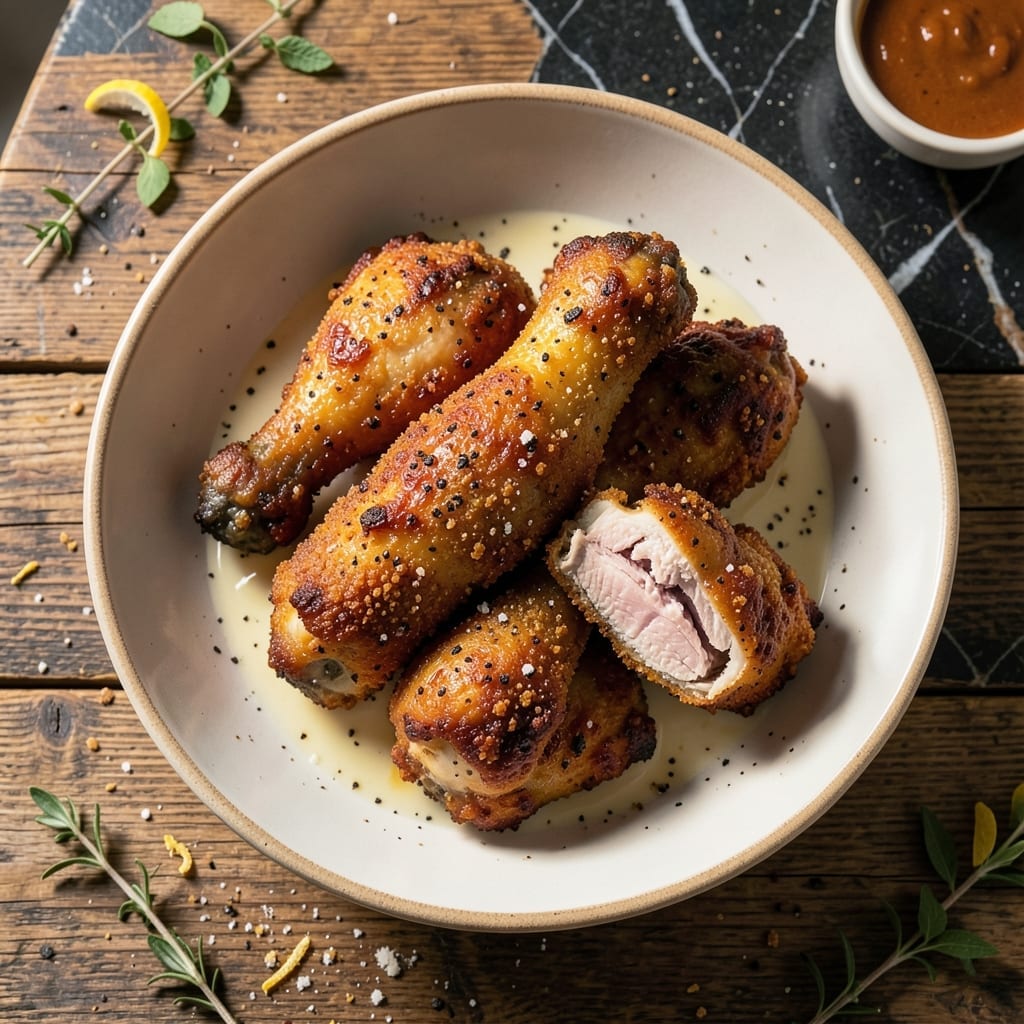
Achieving perfectly crispy fried chicken at home requires a precise double-dipping method that locks in moisture while creating an unbreakable crust. This technique transforms ordinary chicken into restaurant-quality results with every bite.
The secret lies in the coating process—first a seasoned flour dredge, then a buttermilk bath, followed by a final flour coating. This creates layers that crisp to golden perfection and stay attached during frying.
Frying at the right temperature ensures the chicken cooks through without burning the exterior. The result is juicy meat encased in a shatteringly crisp shell that holds up to the first bite and beyond.
Serve hot for the ultimate crunch experience. This method delivers consistent, professional results every time.
Ingredients for Coated Fried Chicken
Eleven ingredients for that restaurant-quality crunch. Nothing less will do for this dish.
| Ingredient | Amount | Notes |
|---|---|---|
| Chicken Thighs and Drumsticks 🍗 | 3 ½ lb | Bone-in, skin-on preferred |
| Buttermilk 🥛 | 2 cups | Full-fat for best adhesion |
| All-Purpose Flour 🌾 | 3 cups | Divided for dredging and final coat |
| Cornstarch 🌽 | ½ cup | For extra crispiness |
| Kosher Salt 🧂 | 2 tbsp | Diamond Crystal preferred |
| Freshly Ground Black Pepper 🌶️ | 1 tbsp | Coarse grind for texture |
| Garlic Powder 🧄 | 2 tsp | Not garlic salt |
| Onion Powder 🧅 | 2 tsp | Fine grind for even distribution |
| Paprika 🌶️ | 2 tsp | Sweet or smoked variety |
| Cayenne Pepper 🔥 | ½ tsp | Adjust for heat preference |
| Vegetable Oil 🫒 | 4 cups | For deep frying, high smoke point |
| Large Eggs 🥚 | 2 whole | Beaten into buttermilk |
The chicken is non-negotiable—bone-in, skin-on thighs and drumsticks deliver the juiciest results. Whole Foods or a trusted butcher will have what you need; avoid pre-cut pieces as they dry out faster. The flour should be all-purpose, nothing fancy. For the cornstarch, any grocery store brand works, but Bob’s Red Mill is a reliable choice for consistent texture.
Out of buttermilk? Whole milk plus 1 tbsp vinegar per cup (let sit 5 minutes) works in a pinch. No cayenne? Red pepper flakes at half the amount. The paprika can be swapped for smoked if you prefer depth. Eggs are essential for binding, but if absolutely necessary, 2 tbsp cornstarch plus 2 tbsp water can substitute—though the crust won’t cling as well.
Fry immediately after coating for best results. Leftovers? They’ll keep in the fridge for 3 days but lose crispiness. Reheat in a 375°F oven on a wire rack to revive the crunch. Never microwave—soggy disaster guaranteed.
Why You’ll Love This Recipe
- One Bowl Wonder: I mix the buttermilk and dry coating in the same bowl—no extra dishes, just crispy chicken with minimal cleanup.
- That Buttermilk Bite: The tangy buttermilk soak makes the meat so juicy it practically falls off the bone, while the cornstarch gives it that shatter-crisp crust.
- Feeds the Crew: I use thighs and drumsticks because they’re cheap, filling, and everyone from picky kids to hungry teens devours them.
- Reheats Like Magic: Leftovers stay crunchy in the oven, so I double the batch for lunches—honestly, it’s better the next day.
Step-by-Step Instructions for Coated Fried Chicken
Master this double-dip technique for an unparalleled crunch that stays crispy long after frying.
Step 1: Prepare the Buttermilk Marinade
In a large bowl, whisk together the 2 cups Buttermilk and 2 whole Large Eggs until fully combined. The eggs add richness and help the coating adhere better to the chicken pieces.
Add all the 3.5 lb Chicken Thighs and Drumsticks to the buttermilk mixture, ensuring each piece is completely submerged. Cover and refrigerate for at least 4 hours, or ideally overnight for maximum flavor penetration and tenderness.
Step 2: Create the Seasoned Flour Mixture
In a separate large bowl, combine the 3 cups All-Purpose Flour, 0.5 cup Cornstarch, 2 tbsp Kosher Salt, 1 tbsp Freshly Ground Black Pepper, 2 tsp Garlic Powder, 2 tsp Onion Powder, 2 tsp Paprika, and 0.5 tsp Cayenne Pepper.
Whisk thoroughly to evenly distribute the seasonings. The cornstarch is crucial here—it creates that extra-crispy texture that sets this recipe apart from standard fried chicken. Use a fine-mesh strainer if you want an ultra-smooth coating without any lumps.
Step 3: Double-Dip for Maximum Crunch
Remove the chicken from the buttermilk marinade, letting any excess drip off. Dredge each piece in the seasoned flour mixture, pressing firmly to ensure the coating adheres completely. Shake off any loose flour.
For the double-dip, return each floured piece back into the buttermilk mixture for a quick second soak, then dredge in the flour mixture once more. This creates multiple layers of coating that will puff and crisp beautifully when fried. Place the coated pieces on a wire rack set over a baking sheet.
Step 4: Fry to Golden Perfection
In a deep, heavy-bottomed pot or Dutch oven, heat the 4 cups Vegetable Oil to 350°F. Use a deep-fry or candy thermometer to monitor the temperature precisely—this is non-negotiable for even cooking and proper crisping.
Carefully lower 3-4 pieces of chicken into the hot oil, being careful not to overcrowd the pot. Fry for 15-18 minutes, turning occasionally, until the coating is deep golden brown and the internal temperature reaches 165°F. The oil temperature will drop when you add the chicken—allow it to return to 350°F between batches.
Step 5: Drain and Rest Before Serving
Transfer the fried chicken to a clean wire rack set over a baking sheet to drain. This allows air to circulate all around the pieces, preventing the coating from becoming soggy on one side. Never drain on paper towels—it traps steam and softens the crust.
Let the chicken rest for 5-10 minutes before serving. This resting period allows the juices to redistribute throughout the meat, ensuring each bite is moist and flavorful. The coating will also crisp up further as it cools slightly. Serve immediately while still hot and at its peak of crunchy perfection.
Pro Tips For Making Coated Fried Chicken
- Soak Overnight: Let the chicken bathe in buttermilk for at least 12 hours—I learned this the hard way after my first few batches turned out dry. The longer soak makes the coating stick better and keeps the meat juicy.
- Double Dredge: Dip the chicken in the flour-cornstarch mix, then back in buttermilk, then back in the flour. This extra step guarantees a thicker, crunchier crust that doesn’t fall off.
- Skip Cold Oil: Make sure your oil hits 350°F before adding the chicken—after burning three batches, I finally figured out that cold oil makes the coating greasy instead of crispy.
- Rest Before Frying: Give the dredged chicken 10-15 minutes on a rack before frying. It sounds tedious, but it lets the coating set so it doesn’t slide off in the oil.
Regional Styles of These Flavors
Southern Buttermilk Style
This classic approach uses a 24-hour buttermilk soak for extra tenderness. The key is adding 1 tsp baking powder to the flour for a lighter, airier crust. I learned this trick from my grandmother in Georgia. 💛
Nashville Hot Chicken
After frying, brush each piece with ½ cup hot oil infused with 3 tbsp cayenne and 1 tbsp brown sugar. The result is fiery, sticky perfection. Serve on white bread with pickle slices to balance the heat.
Korean Double-Fried
Fry once at 325°F for 10 minutes, rest 5 minutes, then fry again at 350°F until golden. The double-fry creates an ultra-crisp shell. Toss in a gochujang glaze for authentic Korean flavor.
Japanese Karaage
Marinate chicken in 2 tbsp soy sauce, 1 tbsp sake, and 1 tbsp grated ginger before coating. Use potato starch instead of cornstarch for a delicate crunch. Fry at 340°F for 12 minutes.
Cajun Blackened
Add 1 tbsp Tony Chachere’s seasoning to your flour mix for that Louisiana kick. Fry at 375°F for a darker, spicier crust. The high heat creates a beautiful char without burning.
Tex-Mex Crunch
Incorporate 1 cup crushed tortilla chips into your final flour coating. Add 1 tbsp taco seasoning for extra zing. Serve with queso dip and pickled jalapeños for a fiesta on a plate. 🔥
Nutrition Facts
Frequently Asked Questions
Why use both flour and cornstarch in the coating?
The flour provides structure while cornstarch creates an ultra-crisp texture. This combo ensures a shatteringly crisp crust that stays attached during frying.
Can I bake this instead of frying?
Baking at 400°F for 30-35 minutes works, but the crust won’t be as crispy. Use a wire rack for air circulation to prevent sogginess.
How do I prevent the coating from falling off?
Pat chicken completely dry before dredging, press flour firmly into the meat, and let coated pieces rest 10 minutes before frying. This helps the coating adhere better.
What oil is best for frying?
Use oils with a high smoke point like vegetable, peanut, or canola. These can reach 350°F without breaking down or imparting off-flavors.

- Jollof Rice Sauce Recipe: West African Tomato and Spice Infusion - September 25, 2026
- Japanese Rice Soup Recipe: Umami-Rich Comfort in a Bowl - September 25, 2026
- Homemade Cream Of Rice Recipe: Silk-Smooth Breakfast in Minutes - September 25, 2026