
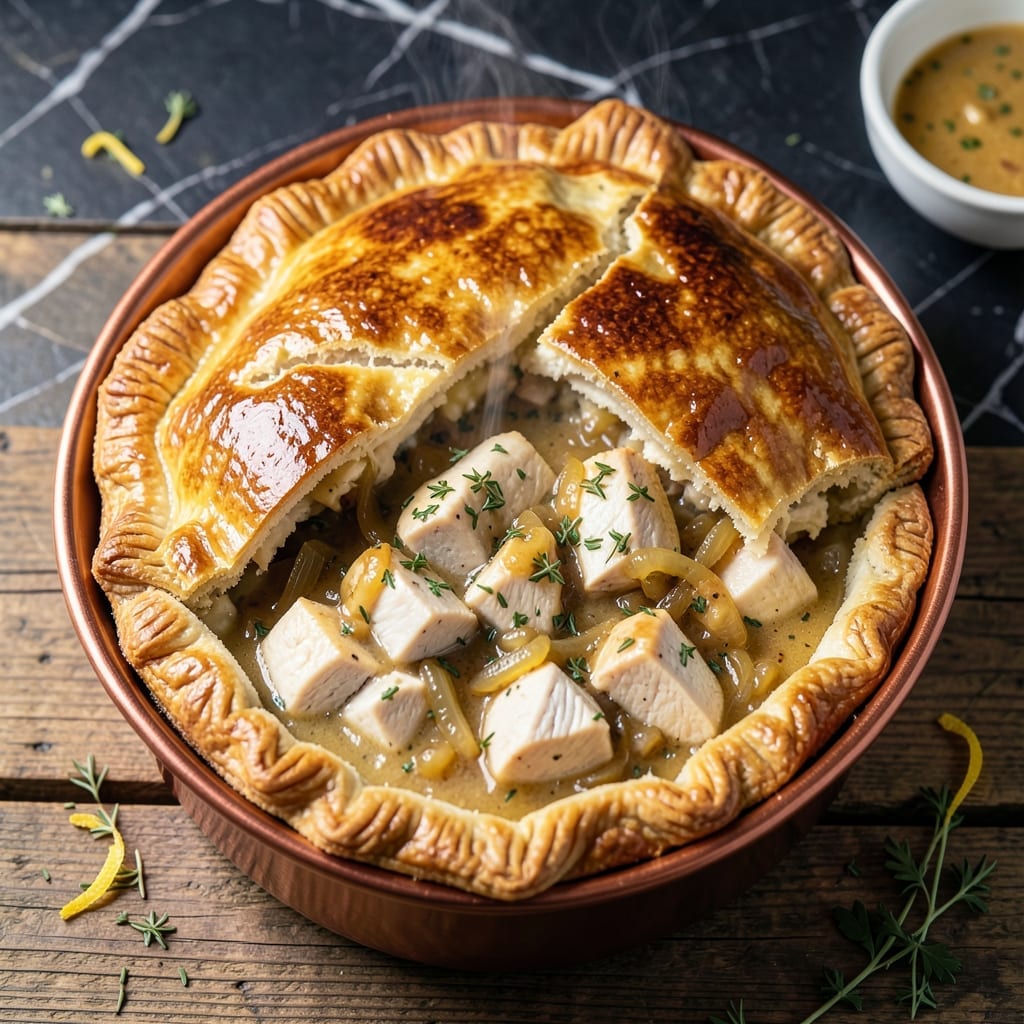
There’s nothing quite like a chicken pot pie with flaky layers that crackle with every bite, revealing a rich, savory filling beneath. I’ve refined this recipe over years of testing, ensuring the crust stays golden and tender while the chicken and vegetables swim in a velvety gravy.
This version skips unnecessary complexity, focusing on a straightforward method that delivers consistent results. The key is a buttery, layered crust and a filling that’s hearty without being heavy. Whether you use a Copper Chef pan or a traditional baking dish, the technique remains the same.
The filling combines tender chicken, peas, carrots, and onions in a creamy sauce that’s seasoned just right. The top crust bakes to a flaky, golden finish, sealing in all the comforting flavors.
Serve this warm, straight from the oven, for a meal that feels like home. Here’s how to make it perfectly every time.
Ingredients for Copper Chef Chicken Pot Pie
Buttery crust, tender chicken, and garden vegetables unite in this comforting classic.
| Ingredient | Amount | Notes |
|---|---|---|
| All-Purpose Flour 🌾 | 2 ½ cups | Divided for crust and filling |
| Unsalted Butter 🧈 | 1 ½ cups | Cold, cubed for crust |
| Ice Water 💧 | ½ cup | For pie dough hydration |
| Salt 🧂 | 1 ½ tsp | Divided for dough and filling |
| Chicken Breast 🍗 | 1 ½ lb | Boneless, skinless, diced |
| Yellow Onion 🧅 | 1 whole | Medium, finely diced |
| Carrots 🥕 | 2 whole | Medium, peeled and diced |
| Frozen Green Peas 🌱 | 1 cup | No need to thaw |
| Garlic Cloves 🧄 | 3 cloves | Minced for filling |
| Chicken Broth 🥣 | 2 cups | Low-sodium preferred |
| Heavy Cream 🥛 | ¾ cup | For creamy gravy |
| Fresh Thyme Leaves 🌿 | 1 tbsp | Or 1 tsp dried thyme |
| Black Pepper 🌶️ | 1 tsp | Freshly ground preferred |
| Large Egg 🥚 | 1 whole | For egg wash |
The crust demands cold butter—Land O’Lakes or Kerrygold work well (unsalted is a must). For the filling, boneless, skinless chicken breasts stay moist if you don’t overcook them. Most supermarkets carry pre-diced mirepoix mixes (onion, carrot, celery) that save time. I grab mine from Whole Foods when I want organic, but any grocery store’s produce section will do. The thyme? Fresh is ideal, but dried in a pinch.
No heavy cream? Half-and-half or whole milk work in a 1:1 swap (texture will be slightly thinner). Out of peas? Frozen corn or green beans can stand in. For a richer broth, use homemade chicken stock—Better Than Bouillon is a great store-bought backup. The all-purpose flour is non-negotiable for the crust, but you could swap in 1:1 gluten-free blend if needed (texture varies).
The assembled pie freezes beautifully before baking—just wrap it tight in foil and plastic. Baked, it keeps in the fridge for 3-4 days. Leftovers reheat well in the microwave (cover with a damp paper towel). The crust stays crispest if you bake straight from the fridge, so don’t let it sit at room temperature too long.
Why You’ll Love This Recipe
- One Pan Magic: That flaky butter crust comes together right in the Copper Chef pan—no extra bowls, no mess.
- Buttery Crust: The cold butter and ice water create layers so crisp they shatter, with a rich flavor that makes the whole dish sing.
- Feeds the Crew: I stretch one batch into two pies and freeze half for those no-time nights. Honestly, it’s my secret weapon.
- Leftovers? Yes Please: The filling thickens overnight, so day-two slices taste even better—my kids fight over the last piece.
Step-by-Step Instructions for Copper Chef Chicken Pot Pie
This professional method delivers the promised flaky crust and rich, creamy filling every time.
Step 1: Prepare the Flaky Pie Dough
In a large bowl, whisk together 2.5 cups all-purpose flour and ½ tsp salt. Add 1.5 cups cold, cubed unsalted butter and work it in using a pastry cutter or your fingers until the mixture resembles coarse crumbs with pea-sized butter pieces visible.
Gradually add ½ cup ice water, 1 tbsp at a time, mixing just until the dough comes together. Don’t overwork it—visible butter streaks ensure flakiness. Divide the dough into two equal portions, shape into discs, and refrigerate for 1 hour.
Step 2: Cook the Savory Chicken Filling
In a large skillet over medium-high heat, cook the diced 1.5 lb chicken breast until no longer pink, about 6-8 minutes. Transfer to a plate and set aside.
In the same skillet, sauté the finely diced yellow onion, peeled and diced 2 carrots, and 3 minced garlic cloves for 4-5 minutes until softened. Stir in 1.5 tsp salt, 1 tsp black pepper, and 1 tbsp fresh thyme leaves, then add 2 cups chicken broth to deglaze.
Step 3: Create the Creamy Gravy
Return the chicken to the skillet along with 1 cup frozen green peas. Pour in ¾ cup heavy cream and simmer for 5-7 minutes until the mixture thickens slightly and coats the back of a spoon.
Taste and adjust seasoning if needed. The filling should be rich and velvety, with the vegetables tender but still holding their shape. Remove from heat and let cool slightly while you roll out the dough.
Step 4: Assemble and Bake to Golden Perfection
Roll out one dough disc to fit your pie dish, then transfer the filling. Roll out the second disc, place it over the filling, and crimp the edges. Brush the top with 1 beaten large egg for a golden finish.
Bake at 375°F for 40-45 minutes until the crust is golden brown and the filling is bubbling. Let rest for 10 minutes before serving to allow the gravy to set.
Pro Tips For Making Copper Chef Chicken Pot Pie
- Chill the Dough: Pop your crust in the fridge for at least 30 minutes before rolling—this keeps the butter from melting too fast and guarantees flaky layers. I learned this the hard way after my first few pies came out tough.
- Dice Chicken Small: Cut the chicken breast into ½-inch pieces so it cooks through quickly and evenly in the filling. Sounds tedious, but it saves you from chewy chunks later.
- Prevent Soggy Bottom: Blind-bake the bottom crust for 10 minutes before adding the filling to keep it crisp. My grandmother swore by this, and she was right—no one likes a wet crust.
- Use Ice-Cold Water: Keep your water and butter as cold as possible when making the dough—about 3-4 tablespoons of ice water per cup of flour. Warm ingredients mean a tough crust, and nobody wants that.
Essential Equipment for This Recipe
Pie Dish Options
I always use a 9-inch glass pie dish for even baking and that perfect golden crust. The Pyrex Basics version is my go-to—it’s durable, non-reactive, and lets me monitor the bottom crust. Avoid dark metal pans, which can cause over-browning. 💡
Rolling Pin Choice
A French-style tapering rolling pin gives me the most control for thin, even crusts. I love the OXO Good Grips model—its weight helps flatten dough without excessive pressure. Wooden pins work too, but avoid non-stick coatings that can scratch over time.
Skillet for Filling
For the chicken and veggies, a 12-inch stainless steel skillet like All-Clad D3 provides ample space and even heat distribution. The wide base lets ingredients cook quickly without steaming. If using Copper Chef, ensure it’s preheated to medium-high heat for proper browning.
Pastry Tools
A pastry cutter makes quick work of blending butter into flour. I use the RSVP Endurance model—its sturdy wires cut through cold butter cleanly. A fork works in a pinch, but expect more effort. For crimping edges, a simple fluted pastry wheel adds a professional touch.
Baking Essentials
Don’t skip the pastry brush for egg wash—I prefer a silicone brush for easy cleanup. A cooling rack prevents the bottom crust from getting soggy after baking. And always keep a bench scraper handy for dividing dough and cleaning your work surface.
Thermometer Check
An instant-read thermometer ensures your filling reaches a safe 165°F. The ThermoWorks ThermaPen gives accurate readings in 3 seconds. This is especially helpful if you’re unsure about doneness in the center of the pie.
Nutrition Facts
Frequently Asked Questions
Can I use pre-made pie crust?
Yes, store-bought crust works in a pinch. Thaw it according to package instructions before rolling. Homemade tastes better, but pre-made saves time without sacrificing too much quality.
How do I prevent a soggy bottom crust?
Blind-bake the bottom crust for 10 minutes before adding filling. Also, ensure your filling isn’t too watery—simmer it until thickened. A cooling rack after baking helps too.
Can I make this ahead of time?
Assemble the pie, cover tightly, and refrigerate for up to 24 hours before baking. For longer storage, freeze unbaked and add 10-15 minutes to baking time.

- Jollof Rice Sauce Recipe: West African Tomato and Spice Infusion - September 25, 2026
- Japanese Rice Soup Recipe: Umami-Rich Comfort in a Bowl - September 25, 2026
- Homemade Cream Of Rice Recipe: Silk-Smooth Breakfast in Minutes - September 25, 2026