
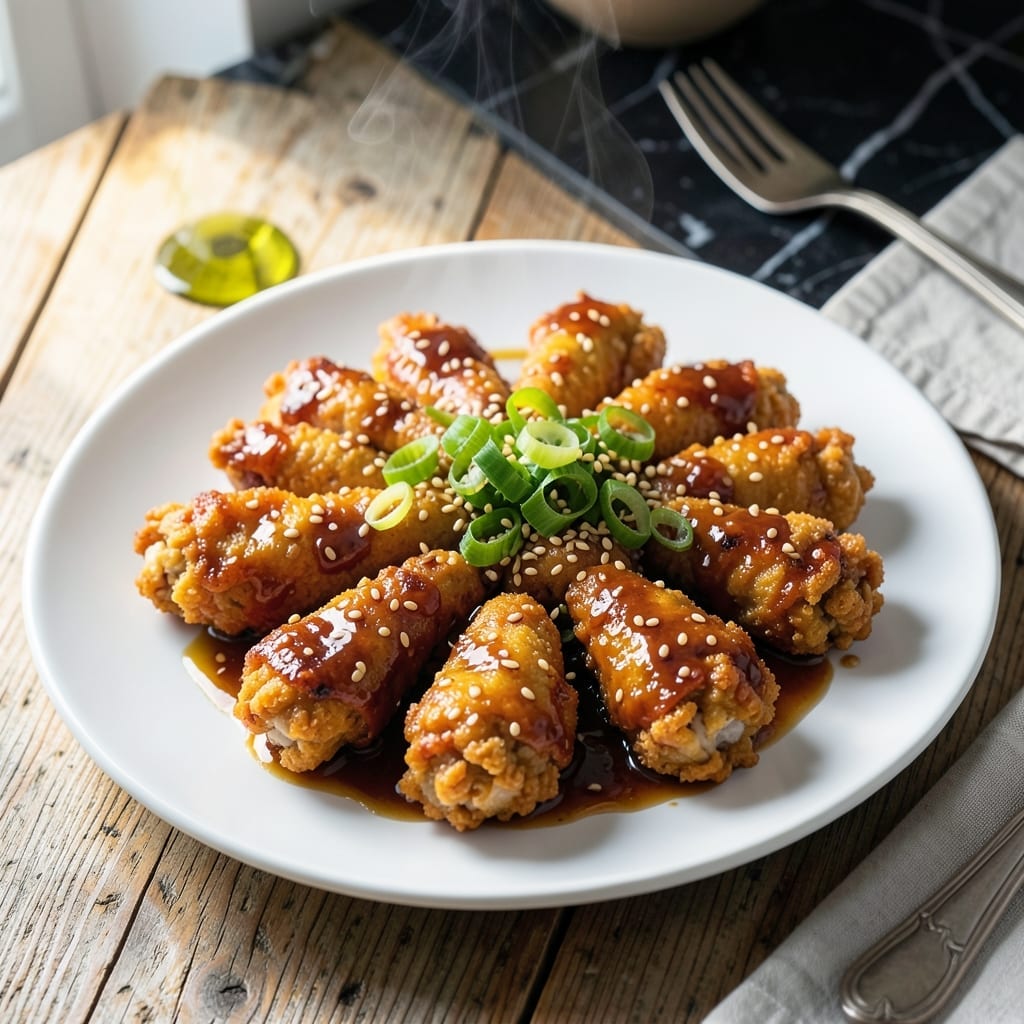
I spent years trying to recreate that perfect takeout sesame chicken at home. This version finally nails it.
The secret is double-frying the chicken for extra crispiness, then tossing it in a sweet-savory sauce that clings to every piece. It’s the same technique your favorite Chinese restaurant uses, simplified for home cooks.
You’ll get golden, crunchy chicken pieces coated in a glossy sauce with just the right balance of sweet and umami. The sesame seeds add that signature nutty finish that makes this dish irresistible.
Serve it over steamed rice with steamed broccoli for the full experience. Here’s how to make it happen in your kitchen.
Ingredients for Copycat Sesame Chicken
Pantry staples plus a quick stop at the Asian market. Nothing exotic here.
| Ingredient | Amount | Notes |
|---|---|---|
| Chicken Breast 🍗 | 1 ½ lb | Boneless, skinless, cut into 1-inch pieces |
| Cornstarch 🌾 | ½ cup | For coating chicken |
| All-Purpose Flour 🌾 | ½ cup | For dredging chicken |
| Large Eggs 🥚 | 2 whole | Beaten for egg wash |
| Vegetable Oil 🫒 | 3 cups | For frying (peanut or canola works too) |
| Soy Sauce 💧 | ⅓ cup | Low-sodium preferred |
| Rice Vinegar 💧 | 2 tbsp | For sauce tang |
| Brown Sugar 🍚 | ½ cup | Packed, for sweetness |
| Honey 🍯 | ¼ cup | For glossy sauce |
| Garlic Cloves 🧄 | 4 cloves | Minced for sauce |
| Fresh Ginger 🌿 | 1 tbsp | Grated for sauce |
| Sesame Oil 🫒 | 1 tbsp | Toasted for depth |
| Sesame Seeds 🌰 | 2 tbsp | Toasted for garnish |
| Green Onions 🧅 | 3 whole | Sliced thin for garnish |
| Red Pepper Flakes 🌶️ | ½ tsp | Optional for heat |
The chicken needs to be boneless, skinless for even cooking and that perfect crisp. I grab mine from Costco when they have the big packs—just cut into uniform pieces so everything fries at the same rate. The cornstarch is non-negotiable for that ultra-crispy coating (regular flour alone won’t cut it). For the oil, peanut or vegetable both work—just pick something with a high smoke point.
No honey? Maple syrup or agave at the same amount works in a pinch. Soy sauce can be swapped for tamari if you need gluten-free. Fresh ginger is ideal, but ground ginger at one-quarter the amount saves time. The sesame seeds? Toast them in a dry pan for 30 seconds—it wakes up the flavor. Skip the green onions? Fine, but they add that fresh pop of color.
The sauce thickens as it cools, so don’t panic if it seems thin at first. Leftovers keep 3-4 days in the fridge. Reheat in the oven to keep the chicken crispy—microwave turns it soggy. Freezes okay for 1 month, but the texture changes a bit.
Why You’ll Love This Recipe
- 20-Minute Meal: I can get crispy sesame chicken on the table faster than waiting for delivery.
- Crispy Perfection: The cornstarch and flour combo gives it that restaurant-style crunch every time.
- Feeds the Crowd: One batch makes enough for family dinner plus leftovers for lunch the next day.
- Pantry Staples: I already have all the main ingredients—chicken, eggs, flour—so no extra shopping trips.
Step-by-Step Instructions for Sweet and Sticky Sesame Chicken
This method delivers that takeout texture and flavor you crave, right from your own kitchen.
Step 1: Coat and Fry the Chicken
First, cut the 1.5 lb Chicken Breast into 1-inch pieces. I’ve found that smaller, uniform pieces cook more evenly and give you maximum crispy surface area. Pat them dry with paper towels—this is crucial for a good sear.
Set up a breading station with 0.5 cup Cornstarch and 0.5 cup All-Purpose Flour in one bowl, and 2 whole Large Eggs beaten in another. Dredge each piece in the cornstarch-flour mix, then dip in egg, then back in the dry mix. The double coating creates that signature extra-crispy texture.
Heat 3 cups Vegetable Oil in a deep skillet to 350°F. Fry the chicken in batches for 4-5 minutes until golden brown and crispy. Don’t overcrowd the pan—this drops the oil temp and makes your chicken greasy instead of crisp. Drain on a wire rack to keep it crispy while you make the sauce.
Step 2: Build the Sesame Sauce
In a saucepan, combine 0.33 cup Soy Sauce, 2 tbsp Rice Vinegar, 0.5 cup Brown Sugar, 0.25 cup Honey, minced 4 cloves Garlic Cloves, and grated 1 tbsp Fresh Ginger. I always use low-sodium soy sauce here so the dish doesn’t become too salty.
Bring to a simmer over medium heat and cook for 3-4 minutes until the sugar dissolves and the mixture thickens slightly. Watch for it to turn a deep amber color and coat the back of a spoon—that’s when you know it’s ready. Stir in the 1 tbsp Sesame Oil and 0.5 tsp Red Pepper Flakes if using.
Step 3: Toss and Garnish
Add the crispy chicken to the sauce and toss gently to coat. I like to let it sit for 1-2 minutes so the chicken absorbs some of that sticky, sweet sauce. The contrast between the crispy coating and the glossy sauce is what makes this dish special.
Transfer to a serving platter and sprinkle with 2 tbsp Sesame Seeds and sliced 3 whole Green Onions. Toast the sesame seeds first if you have time—it brings out their nutty flavor. Serve immediately while the chicken is still crispy and the sauce is gloriously sticky. This tastes just like your favorite takeout, I promise.
Pro Tips For Making Copycat Sesame Chicken
- Cut Chicken Evenly: Slice the chicken breast into uniform 1-inch pieces so they cook at the same rate—no more dry, overdone bits while waiting for the thicker ones to finish.
- Double Dredge for Crisp: Dip the chicken in egg, then flour, then back in egg and straight into cornstarch for that extra-crunchy copycat texture. I learned this the hard way after my first batch turned out gummy.
- Hot Oil, No Crowding: Heat the vegetable oil to 350°F and fry in batches—overcrowding drops the temp and turns your chicken soggy instead of crispy.
- Rest Before Sauce: Let the fried chicken drain on a rack for 2-3 minutes before tossing in sesame sauce, or it’ll steam and lose that perfect crunch. Sounds weird, but it works.
Troubleshooting This Dish
Sauce Too Thin
If your sauce isn’t thickening, simmer it for 2-3 extra minutes over medium-low heat. A cornstarch slurry (1 tsp cornstarch mixed with 1 tbsp water) stirred in off-heat will thicken it instantly. I keep extra cornstarch nearby just in case. 💡
Chicken Not Crispy
Greasy instead of crispy? Your oil likely wasn’t hot enough. Use a thermometer to confirm 350°F before frying. Also, drain fried chicken on a wire rack, not paper towels, to prevent steam from making it soggy.
Sauce Too Salty
Low-sodium soy sauce helps prevent this, but if it’s too salty, add 1-2 tbsp honey or brown sugar to balance. A squeeze of lime juice can also brighten the flavor and reduce the salt perception.
Chicken Overcooked
Fry in small batches to avoid temperature drops. If pieces are cooking unevenly, cut them to uniform 1-inch sizes. Use a meat thermometer to ensure chicken reaches 165°F without going over.
Sauce Not Sticking
Toss the chicken in sauce immediately after frying while it’s still hot. If the sauce slides off, let it cool slightly—it thickens as it cools. A light dusting of extra cornstarch on the chicken before saucing can help adhesion. ✨
Soggy Leftovers
Reheat in a 400°F oven for 8-10 minutes to restore crispiness. Microwaving turns the coating soggy. Store sauce and chicken separately if possible to maintain texture.
Nutrition Facts
Frequently Asked Questions
Can I use chicken thighs instead of breasts?
Yes! Thighs stay juicier and are more forgiving. Use 1.5 lb boneless, skinless thighs and trim excess fat. They may need 1 extra minute frying time.
What if I don’t have a deep fryer?
A heavy pot or Dutch oven works perfectly. Use enough oil to submerge chicken by half. Maintain 350°F and fry in batches to avoid crowding.
How can I make this gluten-free?
Swap regular soy sauce for tamari and use cornstarch only for coating (skip flour). Check all labels for hidden gluten.
Can I bake the chicken instead of frying?
Toss coated pieces in 1 tbsp oil and bake at 400°F for 20-25 minutes, flipping halfway. It won’t be as crispy but still delicious.

- Jollof Rice Sauce Recipe: West African Tomato and Spice Infusion - September 25, 2026
- Japanese Rice Soup Recipe: Umami-Rich Comfort in a Bowl - September 25, 2026
- Homemade Cream Of Rice Recipe: Silk-Smooth Breakfast in Minutes - September 25, 2026