
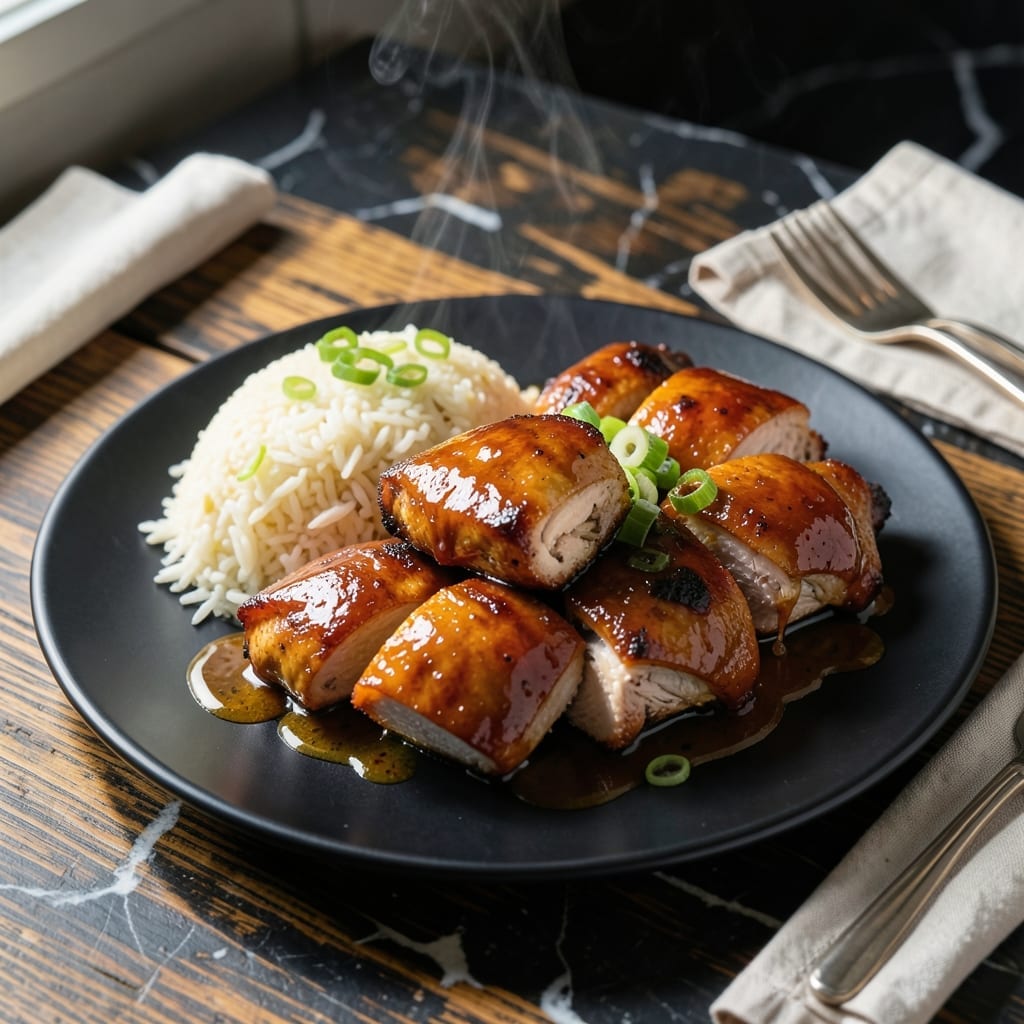
This restaurant-quality teriyaki chicken brings that signature sweet-savory glaze home with perfect balance. I’ve reverse-engineered the classic dish to capture every nuance of the original.
The sauce is the star—thick, glossy, and packed with umami depth. A simple pan-searing technique ensures juicy chicken that soaks up the glaze beautifully, with minimal effort for maximum flavor.
What you’ll get is tender, caramelized chicken with a sticky, finger-licking finish. The glaze clings to each piece, delivering that addictive contrast of sweet and salty in every bite.
Serve over steamed rice with steamed veggies for the full experience. This copycat version delivers every time.
Ingredients for Copycat Teriyaki Chicken
Restaurant-quality ingredients for that sticky, sweet-savory glaze at home. Nothing too fancy, just right.
| Ingredient | Amount | Notes |
|---|---|---|
| Boneless Skinless Chicken Thighs 🍗 | 1 ½ lb | Patted dry for better sear |
| Soy Sauce 🫒 | ½ cup | Low-sodium preferred for balance |
| Brown Sugar 🍚 | ⅓ cup | Packed for accurate measurement |
| Honey 🍯 | ¼ cup | Helps thicken the glaze |
| Rice Vinegar 💧 | 2 tbsp | Adds bright acidity |
| Fresh Garlic Cloves 🧄 | 3 cloves | Minced finely for even flavor |
| Fresh Ginger 🌿 | 1 tbsp | Grated for maximum flavor |
| Cornstarch 🌾 | 1 tbsp | Slurry for thickening sauce |
| Water 💧 | 2 tbsp | For cornstarch slurry |
| Vegetable Oil 🫒 | 2 tbsp | High smoke point for searing |
| Sesame Oil 🫒 | 1 tsp | For finishing aroma |
| Green Onions 🧅 | 3 whole | Thinly sliced for garnish |
| Sesame Seeds 🌰 | 1 tsp | Toasted optional for crunch |
| Kosher Salt 🧂 | ½ tsp | Season chicken before cooking |
| Black Pepper 🌶️ | ¼ tsp | Freshly ground preferred |
The chicken makes this dish. Thighs stay juicier than breasts during cooking—look for uniform thickness so they cook evenly. I grab mine from Costco in bulk (cheaper per pound) or Whole Foods if I want organic. The soy sauce is non-negotiable: Kikkoman low-sodium is my go-to, but any quality brand works. Don’t skip the fresh ginger and garlic—pre-minced from jars lacks the bright punch you need here.
No brown sugar? White sugar plus a tablespoon of molasses works in a pinch. Out of honey? Maple syrup or agave at the same amount, though the flavor shifts slightly. Rice vinegar can be apple cider vinegar, but it’s a touch sharper. If you’re gluten-free, swap the soy sauce for tamari—just as rich, no wheat. The cornstarch slurry is key for that glossy finish (don’t try to thicken with flour, it won’t be the same).
The cooked chicken keeps for 3-4 days in the fridge, but the sauce thickens as it cools—thin with a splash of water when reheating. Freezes beautifully for 3 months. I always double the sauce recipe so there’s extra for drizzling over rice (worth the extra minute).
Why You’ll Love This Recipe
- One Pan Wonder: I toss the chicken thighs with the soy sauce, brown sugar, and honey, then let the oven do the work—minimal cleanup, maximum flavor.
- Sticky Sweet Magic: The brown sugar and honey caramelize into this glossy, finger-licking glaze that clings to every bite of tender chicken.
- Meal Prep Hero: Honestly, it reheats like a dream, so I make a big batch for lunches all week—still tastes fresh out of the fridge.
- Budget Friendly Feast: Between us, chicken thighs are cheaper than breasts, and this recipe makes them taste like a restaurant meal.
Instructions
Here’s the method I use to nail that restaurant-quality glaze and tender chicken every time.
Step 1: Season and Sear the Chicken
Pat the 1.5 lb boneless skinless chicken thighs completely dry with paper towels—this is crucial for a good sear. Season both sides evenly with the 0.5 tsp kosher salt and 0.25 tsp black pepper. I press the seasoning in lightly so it adheres well to the meat.
Heat the 2 tbsp vegetable oil in a large skillet over medium-high heat until it shimmers but doesn’t smoke. Add the chicken in a single layer, working in batches if needed to avoid crowding. Cook undisturbed for 5-6 minutes per side until deep golden brown and cooked through. Transfer to a plate and set aside.
Step 2: Build the Teriyaki Sauce Base
In the same skillet (no need to clean it—those browned bits add flavor), reduce heat to medium. Add the 3 cloves minced fresh garlic cloves and 1 tbsp grated fresh ginger, stirring constantly for 30 seconds until fragrant. Be careful not to let them burn.
Pour in the 0.5 cup soy sauce, 0.33 cup packed brown sugar, 0.25 cup honey, and 2 tbsp rice vinegar. Stir well to dissolve the sugar, then bring to a gentle simmer. Let it bubble away for 3-4 minutes until slightly reduced and syrupy.
Step 3: Create the Slurry and Thicken the Glaze
In a small bowl, whisk together the 1 tbsp cornstarch and 2 tbsp water until smooth. This slurry will transform your sauce from thin to that perfect glossy glaze we’re after. Slowly pour the slurry into the simmering sauce while whisking constantly to prevent lumps.
Continue cooking for 2-3 minutes until the mixture thickens enough to coat the back of a spoon. You’ll notice it changes from a liquid to a rich, sticky glaze. If it thickens too much, add a splash of water—it should be pourable but not watery.
Step 4: Glaze the Chicken and Finish
Return the seared chicken to the skillet, coating each piece thoroughly with the teriyaki glaze. Simmer for 2-3 minutes, flipping occasionally, until the chicken is heated through and the sauce has reduced to a beautiful, thick lacquer. The chicken should glisten with that signature sticky coating.
Remove from heat and drizzle with the 1 tsp sesame oil. This adds that final aromatic touch that makes it taste just like your favorite takeout. Garnish with the 3 whole thinly sliced green onions and 1 tsp sesame seeds for color and crunch.
Pro Tips For Making Copycat Teriyaki Chicken
- Sear Before Saucing: Brown the chicken thighs first in a screaming hot pan for 3-4 minutes per side—this builds a fond that makes the teriyaki glaze taste 10x richer.
- Thin Your Honey: Warm the honey for 10 seconds in the microwave or mix it with 1 teaspoon of hot water so it blends smoothly into the soy sauce instead of clumping at the bottom.
- Skip the Boil: Simmer the sauce gently rather than boiling it hard; I learned this the hard way after my first batch turned into caramelized syrup that scorched the pan.
- Slice Against Grain: After cooking, slice the thighs against the grain into 1-inch strips—it makes them tender enough to cut with a fork, even if they’re slightly overdone.
Serving Suggestions for This Dish
Plating Perfection
Fan the glazed chicken over a bed of steamed jasmine rice—about 1 cup cooked per serving. The white rice makes the caramelized sauce pop visually. I use a rice cooker for perfect texture every time. 💛
Fresh Garnishes
Sprinkle the thinly sliced green onions and toasted sesame seeds right before serving. The green adds freshness against the rich glaze, while sesame seeds bring nutty crunch. A quick broil for 1-2 minutes adds extra sheen to the sauce.
Veggie Pairings
Steamed broccoli florets or a simple cucumber salad cut through the sweetness. For broccoli, steam for 4-5 minutes until bright green. Toss cucumbers with rice vinegar and a pinch of sugar for balance.
Extra Sauce
Always serve with additional glaze on the side—I double the sauce portion so each person can drizzle more. Warm it slightly in the microwave for 15-20 seconds to restore that silky consistency.
Family Style
For casual meals, pile everything on a large platter with tongs for serving. The communal approach lets everyone customize their plate. I love watching guests soak up every last drop of sauce. ✨
Nutrition Facts
Frequently Asked Questions
Can I use chicken breast instead of thighs?
Yes, but expect slightly drier results. Cook for 4-5 minutes per side to prevent overcooking. Thighs are preferred for their juiciness and ability to soak up the glaze better.
How do I make the sauce thicker?
Simmer the sauce longer after adding the cornstarch slurry. If it’s still thin, mix 1 tsp cornstarch with 1 tbsp water and stir in. Cook for an additional 1-2 minutes.
Can I make this ahead of time?
Cook the chicken and sauce separately, then combine and reheat gently. Store in an airtight container in the fridge for up to 3 days. Reheat on low to keep the sauce from breaking.
What’s the best way to reheat leftovers?
Warm in a skillet over low heat with a splash of water to loosen the sauce. Microwaving works too—cover with a damp paper towel and heat in 30-second bursts.

- Jollof Rice Sauce Recipe: West African Tomato and Spice Infusion - September 25, 2026
- Japanese Rice Soup Recipe: Umami-Rich Comfort in a Bowl - September 25, 2026
- Homemade Cream Of Rice Recipe: Silk-Smooth Breakfast in Minutes - September 25, 2026