
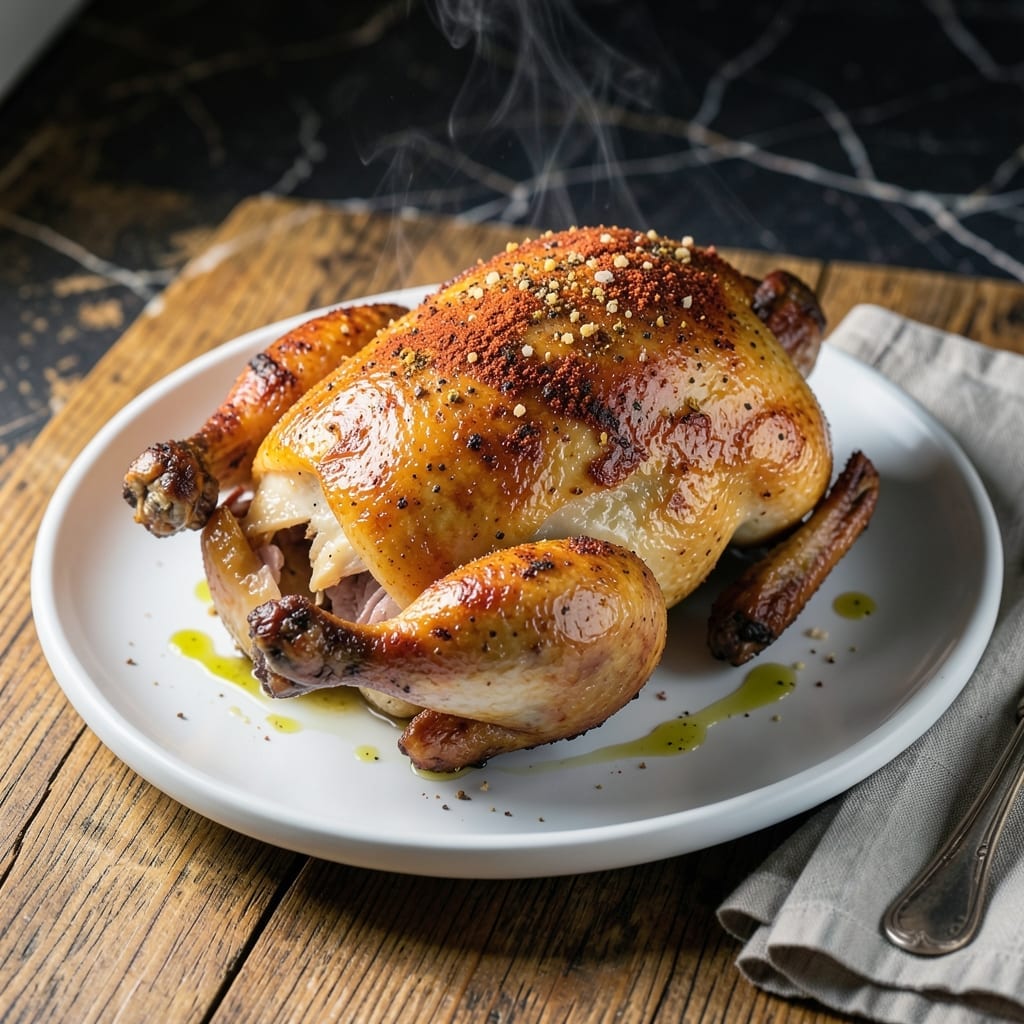
Achieving extra-crispy chicken skin and juicy meat is a culinary milestone worth mastering. This proven technique delivers professional results with minimal effort.
The secret lies in thorough drying, precise seasoning, and controlled cooking. Hot oil and steady heat create that coveted shatteringly crispy exterior while locking in moisture.
You’ll end up with golden, crackling skin that gives way to tender, flavorful meat. The contrast in textures makes every bite satisfying.
Serve with simple sides to let the chicken shine. Here’s how to make it perfectly every time.
Ingredients for Crackling Chicken
Professional results require quality ingredients and precise technique for this dish.
| Ingredient | Amount | Notes |
|---|---|---|
| Whole Chicken 🍗 | 3 ½ lb | Pat dry thoroughly before seasoning |
| Kosher Salt 🧂 | 1 ½ tbsp | Diamond Crystal preferred for texture |
| Black Pepper 🌶️ | 1 tsp | Freshly ground for best flavor |
| Garlic Powder 🧄 | 2 tsp | Not garlic salt substitute |
| Onion Powder 🧅 | 1 ½ tsp | Adds depth to seasoning blend |
| Paprika 🌶️ | 1 tbsp | Sweet or smoked variety |
| Dried Thyme 🌿 | 1 tsp | Crushed between fingers to release oils |
| Dried Rosemary 🍃 | 1 tsp | Finely chopped if using fresh |
| Neutral Oil 🫒 | ½ cup | High smoke point like avocado or vegetable |
| Unsalted Butter 🧈 | 4 tbsp | Melted for basting |
| Lemon 🍋 | 1 whole | Zested and juiced for brightness |
| Fresh Parsley 🌿 | ¼ cup | Chopped for garnish |
The chicken quality is non-negotiable. Air-chilled birds from Whole Foods or a trusted butcher yield superior skin crispness compared to water-chilled supermarket options. Aim for 3.5-4 pounds—large enough for even cooking, small enough to fit in most home ovens. The skin must be completely dry before seasoning (paper towels work, but air-drying overnight in the fridge is optimal).
Seasoning substitutions require care. Table salt at half the volume replaces kosher salt, but weigh if possible for accuracy. Fresh garlic and onion can replace powders (use 4 cloves and 1 small onion respectively), but the flavor profile will differ slightly. Smoked paprika adds depth if you prefer a barbecue note. The butter is essential for that final basting—no substitutes maintain the same richness.
Leftovers keep surprisingly well. Store carved chicken in airtight containers (skin will soften but flavor remains excellent) for up to 4 days. Re-crisp in a 400°F oven for 10-12 minutes. The seasoning blend can be pre-mixed and stored in dark containers for up to 6 months.
Why You’ll Love This Recipe
- One Pan Wonder: I just rub the chicken with salt, pepper, and those powders, pop it in the oven, and let it do its thing.
- Crispy Perfection: The skin gets so crackly it shatters, while the meat stays juicy from the garlic and onion.
- Feeds a Crowd: I made this for Sunday dinner and had enough for Monday’s sandwiches—no extra effort.
- Budget Friendly: A whole chicken and a few pantry staples, and I’ve got a meal that stretches for days.
Step-by-Step Instructions for Crackling Chicken
Achieve perfectly crispy skin and moist meat with this foolproof roasting method.
Step 1: Dry and Season the Whole Chicken
Pat the 3.5 lb whole chicken completely dry inside and out with paper towels. Moisture prevents crisping, so be thorough—pay special attention to the cavity and under the wings where water tends to pool.
Combine the 1.5 tbsp kosher salt, 1 tsp black pepper, 2 tsp garlic powder, 1.5 tsp onion powder, 1 tbsp paprika, 1 tsp dried thyme, and 1 tsp dried rosemary. Rub this seasoning blend all over the chicken, including inside the cavity. Let it rest uncovered in the refrigerator for 1 hour to allow the skin to dry further.
Step 2: Truss and Prepare for Roasting
Remove the chicken from the refrigerator and let it sit at room temperature for 30 minutes. Truss the legs together with kitchen twine and tuck the wings under the body. This compact shape ensures even cooking and protects the breast meat from drying out.
Place the chicken breast-side up on a roasting rack set in a rimmed baking sheet. Drizzle with 0.5 cup neutral oil, ensuring the skin is thoroughly coated. The rack allows hot air to circulate underneath, which is essential for achieving all-over crispiness.
Step 3: Roast at High Heat for Crispy Skin
Preheat your oven to 425°F. When fully preheated, place the chicken in the oven and roast undisturbed for 1 hour to 1 hour 15 minutes. Resist the urge to open the oven door—each time you do, you lose heat and introduce moisture, which softens the skin.
You’ll know it’s ready when the internal temperature reaches 165°F in the thickest part of the thigh and the skin turns a deep golden brown. I baste the chicken with 4 tbsp unsalted butter melted and mixed with the juice of 1 whole lemon halfway through for extra flavor and shine.
Step 4: Rest and Serve for Maximum Juiciness
Transfer the chicken to a cutting board and tent loosely with foil. Let it rest for 15-20 minutes. This step is non-negotiable—the juices redistribute throughout the meat during this time, ensuring every bite is moist and flavorful.
Carve the chicken and garnish with 0.25 cup fresh parsley for a pop of color and freshness. Serve immediately while the skin is still crisp. The contrast of the crackling skin and tender meat is what makes this dish exceptional.
Pro Tips For Making Crackling Chicken
- Dry the Skin: Pat the chicken completely dry with paper towels before seasoning—I learned this the hard way after my first few batches came out soggy instead of crackling.
- Salt Generously: Use more kosher salt than you think, especially under the skin and in the cavity, to guarantee that crispy, flavorful crust.
- Skip the Crowding: Give the chicken space on the rack or pan so hot air circulates properly—packing it in just steams the skin.
- Rest Before Carving: Let it sit 10-15 minutes after roasting to keep the juices in the meat, not on your cutting board.
Dietary Considerations for This Recipe
Gluten-Free Friendly
This dish is naturally gluten-free as written—no flour, breadcrumbs, or wheat-based ingredients are used in the preparation. Just ensure your seasoning blends are pure and haven’t been processed in facilities with gluten cross-contamination. I always check labels on my paprika and other spices. 💪
Low-Carb Option
The recipe contains virtually no carbohydrates, making it ideal for keto or low-carb diets. The only carbs come from the 1 tbsp paprika and trace amounts in the other spices—less than 2g net carbs per serving. Perfect for your macro goals.
Dairy-Free Adaptation
To make this dairy-free, simply omit the 4 tbsp unsalted butter basting step. Replace it with an additional 2 tbsp neutral oil mixed with the lemon juice. The skin will still crisp beautifully, and you won’t miss the dairy richness. 🥗
Reduced Sodium
For a lower-sodium version, cut the 1.5 tbsp kosher salt in half and add 1 tsp lemon zest to the seasoning blend. The citrus brightens the flavor while reducing salt. I’ve found this works well without sacrificing taste.
Allergen Note
This recipe is free from the top 9 allergens except for potential trace amounts in spices. If you have severe allergies, verify all your seasoning brands are processed in allergen-free facilities. Always better to be safe than sorry.
Nutrition Facts
Frequently Asked Questions
What makes the skin extra crispy?
Thorough drying, high heat (425°F), and a roasting rack are key. The rack allows air to circulate underneath while the oil coating helps conduct heat evenly.
Can I use chicken pieces instead of whole?
Yes, but reduce roasting time to 35-45 minutes. Bone-in, skin-on thighs work best for even cooking and maximum crispiness.
Why rest the chicken after roasting?
Resting for 15-20 minutes lets juices redistribute. Skipping this makes the meat dry out when carved. Patience pays off with juicier results.
How do I store leftovers?
Keep in an airtight container for up to 4 days. Re-crisp in a 400°F oven for 10-12 minutes before serving.

- Jollof Rice Sauce Recipe: West African Tomato and Spice Infusion - September 25, 2026
- Japanese Rice Soup Recipe: Umami-Rich Comfort in a Bowl - September 25, 2026
- Homemade Cream Of Rice Recipe: Silk-Smooth Breakfast in Minutes - September 25, 2026