
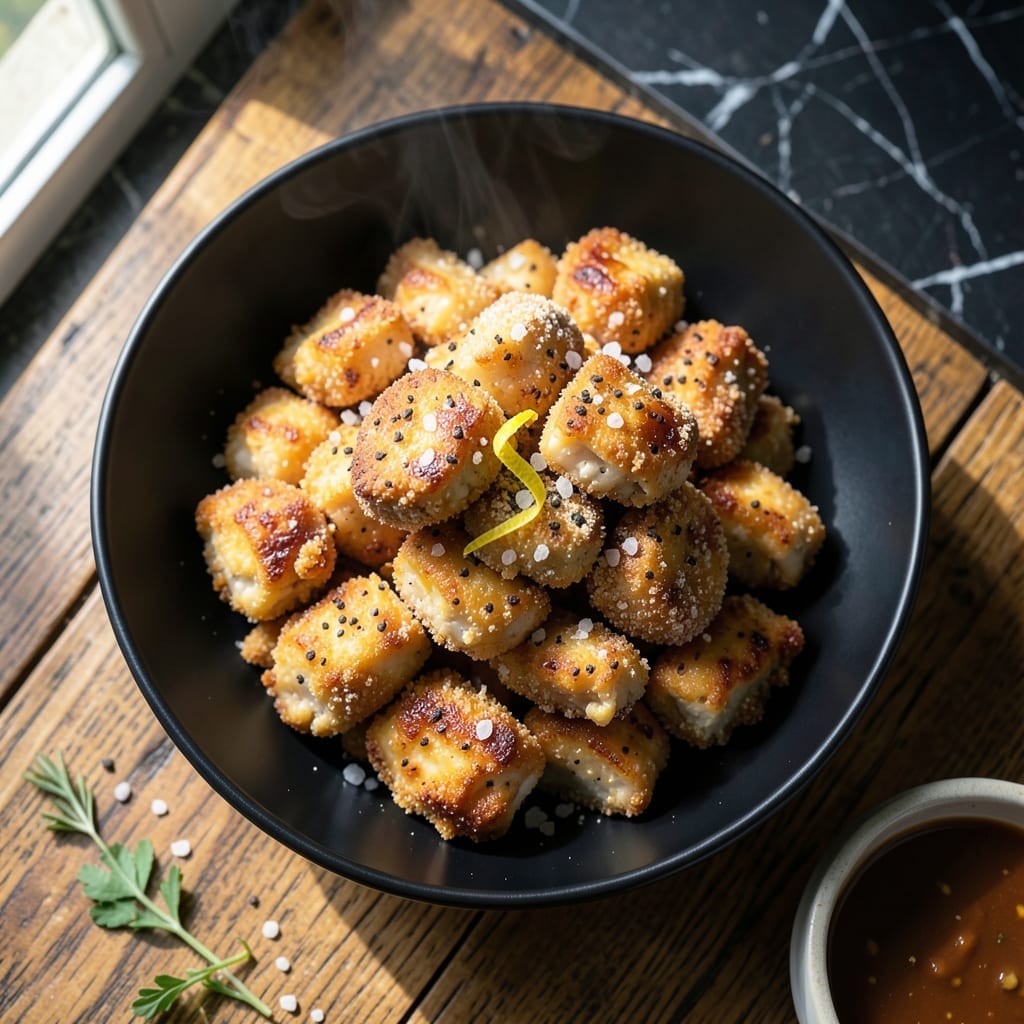
This recipe transforms ordinary chicken into crispy, golden bites that defy expectations. The secret lies in a simple cornstarch coating that creates an irresistible crunch without deep frying.
I developed this method after testing countless breading techniques, and cornstarch consistently delivered the best texture. The chicken stays juicy inside while achieving a shatteringly crispy exterior that holds up even after baking.
What makes this truly special is how the cornstarch creates a light, airy crust that stays crispy longer than traditional flour coatings. Each bite offers perfect contrast between the tender meat and the crunchy exterior.
Serve these as an appetizer with dipping sauces or as a main course with rice and vegetables. The technique works with any cut of chicken, making it versatile for any meal.
Ingredients for Crazy Chicken
Transform ordinary chicken with this crispy cornstarch coating and bold seasoning blend.
| Ingredient | Amount | Notes |
|---|---|---|
| Boneless Skinless Chicken Thighs 🍗 | 1 ½ lb | Cut into bite-sized pieces |
| Cornstarch 🌾 | ½ cup | For ultra-crispy coating |
| All-Purpose Flour 🌾 | ¼ cup | Lightly seasons the starch |
| Baking Powder 🧂 | 1 tsp | Enhances crispiness texture |
| Kosher Salt 🧂 | 1 ½ tsp | Diamond Crystal preferred |
| Freshly Ground Black Pepper 🌶️ | 1 tsp | Coarse grind recommended |
| Garlic Powder 🧄 | 1 tsp | Not garlic salt |
| Onion Powder 🧅 | 1 tsp | Balances the seasoning |
| Paprika 🌶️ | 1 tsp | Sweet or smoked variety |
| Large Eggs 🥚 | 2 whole | For binding the coating |
| Neutral Oil 🫒 | ½ cup | Avocado or vegetable oil |
| Buttermilk 🥛 | ½ cup | For tenderizing chicken |
The chicken quality is paramount. Boneless, skinless thighs yield the juiciest results—breasts dry out too quickly with this high-heat method. Source from Whole Foods or Costco for consistent sizing. The cornstarch must be pure, not the cooking wine variety. Bob’s Red Mill is a reliable brand. For the oil, choose something with a high smoke point—avocado oil is ideal but vegetable oil works fine too.
No buttermilk? Whole milk with 1 tbsp vinegar (let sit 5 minutes) substitutes perfectly. Swap thighs for breasts if you prefer, but reduce cooking time by 25%. The paprika can be omitted, but it adds a subtle depth. For extra heat, add 0.25 tsp cayenne to the dry mix. The egg binds everything—flax eggs won’t work here due to the moisture content.
Marinate the chicken in buttermilk for 1-4 hours for maximum tenderness. Store raw chicken in the fridge for up to 2 days before cooking. Leftover cooked chicken keeps 3-4 days refrigerated or 3 months frozen. Reheat in the oven to preserve crispiness.
Why You’ll Love This Recipe
- Minimal Effort: I just toss the chicken in cornstarch and flour, and the baking powder does all the work for that extra crisp.
- Crispy Perfection: That combo of cornstarch and baking powder gives the thighs this insane crunch with juicy centers every time.
- Feeds Everyone: Honestly, it’s my go-to for potlucks and Sunday dinners—crowd-pleaser without the fuss.
- Budget Hero: Chicken thighs stay cheap, and a little flour and cornstarch stretch to feed a family for days.
Step-by-Step Instructions for Crispy Cornstarch-Coated Chicken Bites
This method delivers ultra-crispy results with a tender interior every time.
Step 1: Prepare the Chicken and Wet Mixture
Cut the 1.5 lb boneless skinless chicken thighs into bite-sized pieces, about 1-inch chunks. I prefer thighs over breasts here—they stay juicier during frying. Pat them completely dry with paper towels; moisture prevents the coating from adhering properly.
In a medium bowl, whisk together the 2 whole large eggs and 0.5 cup buttermilk until smooth and fully combined. The buttermilk’s acidity tenderizes the chicken while the eggs provide a sticky base for the dry coating to cling to.
Step 2: Create the Crispy Dry Coating
In a separate large bowl, combine the 0.5 cup cornstarch, 0.25 cup all-purpose flour, 1 tsp baking powder, 1.5 tsp kosher salt, 1 tsp freshly ground black pepper, 1 tsp garlic powder, 1 tsp onion powder, and 1 tsp paprika.
Whisk thoroughly to distribute the seasonings evenly. The baking powder is the secret here—it creates tiny air pockets in the coating that expand during frying, resulting in that signature craggy, ultra-crispy texture that sets this recipe apart.
Step 3: Coat the Chicken Completely
Working in batches, dip each piece of chicken into the egg-buttermilk mixture, letting any excess drip off. Then toss it in the cornstarch mixture, pressing gently to ensure full coverage. For maximum crispiness, I like to dip each piece a second time in both wet and dry mixtures.
Place the coated chicken on a wire rack set over a baking sheet. This allows air to circulate underneath, preventing the coating from getting soggy while you finish coating the remaining pieces. You should have a thick, even layer of coating on each piece.
Step 4: Fry to Golden Perfection
Heat the 0.5 cup neutral oil in a large, heavy-bottomed skillet over medium-high heat until shimmering but not smoking. To test readiness, drop in a pinch of the dry coating—if it sizzles immediately, the oil is ready.
Carefully add the chicken pieces in a single layer without crowding the pan. Fry for 3-4 minutes per side until deep golden brown and crispy. The coating should look blistered and craggy when done. Use a slotted spoon to transfer to a paper towel-lined plate to drain.
Step 5: Keep Warm and Serve Immediately
Maintain the first batch in a 200°F oven while frying subsequent batches. This keeps the chicken crispy without overcooking. The internal temperature should reach 165°F—use a meat thermometer to verify if unsure.
Serve immediately while hot and crispy. The contrast between the shatteringly crisp coating and the juicy interior is what makes this dish special. Any leftovers should be reheated in a toaster oven or air fryer to restore crispiness.
Pro Tips For Making Crazy Chicken
- Double-Dredge the Thighs: Toss the chicken in cornstarch first, then the flour-baking powder mix—I learned this the hard way after my first batch came out gummy instead of crispy.
- Use Ice-Cold Thighs: Pat them bone-dry straight from the fridge; the cold helps the coating cling better and keeps the meat juicy during frying.
- Skip the Overcrowding: Fry in batches with at least an inch between pieces, or the oil temp drops and you’ll end up with soggy, steamed chicken.
- Salt the Flour Mix: Add 1 teaspoon kosher salt to the flour-baking powder blend before dredging—this seasons the crust deeply, not just the surface.
Perfect Pairings for crazy chicken
Dipping Sauce Pairings
These crispy bites beg for dipping. I love a simple honey mustard made with 3 tbsp Dijon and 2 tbsp honey. The sweetness contrasts beautifully with the savory chicken. 💛
Side Dish Ideas
A cool cucumber salad with rice vinegar and sesame seeds cuts through the richness. Toss 2 cups sliced cucumber with 1 tbsp vinegar and ½ tsp sesame oil for balance.
Beverage Matches
An ice-cold IPA like Dogfish Head 60 Minute cleanses your palate between bites. For non-alcoholic, ginger beer with lime adds a refreshing zing.
Fresh Garnishes
Sprinkle with chopped scallions or cilantro right before serving. The fresh herbs brighten up each bite. A squeeze of lime wedge adds a citrus pop.
Rice Pairing
Serve over steamed jasmine rice to make it a meal. The rice soaks up any extra crispy bits from the chicken. I prefer 1 cup rice per 2 servings of chicken.
Spicy Option
For heat lovers, add sriracha mayo (¼ cup mayo + 1 tbsp sriracha). The creamy spice complements the crunch perfectly. ✨
Nutrition Facts
Frequently Asked Questions
Can I use chicken breasts instead of thighs?
Yes, but reduce cooking time by 25% to prevent dryness. Thighs stay juicier due to higher fat content. For best results, brine breasts first in saltwater for 30 minutes.
Why does the recipe use cornstarch instead of flour?
Cornstarch creates a lighter, crunchier crust that stays crispier longer. It also absorbs less oil during frying. The baking powder in the mix enhances this texture even more.
How do I keep the chicken crispy after cooking?
Place cooked pieces on a wire rack in a 200°F oven. Never cover them, as steam will make the coating soggy. Reheat leftovers in an air fryer for 3-4 minutes.
Can I bake instead of fry?
Yes! Bake at 425°F for 18-20 minutes, flipping halfway. The texture will be slightly different but still delicious. Use a wire rack on the baking sheet.

- Jollof Rice Sauce Recipe: West African Tomato and Spice Infusion - September 25, 2026
- Japanese Rice Soup Recipe: Umami-Rich Comfort in a Bowl - September 25, 2026
- Homemade Cream Of Rice Recipe: Silk-Smooth Breakfast in Minutes - September 25, 2026