
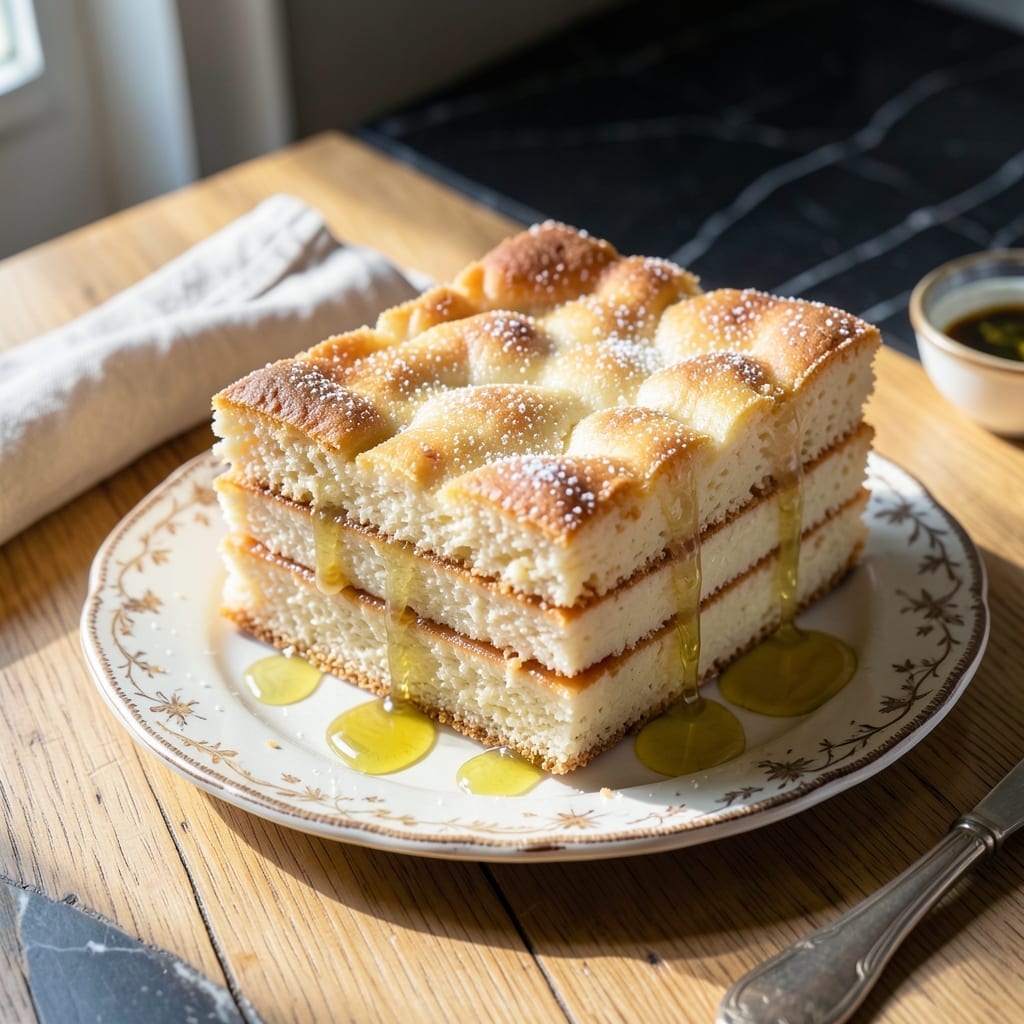
This Japanese-inspired cream of rice cake delivers a delicate, cloud-like texture that melts in your mouth. The subtle sweetness and lightness make it an elegant treat perfect for any occasion.
With a simple preparation and minimal ingredients, these cakes come together effortlessly. The result is a refined dessert that’s both comforting and impressively airy.
Ingredients for Cream of Rice Cake
Minimal ingredients yield a delicate, melt-in-your-mouth Japanese-style dessert with effortless elegance.
| Ingredient | Amount | Notes |
|---|---|---|
| Cream of Rice Cereal 🌾 | 2 cups | Uncooked, plain variety |
| Granulated Sugar 🍚 | ¾ cup | Fine white sugar preferred |
| Whole Milk 🥛 | 1 ½ cups | Full-fat for richness |
| Unsalted Butter 🧈 | 4 tbsp | Softened to room temperature |
| Large Eggs 🥚 | 2 whole | Separated, room temperature |
| Vanilla Extract 🌿 | 1 tsp | Pure extract recommended |
| Baking Powder 🧂 | 1 tsp | Ensures proper rise |
| Salt 🧂 | ¼ tsp | Fine sea salt preferred |
| Matcha Powder 🍵 | 1 tsp | Optional, for green tea flavor |
| Powdered Sugar 🍚 | ½ cup | For dusting finished cakes |
The cream of rice cereal is the foundation here. Kellogg’s or store-brand plain varieties work perfectly—avoid flavored or sweetened types. Whole milk is non-negotiable for the proper texture (the fat content ensures that cloud-like consistency). Organic Valley or local dairy brands deliver superior richness. Unsalted butter allows precise control over salt content, so don’t substitute salted alternatives.
Need a dairy-free version? Oat milk with a tablespoon of melted coconut oil can replace the whole milk and butter. No matcha? Skip it entirely—the cakes are still divine. For a more pronounced vanilla flavor, use vanilla bean paste at half the quantity. The egg whites are essential for structure, so don’t attempt egg-free substitutions with this method.
Store uncooked cereal in an airtight container for up to 1 year. The baked cakes keep 2-3 days at room temperature in a sealed container, but they’re best enjoyed fresh. Dust with powdered sugar just before serving to maintain that pristine white appearance.
Why You’ll Love This Recipe
- I’ll be real: leftovers taste even better the next day, and they keep for days in the fridge.
- One Bowl Magic: I just dump the Cream of Rice, sugar, milk, butter, and eggs in a bowl, mix, and bake—no fancy steps.
- Buttery Sweet Comfort: That rich whole milk and butter combo gives it this melt-in-your-mouth warmth, like a hug in cake form.
- Brunch or Snack: Honestly, it’s just as good with coffee for breakfast as it is with fruit for dessert.
Step-by-Step Instructions for Cream of Rice Cake
Master the technique for achieving that signature light, jiggly texture these cakes are known for.
Step 1: Bloom the Cream of Rice Cereal
In a saucepan, combine the 2 cups Cream of Rice Cereal with the 1.5 cups Whole Milk. Heat over medium heat, stirring constantly with a wooden spoon to prevent lumps from forming. You want the mixture to reach a gentle simmer—look for small bubbles breaking the surface consistently.
Continue cooking for 2-3 minutes until the cereal absorbs most of the milk and thickens to a porridge-like consistency. The mixture should coat the back of your spoon but still be pourable. Remove from heat immediately once thickened to avoid overcooking the cereal.
Step 2: Incorporate Butter and Sugar
While the cereal mixture is still hot, add the 4 tbsp Unsalted Butter and 0.75 cup Granulated Sugar. Stir vigorously until the butter melts completely and the sugar dissolves. The mixture should look glossy and slightly translucent at the edges.
Let this cool for 5-7 minutes at room temperature, stirring occasionally to release heat evenly. You want it warm but not hot to the touch when you proceed to the next step—this prevents cooking the eggs prematurely. The texture should be smooth with no visible sugar granules.
Step 3: Temper and Combine Eggs
In a separate bowl, whisk the 2 whole Large Eggs with the 1 tsp Vanilla Extract, 1 tsp Baking Powder, 0.25 tsp Salt, and 1 tsp Matcha Powder until fully combined and slightly frothy. This incorporates air for a lighter texture.
Slowly pour the warm cereal mixture into the egg mixture while whisking constantly. This tempering process ensures the eggs integrate smoothly without scrambling. Continue whisking for 1-2 minutes until the batter is completely uniform with no streaks of egg visible.
Step 4: Bake to Perfection
Pour the batter into a greased 8-inch square baking dish or line it with parchment paper for easy removal. Tap the dish gently on the counter 2-3 times to release any large air bubbles—this creates a smoother final texture.
Bake in a preheated 350°F oven for 25-30 minutes until the top is golden brown and the center jiggles slightly when gently shaken. A toothpick inserted should come out with a few moist crumbs but no wet batter. Avoid overbaking; the cake continues setting as it cools.
Step 5: Cool and Dust with Powdered Sugar
Remove from the oven and let the cake cool in the pan for 10 minutes. Then transfer to a wire rack and cool completely to room temperature—this takes about 1 hour. The texture will firm up significantly as it cools.
Once fully cooled, dust the top evenly with the 0.5 cup Powdered Sugar using a fine-mesh sieve. For clean slices, use a sharp knife dipped in hot water between cuts. Serve at room temperature for the ideal balance of tenderness and structure.
Pro Tips For Making Cream Of Rice Cake
- Pre-cook the cereal: Cook the cream of rice in milk first until thickened—I learned this the hard way after ending up with a grainy texture when I skipped this step.
- Room temperature eggs: Take the eggs out 30 minutes before mixing, or they’ll shock the warm cereal mixture and make the batter separate.
- Butter the pan well: Use at least 1 tablespoon of butter to grease the baking dish, especially the corners, or the cake will stick like glue.
- Bake low and slow: Set the oven to 325°F and give it a full 45-50 minutes—higher heat browns the top too fast while the center stays wet.
Best Sauces and Condiments for cream of rice cake
Fruit Compote
A warm berry compote made with 1 cup mixed berries and 2 tbsp sugar adds a burst of freshness. Simmer for 5-7 minutes until syrupy. The tartness balances the cake’s sweetness beautifully. 🍓
Whipped Cream
Lightly sweetened whipped cream with 1 tsp vanilla and 1 tbsp powdered sugar enhances the airy texture. Fold in 2 tbsp mascarpone for extra richness if you like. Serve a dollop on top or alongside each slice.
Honey Drizzle
A drizzle of warm honey (about 1 tbsp per serving) adds natural sweetness and a glossy finish. I love using local wildflower honey for its floral complexity. Pair with a sprinkle of toasted almonds for crunch.
Matcha Dusting
For a Japanese-inspired touch, sift ½ tsp matcha powder over the powdered sugar. The earthy notes complement the subtle vanilla in the cake. This also adds a lovely green speckled appearance. ✨
Citrus Glaze
Mix ½ cup powdered sugar with 1 tbsp lemon juice for a tangy glaze. Add 1 tsp lemon zest for extra brightness. Drizzle over the cake just before serving for a zesty contrast.
Chocolate Sauce
A dark chocolate ganache made with ½ cup heavy cream and 4 oz chopped chocolate creates a decadent pairing. The bitterness of the chocolate cuts through the cake’s lightness perfectly.
Nutrition Facts
Frequently Asked Questions
Can I use instant cream of rice?
No, instant versions won’t give the right texture. Stick with regular uncooked cereal for the proper consistency.
Why did my cake turn out dense?
Overmixing the batter or overbaking can cause this. Whisk just until combined and remove from oven when the center jiggles slightly.
How do I store leftovers?
Keep in an airtight container at room temperature for 2-3 days. Dust with powdered sugar just before serving.
Can I make this gluten-free?
Yes! Cream of rice cereal is naturally gluten-free. Just verify your baking powder is gluten-free.

- Cream of Rice Cake Recipe: Light and Airy Japanese-Style Sweets - September 26, 2026
- Crispy Pork and Rice Recipe: Wok-Seared Umami With Crispy Edges - September 26, 2026
- Rice Krispie Eggs Recipe: Crunchy Marshmallow Nest Surprise - September 26, 2026