
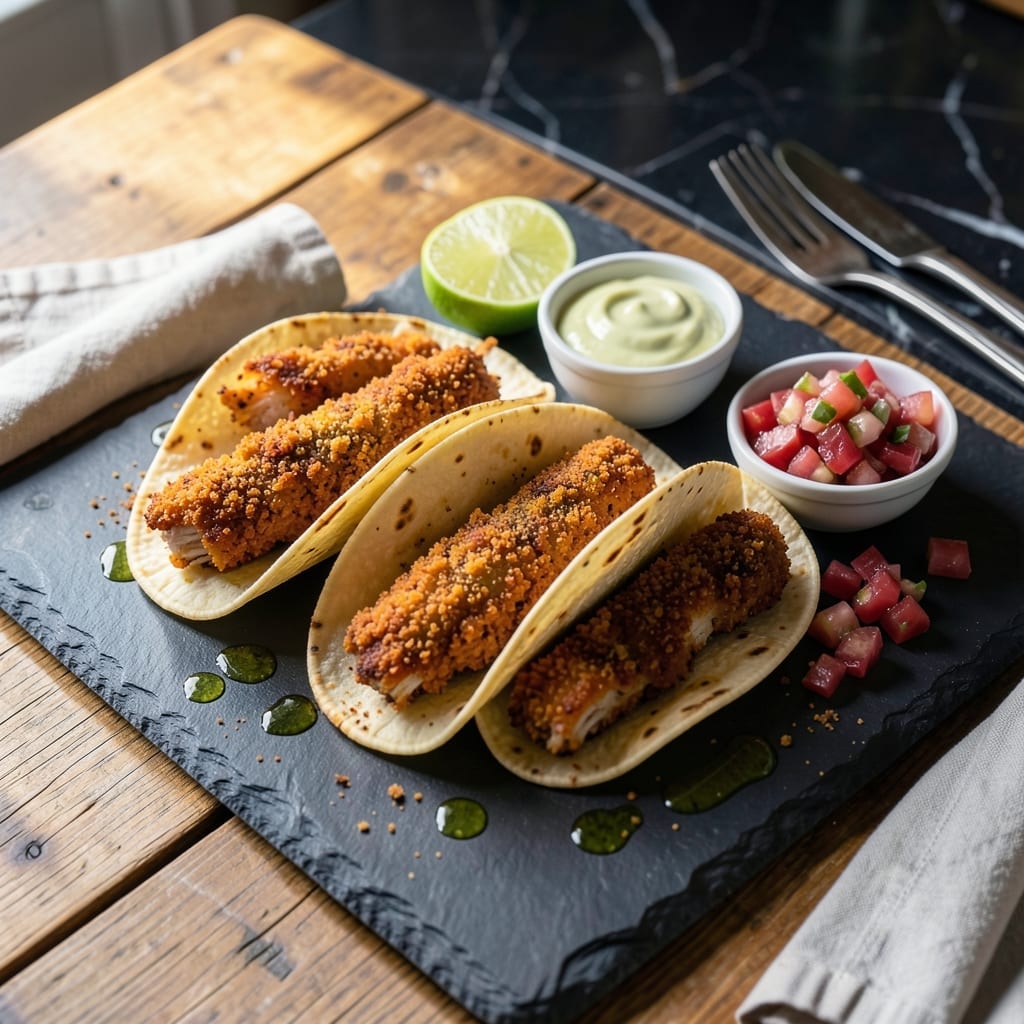
There’s a reason crispy chicken tacos remain a weeknight favorite—they deliver restaurant-quality crunch with minimal effort.
This recipe achieves that crispy texture through a simple breading technique and proper frying temperature. The spiced coating forms a golden shell that stays crunchy even after being loaded into warm tortillas.
What sets these apart is the balance of textures: shatteringly crispy chicken contrasted with soft tortillas and fresh toppings. A squeeze of lime brightens every bite.
Serve with salsa, avocado, and cilantro for a complete meal that’s ready in under 30 minutes.
Ingredients for Crispy Chicken Tacos
Pantry staples and fresh toppings create restaurant-quality crispy chicken tacos at home.
| Ingredient | Amount | Notes |
|---|---|---|
| Boneless Skinless Chicken Breasts 🍗 | 1 ½ lb | Cut into 1-inch strips |
| All-Purpose Flour 🌾 | 1 cup | For initial dredging |
| Large Eggs 🥚 | 2 whole | Beaten for egg wash |
| Panko Breadcrumbs 🍞 | 2 cups | For crispy texture |
| Chili Powder 🌶️ | 2 tbsp | For spice blend |
| Ground Cumin 🌿 | 1 tbsp | Toasted for depth |
| Garlic Powder 🧄 | 1 tbsp | For savory base |
| Onion Powder 🧅 | 1 tbsp | For aromatic base |
| Salt 🧂 | 1 tsp | Diamond Crystal preferred |
| Black Pepper 🌶️ | ½ tsp | Freshly ground |
| Vegetable Oil 🫒 | 2 cups | For frying (peanut or canola work too) |
| Small Corn Tortillas 🌮 | 12 pieces | Warm before serving |
| Fresh Lime 🍈 | 1 whole | Cut into wedges |
| Fresh Cilantro 🌿 | ½ cup | Chopped for garnish |
| Avocado 🥑 | 2 whole | Sliced for topping |
The chicken quality is paramount here. Boneless, skinless breasts from Whole Foods or Costco yield the most consistent results. For optimal crunch, ensure the cut strips are uniform—approximately 1-inch thickness. Panko breadcrumbs, available in the Asian aisle of most supermarkets, provide superior crispiness compared to standard breadcrumbs.
For a gluten-free adaptation, substitute almond flour or crushed cornflakes for the all-purpose flour and panko. No chili powder? Cayenne plus smoked paprika at half the quantity works well. The vegetable oil can be replaced with peanut or avocado oil for higher smoke points. Fresh limes are non-negotiable—bottled juice lacks the necessary acidity.
Store raw chicken in the coldest part of the refrigerator for up to 2 days. The breaded chicken can be prepped 4 hours ahead and refrigerated. Leftovers keep for 3-4 days in an airtight container, though the coating loses crispness upon reheating.
Why You’ll Love This Recipe
- One Pan Wonder: I bread and cook everything on a single baking sheet—no stacks of dirty dishes here.
- That Crunch Though: Panko plus chili powder gives a ridiculous crunch that still stays juicy inside.
- Feeds a Crowd: I stretch one batch to taco night, lunch boxes, and even a next-day salad topping.
- Budget Stretch: Boneless chicken breasts go further when pounded thin and breaded with pantry staples.
Step-by-Step Instructions for Crispy Chicken Tacos
Master the technique for perfectly crispy chicken with a well-seasoned crust every time.
Step 1: Season and Coat the Chicken
Cut the 1.5 lb Boneless Skinless Chicken Breasts into 1-inch strips. In a shallow dish, combine the 2 tbsp Chili Powder, 1 tbsp Ground Cumin, 1 tbsp Garlic Powder, 1 tbsp Onion Powder, 1 tsp Salt, and 0.5 tsp Black Pepper. Toss the chicken strips in this mixture until evenly coated.
This spice blend creates a flavorful foundation that will shine through the crispy exterior. I press the seasoning into the meat to ensure it adheres well during the breading process. The chicken should appear uniformly dusted with the spice mixture before moving to the next step.
Step 2: Create the Breading Station and Coat
Set up three shallow dishes in a row. Place the 1 cup All-Purpose Flour in the first, beat the 2 whole Large Eggs in the second, and put the 2 cups Panko Breadcrumbs in the third. This assembly line approach makes coating efficient and mess-free.
Dredge each seasoned chicken strip in the flour, shaking off excess, then dip in the beaten eggs, letting any excess drip off. Finally, press the strip into the panko breadcrumbs, turning to coat completely. The panko creates an extra-crispy texture that’s essential for this dish. Place breaded strips on a plate and let them rest for 5 minutes to set the coating.
Step 3: Fry to Golden Perfection
Heat the 2 cups Vegetable Oil in a large, heavy-bottomed skillet over medium-high heat until it reaches 350°F. To test readiness, drop in a pinch of panko—if it sizzles immediately and floats to the surface, the oil is ready.
Carefully place several breaded chicken strips in the hot oil, being careful not to overcrowd the pan. Fry for 3-4 minutes per side until golden brown and the internal temperature reaches 165°F. The coating should be uniformly crispy and the chicken cooked through. Transfer to a paper towel-lined plate to drain excess oil.
Step 4: Warm Tortillas and Assemble Tacos
Warm the 12 pieces Small Corn Tortillas in a dry skillet over medium heat for 20-30 seconds per side until pliable and slightly charred in spots. This step enhances their flavor and prevents them from tearing when folded.
To assemble, place 2-3 crispy chicken strips in each tortilla. Top with sliced 2 whole Avocado, chopped 0.5 cup Fresh Cilantro, and a squeeze of juice from the 1 whole Fresh Lime. The acidity from the lime cuts through the richness of the fried chicken, while the cilantro adds a fresh contrast to the crispy texture.
Pro Tips For Making Crispy Chicken Tacos
- Pound the Chicken: Use a rolling pin or meat mallet to flatten the chicken breasts to an even ½-inch thickness. I learned this the hard way—uneven pieces cook at different rates, leaving some parts dry while others stay undercooked.
- Double Dredge: Dip the chicken in flour, then egg, then panko, but repeat the egg and panko step for an extra-crispy coating. Sounds tedious, but it actually changes the outcome—every bite stays crunchy even after loading up the tacos.
- Skip Cold Oil: Make sure your oil is hot before adding the chicken—about 350°F or until a pinch of panko sizzles immediately. After burning three batches, I finally figured out that cold oil just soaks into the breading instead of frying it.
- Rest Before Frying: Let the breaded chicken rest for 10 minutes before frying. My grandmother swore by this, and she was right: it helps the coating stick and keeps the juices sealed in.
Dietary Considerations for This crispy chicken tacos
Gluten-Free Option
Swap 1 cup almond flour for the all-purpose flour and use crushed cornflakes instead of panko. The texture remains crispy, though slightly denser. I’ve tested this with Bob’s Red Mill almond flour with great results. 💪
Dairy-Free Adjustments
This recipe is naturally dairy-free, but check your tortillas—some brands contain lard. Mission brand corn tortillas are reliably dairy-free. For extra creaminess without dairy, add sliced avocado or a drizzle of cashew cream.
Lower-Calorie Version
Use an air fryer at 375°F for 12-15 minutes, flipping halfway. This cuts oil significantly while keeping the crust crispy. Spray the breaded chicken lightly with avocado oil before air frying for best results.
Spice Sensitivity
Reduce chili powder to 1 tbsp and omit black pepper for a milder flavor. Add 1 tsp smoked paprika for depth without heat. I often make this version for kids or those who prefer less spice.
Extra Protein Boost
Add ½ cup finely chopped nuts like almonds or pecans to the panko mixture. This increases protein and adds a nutty crunch. Toast the nuts first at 350°F for 5 minutes to enhance flavor. 🌟
Vegetarian Alternative
Replace chicken with 1-inch thick slices of cauliflower. Follow the same breading and frying process, but reduce frying time to 2-3 minutes per side. The spice blend works beautifully with cauliflower’s mild flavor.
Nutrition Facts
Frequently Asked Questions
Can I bake the chicken instead of frying?
Yes! Bake at 400°F for 15-18 minutes, flipping halfway. Use a wire rack for even crispiness. The texture won’t be identical, but it’s a healthier alternative.
Why does my breading keep falling off?
Ensure each step is dry-wet-dry (flour-egg-panko) and let the breaded chicken rest for 5 minutes before frying. Overcrowding the pan can also cause the breading to detach.
What’s the best way to keep them warm?
Place fried strips on a wire rack in a 200°F oven. This keeps them crispy without steam buildup. Avoid stacking, as it traps moisture.
Can I use chicken thighs instead of breasts?
Thighs stay juicier and handle frying well. Adjust cooking time to 4-5 minutes per side to reach 165°F internally.

- Jollof Rice Sauce Recipe: West African Tomato and Spice Infusion - September 25, 2026
- Japanese Rice Soup Recipe: Umami-Rich Comfort in a Bowl - September 25, 2026
- Homemade Cream Of Rice Recipe: Silk-Smooth Breakfast in Minutes - September 25, 2026