
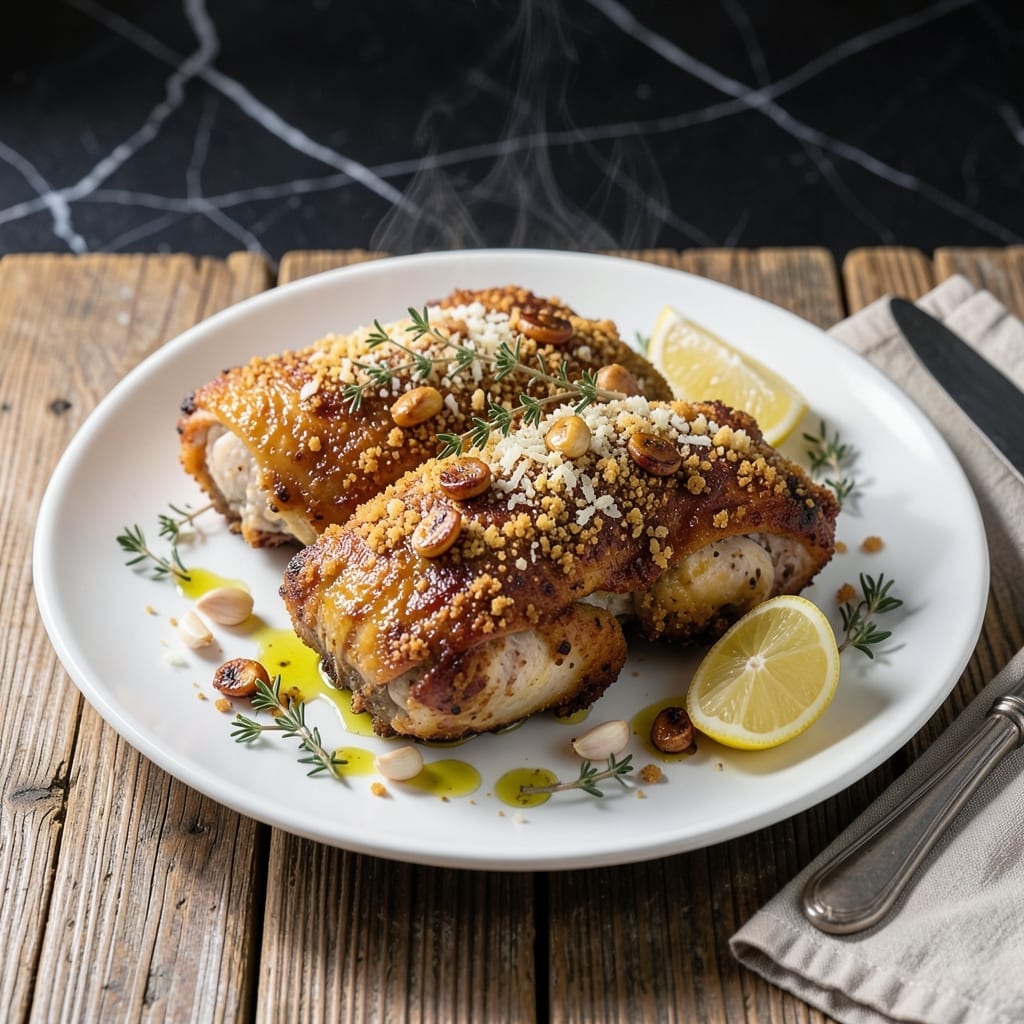
There’s something deeply satisfying about biting into perfectly crispy chicken with a golden crust that shatters between your teeth. This recipe delivers that coveted texture every time, with an aromatic garlic punch that elevates each bite.
The secret lies in a precise method: coating the chicken in a seasoned flour mixture and cooking it at the right temperature. I’ve refined this technique to ensure the exterior turns golden and crispy while the inside stays juicy and tender.
What you’ll get is a dish that’s rich in flavor, with layers of garlic and herbs that complement the chicken beautifully. The crust stays crispy even after resting, making it perfect for serving immediately or saving for later.
Pair it with your favorite sides for a meal that feels like it came from a professional kitchen.
Ingredients for Crispy Garlic Chicken
Simple ingredients, extraordinary crispy results with every golden bite.
| Ingredient | Amount | Notes |
|---|---|---|
| Chicken Thighs 🍗 | 1 ½ lb | Boneless, skinless, patted dry |
| All-Purpose Flour 🌾 | 1 ½ cups | For crispy coating |
| Garlic Cloves 🧄 | 6 cloves | Minced for maximum flavor |
| Large Eggs 🥚 | 2 whole | Beaten for egg wash |
| Breadcrumbs 🍞 | 1 cup | Panko for extra crunch |
| Parmesan Cheese 🧀 | ½ cup | Freshly grated for best texture |
| Olive Oil 🫒 | ½ cup | For frying and crispiness |
| Garlic Powder 🧄 | 2 tsp | For seasoning the flour |
| Onion Powder 🧅 | 2 tsp | Adds depth to seasoning |
| Paprika 🌶️ | 1 tsp | Sweet or smoked variety |
| Salt 🧂 | 1 ½ tsp | Kosher or sea salt preferred |
| Black Pepper 🌶️ | 1 tsp | Freshly ground for best flavor |
| Dried Thyme 🌿 | 1 tsp | Crushed between fingers |
| Butter 🧈 | 2 tbsp | Melted, for richness |
The chicken thighs are key here—boneless, skinless ones crisp up perfectly without drying out. Most supermarkets carry them pre-packaged, but the butcher counter at Whole Foods usually has fresher options. For the breadcrumbs, panko (the Japanese-style ones in the Asian aisle) gives that shatteringly crisp crust. The Parmesan should be freshly grated—pre-shredded just doesn’t melt the same way.
Out of panko? Regular breadcrumbs work in a pinch (just not as crispy). No Parmesan? Pecorino Romano has a sharper bite that plays well with the garlic. The flour can be swapped for cornstarch if you’re going gluten-free—use half the amount. Fresh garlic is non-negotiable though—jarred stuff lacks the punch. And if you’re feeling fancy, add a pinch of cayenne to the seasoning for a little heat.
Leftovers keep beautifully—store in an airtight container for up to 4 days. Reheat in the oven or toaster oven to maintain crispiness. The seasoned flour mix can be prepped ahead and stored for 1 week (just whisk before using).
Why You’ll Love This Recipe
- One Pan Magic: I dirty a single dish start to finish—just coat, pan-fry, and serve.
- Garlic Crunch: That double-crisp crust of breadcrumbs and flour with minced garlic in every bite is ridiculously good.
- Feeds the Crew: Six thighs stretch to eight with sides, and my picky nephew still cleans his plate.
- Leftovers Win: Cold pieces stay crunchy enough for next-day sandwiches, and the budget loves cheap thighs.
Step-by-Step Instructions for Crispy Garlic Chicken
Here’s the method that guarantees a golden crust packed with garlic flavor every single time.
Step 1: Season and Coat the Chicken Thighs
Pat the 1.5 lb chicken thighs completely dry with paper towels—this is non-negotiable for crispiness. In a shallow dish, combine the 1.5 cups all-purpose flour, 2 tsp garlic powder, 2 tsp onion powder, 1 tsp paprika, 1.5 tsp salt, 1 tsp black pepper, and 1 tsp dried thyme. Mix well so every bite is packed with flavor.
Dredge each thigh in the seasoned flour, pressing gently to adhere. Shake off excess—you want a thin, even coating, not a thick paste. This creates that perfect crunch without becoming gummy.
Step 2: Create the Egg Wash and Breadcrumb Station
Beat the 2 whole large eggs in a separate shallow dish until uniform. In another dish, mix the 1 cup breadcrumbs and 0.5 cup Parmesan cheese. The cheese adds a sharp, nutty depth to the crunch.
Dip each floured thigh into the egg wash, letting excess drip off. Then coat thoroughly in the breadcrumb mixture, pressing firmly to create a thick, textured layer. Place on a plate and let rest for 5 minutes—this helps the coating set so it doesn’t fall off during frying.
Step 3: Pan-Fry to Golden Perfection
Heat the 0.5 cup olive oil and 2 tbsp butter in a large skillet over medium-high heat until the butter stops foaming. This combo gives you richness and a high smoke point. Add the chicken in a single layer—don’t crowd the pan or the temperature will drop.
Cook for 4-5 minutes per side until the coating is deep golden brown and crisp. The internal temperature should reach 165°F. You’ll hear a steady sizzle—if it stops, your heat is too low. Flip only once to keep the crust intact.
Step 4: Infuse with Garlic and Finish
While the chicken cooks, mince the 6 cloves garlic cloves. In the last 2 minutes of cooking, add the garlic to the pan around the chicken. Let it sizzle until fragrant and just golden—about 1-2 minutes. Don’t let it burn or it’ll turn bitter.
Spoon the garlic and pan drippings over the chicken as it finishes. This infuses every bite with that aromatic bite. Transfer to a wire rack to drain excess oil and keep the crust crisp—never stack the pieces, or they’ll steam and get soggy.
Pro Tips For Making Crispy Garlic Chicken
- Double Dredge: Dip the chicken in flour, then egg, then breadcrumbs—but repeat the egg and breadcrumb step for an extra-thick crust that stays put. I learned this the hard way after my first few batches lost their coating in the pan.
- Dry the Thighs: Pat the chicken thighs bone-dry with paper towels before dredging. Sounds tedious, but it’s the only way to get that shatter-crisp crust instead of a soggy mess.
- Skip the Crowding: Fry in batches with at least an inch between pieces—any closer and the steam will turn your crust to a chewy disappointment. After burning three batches, I finally figured out the pan needs breathing room.
- Grate the Garlic: Swap minced garlic for freshly grated—it clings to the chicken better and distributes flavor in every bite. My grandmother swore by this, and she was right.
Dietary Considerations for These Flavors
Gluten-Free Option
Swap the all-purpose flour for cornstarch—use only ½ cup since it’s more absorbent. Ensure your breadcrumbs are certified gluten-free. I love Aleia’s brand for their texture. The crispiness will be just as satisfying.
Dairy-Free Version
Replace the Parmesan cheese with nutritional yeast (¼ cup) for a cheesy flavor without dairy. Use olive oil or a dairy-free butter like Miyoko’s for frying. The garlic and herbs will still shine beautifully. 💛
Lower-Carb Approach
Skip the flour coating entirely and use crushed pork rinds (1 cup) mixed with the Parmesan and spices. The egg wash helps them adhere. This cuts carbs significantly while keeping the crunch.
Egg-Free Alternative
Use buttermilk (½ cup) or a mix of 1 tbsp flaxseed meal with 3 tbsp water as a binder. Let the chicken soak for 5 minutes before dredging in the breadcrumb mix. Works like a charm.
Allergen Notes
This recipe contains gluten, dairy, and eggs. For nut allergies, check that your breadcrumbs are processed in a nut-free facility. Always read labels to avoid cross-contamination.
Lighter Version
Bake at 400°F for 20-25 minutes on a wire rack instead of pan-frying. Use cooking spray instead of olive oil to reduce fat. Flip halfway for even crisping. Still delicious with less oil! 🔥
Nutrition Facts
Frequently Asked Questions
Can I use chicken breasts instead of thighs?
Yes, but adjust cooking time to 3-4 minutes per side as breasts cook faster and can dry out. Thighs are preferred for their juiciness and ability to stay tender during frying.
How do I keep the coating from falling off?
Pat the chicken completely dry, let the coated pieces rest for 5 minutes before frying, and avoid flipping too soon. This helps the crust set properly.
Can I bake this instead of pan-frying?
Yes! Bake at 400°F for 20-25 minutes on a wire rack. Spray with oil for extra crispiness, and flip halfway through for even browning.
Why is my chicken not crispy?
Common causes include not enough oil, overcrowding the pan, or low heat. Use medium-high heat and cook in batches to maintain the right temperature.

- Jollof Rice Sauce Recipe: West African Tomato and Spice Infusion - September 25, 2026
- Japanese Rice Soup Recipe: Umami-Rich Comfort in a Bowl - September 25, 2026
- Homemade Cream Of Rice Recipe: Silk-Smooth Breakfast in Minutes - September 25, 2026