
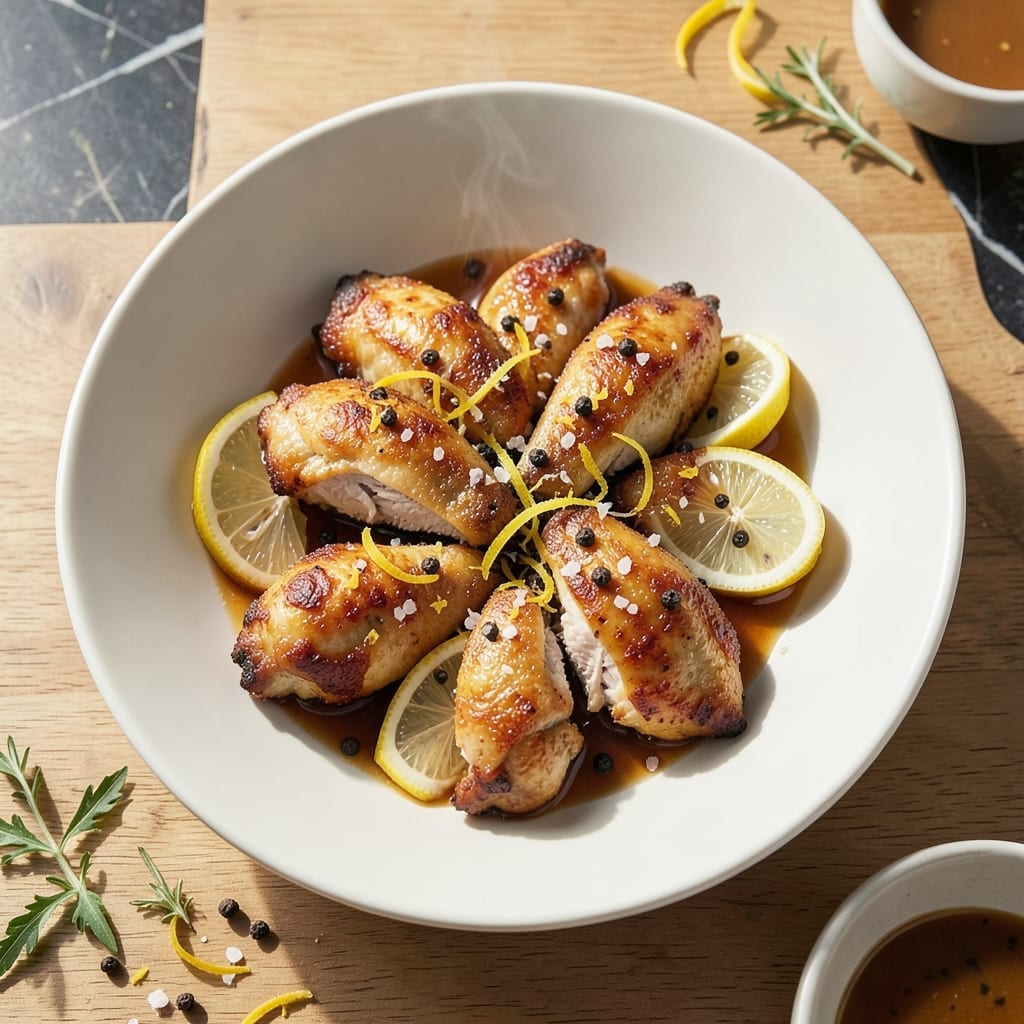
This recipe delivers crispy chicken with a bright lemon punch that’s impossible to resist. The secret starts with a zesty brine that locks in moisture while building layers of citrus flavor. No dry, lackluster chicken here—just juicy meat wrapped in a shatteringly crispy crust.
The brine works its magic in just 4 hours, infusing every bite with tangy depth. After drying and dredging, the chicken fries to a golden finish that stays crispy long after it leaves the pan. It’s a foolproof method for restaurant-quality results at home.
Each piece emerges with a golden, crackling exterior that gives way to tender meat bursting with lemon essence. The aroma alone signals this is no ordinary fried chicken. Serve hot for the ultimate texture contrast.
Perfect as a main course or in sandwiches, this dish proves that crispy and flavorful aren’t mutually exclusive. The brine makes all the difference.
Ingredients for Crispy Lemon Chicken
Bright citrus and a shatteringly crisp crust start with these quality ingredients.
| Ingredient | Amount | Notes |
|---|---|---|
| Chicken Thighs 🍗 | 2 lb | Boneless, skin-on for extra crisp |
| Lemon Juice 🍋 | 1 cup | Freshly squeezed for best flavor |
| Lemon Zest 🍋 | 2 tbsp | From about 2-3 lemons |
| Kosher Salt 🧂 | ½ cup | Diamond Crystal preferred for brining |
| Granulated Sugar 🧈 | ¼ cup | Balances the acidity in brine |
| Black Peppercorns 🌶️ | 1 tbsp | Lightly crushed for brine |
| All-Purpose Flour 🌾 | 2 cups | For dredging chicken |
| Cornstarch 🌾 | ½ cup | Adds extra crispiness |
| Garlic Powder 🧄 | 1 tbsp | Enhances flavor in coating |
| Onion Powder 🧅 | 1 tbsp | Adds depth to seasoning |
| Paprika 🌶️ | 1 tsp | Sweet or smoked variety |
| Vegetable Oil 🫒 | 4 cups | For frying, high smoke point |
| Fresh Parsley 🌿 | ¼ cup | Chopped, for garnish |
| Fresh Thyme 🍃 | 2 tsp | Optional, for extra aroma |
The chicken thighs are key here—skin-on, bone-in gives you the crispiest result, but boneless works if that’s what you have. For the brine, fresh lemon juice is non-negotiable (bottled lacks the punch). Diamond Crystal kosher salt dissolves quickly and evenly. Most supermarkets carry it, but any kosher salt will do. The sugar balances the acidity, so don’t skip it.
No lemon zest? A pinch of citric acid can mimic the tang, but fresh zest is ideal. Swap chicken thighs for breasts if you prefer white meat (adjust cooking time to avoid drying out). The cornstarch in the dredge is what makes this extra crispy—don’t substitute flour for it. For frying, peanut oil works too if you have it (higher smoke point).
The brined chicken can sit in the fridge for up to 12 hours if you want deeper flavor. Leftovers keep 3-4 days in the fridge—reheat in the oven to maintain crispiness. Fresh parsley and thyme are best used the day of cooking.
Why You’ll Love This Recipe
- One Pan Magic: I toss everything on a single sheet pan—chicken, lemon, salt—and let the oven do the work.
- Zesty Crunch: That sugar in the marinade caramelizes into a sticky, crispy coating with bright lemon punch.
- Weeknight Hero: Between us, it’s saved me on more chaotic Tuesdays than I can count.
- Budget Stretcher: Chicken thighs stay juicy and cost half what breasts do, and leftovers still taste fresh.
Step-by-Step Instructions for Crispy Lemon Chicken
This method guarantees maximum crunch with juicy meat and bright citrus flavor.
Step 1: Brine the Chicken Thighs
In a large bowl, whisk together the 1 cup Lemon Juice, 2 tbsp Lemon Zest, 0.5 cup Kosher Salt, 0.25 cup Granulated Sugar, and 1 tbsp Black Peppercorns until the salt and sugar dissolve completely. The brine should be slightly syrupy and fragrant with citrus.
Submerge all the 2 lb Chicken Thighs in the brine, ensuring they’re fully coated. Refrigerate for 4-6 hours—this is non-negotiable for tender meat and that signature zesty flavor. The lemon acid tenderizes while the salt seasons deeply. Stir the brine once or twice during brining to redistribute flavors.
Step 2: Prepare the Dredging Mixture
In a shallow dish, combine the 2 cups All-Purpose Flour, 0.5 cup Cornstarch, 1 tbsp Garlic Powder, 1 tbsp Onion Powder, and 1 tsp Paprika. Whisk thoroughly to break up any lumps. The cornstarch is the secret to extra crispiness—it creates a lighter, crunchier crust than flour alone.
Remove the chicken from the brine and pat it completely dry with paper towels. This step is critical; any moisture will prevent the coating from adhering properly. Dredge each piece in the flour mixture, pressing firmly to create an even layer that clings to every surface.
Step 3: Fry to Golden Perfection
Heat the 4 cups Vegetable Oil in a deep, heavy-bottomed pot to 350°F. Use a thermometer for accuracy—oil that’s too cool will make the chicken greasy, while oil that’s too hot will burn the outside before the inside cooks. The oil should shimmer but not smoke.
Carefully lower 2-3 pieces of dredged chicken into the hot oil, being careful not to overcrowd the pot. Fry for 8-10 minutes per side until the coating is deep golden brown and the internal temperature reaches 165°F. The coating should be crisp enough to hear it crackle when you remove it from the oil.
Step 4: Drain and Garnish
Transfer the fried chicken to a wire rack set over a baking sheet to drain. This allows air to circulate on all sides, preserving crispiness. Avoid draining on paper towels—they can trap steam and make the coating soggy. Let the chicken rest for 5 minutes before serving.
Finely chop the 0.25 cup Fresh Parsley and, if using, the 2 tsp Fresh Thyme. Sprinkle the herbs generously over the hot chicken just before serving. The residual heat will release the herbs’ aromas, complementing the lemon’s brightness in every bite.
Pro Tips For Making Crispy Lemon Chicken
- Dry the Thighs: Pat the chicken thighs completely dry with paper towels before seasoning—I learned this the hard way after my first batch steamed instead of crisped.
- Zest Before Juicing: Always zest the lemons before cutting them open for juice, because it’s nearly impossible to do afterward and you’ll waste half the flavor.
- Skip the Overcrowding: Cook the thighs in a single layer with space between them, or they’ll boil in their own juices instead of getting that golden crust.
- Rest Before Serving: Let the chicken rest 5 minutes after cooking so the juices redistribute—serving it straight off the pan leaves half the flavor on the cutting board.
Best Sauces and Condiments for These Flavors
Citrus-Forward Dips
A lemon aioli with 1 cup mayo, 3 tbsp fresh lemon juice, and 1 minced garlic clove adds creamy contrast. I whisk in 1 tsp lemon zest for extra brightness. For a lighter option, try Greek yogurt with the same citrus ratio. 💫
Herb-Infused Sauces
Blend ½ cup olive oil, ¼ cup lemon juice, 2 tbsp honey, and 2 tbsp chopped parsley for a vibrant dressing. Drizzle over the chicken or serve as a dipping sauce. The honey balances the acidity beautifully.
Spicy Kicks
Mix ¼ cup sriracha with 2 tbsp honey and 1 tbsp lemon juice for a sweet-spicy glaze. Brush it on during the last 2 minutes of frying. For heat lovers, add ½ tsp cayenne to the dredging mixture.
Classic Pairings
Serve with store-bought marinara warmed with 1 tbsp lemon zest for quick customization. Or try chipotle mayo—1 cup mayo plus 1 tbsp adobo sauce—for smoky depth. Both complement the crispy texture.
Fresh Finishes
Top with a salsa verde of blended tomatillos, jalapenos, and cilantro for freshness. Or sprinkle with crumbled feta and lemon wedges for a Mediterranean touch. Simple but impactful. 🍋
Nutrition Facts
Frequently Asked Questions
Can I use chicken breasts instead of thighs?
Yes, but reduce cooking time to 6-7 minutes per side to prevent drying out. Thighs stay juicier, but breasts work if pounded to even thickness. Brining is even more important for white meat.
Why does the chicken need to rest after frying?
Resting for 5 minutes lets juices redistribute and the coating set. Cutting too soon causes moisture loss, making the meat dry and the crust less crispy.
How do I keep the coating crispy longer?
Drain on a wire rack, not paper towels. Store leftovers uncovered in the fridge, then reheat in a 400°F oven for 10-12 minutes to revive crunch.
Can I bake instead of fry?
Bake at 425°F on a rack for 25-30 minutes, flipping once. It won’t be as crispy but still flavorful. Use a wire rack to allow air circulation.

- Jollof Rice Sauce Recipe: West African Tomato and Spice Infusion - September 25, 2026
- Japanese Rice Soup Recipe: Umami-Rich Comfort in a Bowl - September 25, 2026
- Homemade Cream Of Rice Recipe: Silk-Smooth Breakfast in Minutes - September 25, 2026