
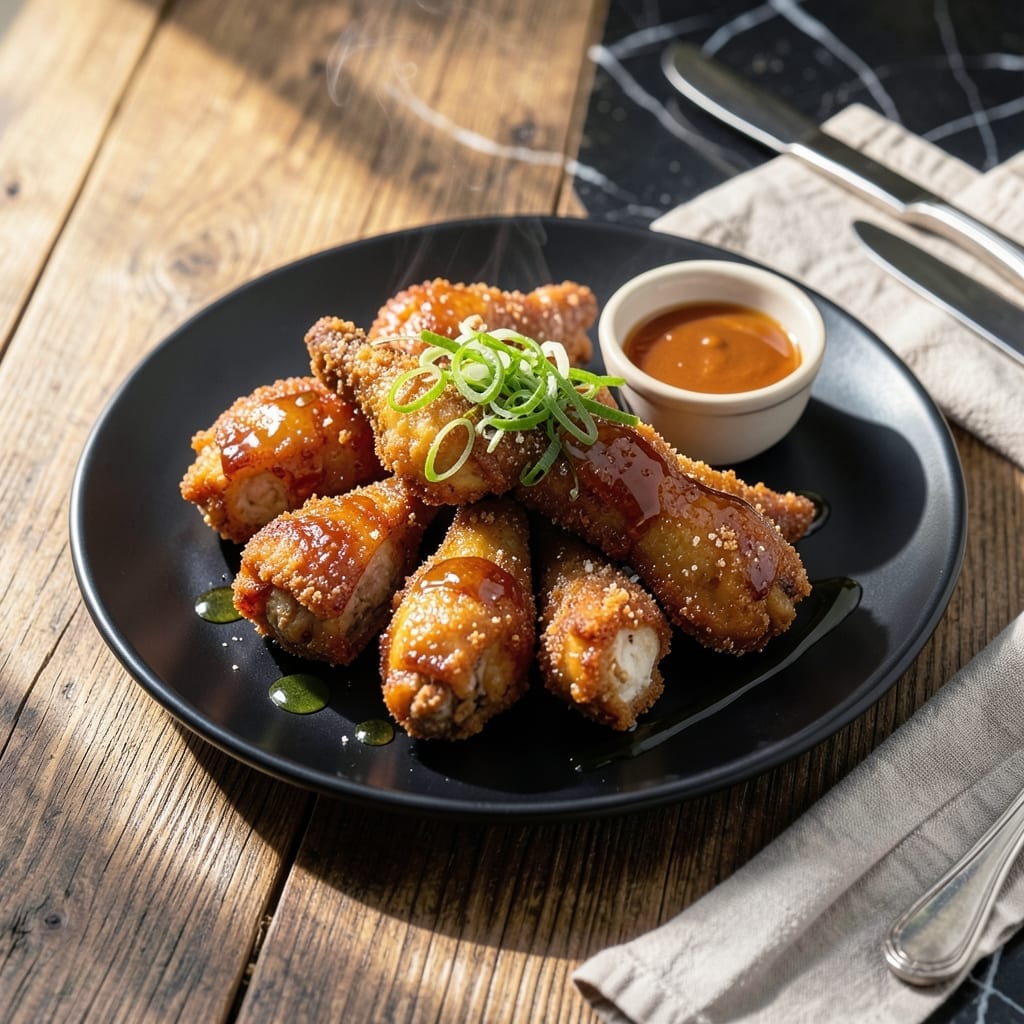
This recipe delivers on its promise of crispy perfection with every bite. The secret lies in a double-coating technique that creates an ultra-crunchy exterior while keeping the chicken juicy inside.
I developed this method after countless attempts to achieve restaurant-quality texture at home. The honey glaze adds a sweet contrast that balances the savory crunch, making it irresistible to both kids and adults.
What you get is golden-brown chicken with a shatteringly crispy coating and a sticky-sweet finish. The pieces stay crisp long after frying, thanks to a simple resting step that locks in the texture.
Serve this as a main course with rice or vegetables for a meal that feels special but comes together with straightforward techniques. The results speak for themselves.
Ingredients for Crispy Sweet Chicken
Double-coated chicken thighs meet a honey glaze for restaurant-quality crunch at home.
| Ingredient | Amount | Notes |
|---|---|---|
| Chicken Thighs 🍗 | 2 lb | Boneless, skinless, cut into bite-sized pieces |
| All-Purpose Flour 🌾 | 1 ½ cups | Divided for double coating |
| Cornstarch 🌾 | ½ cup | For extra crispiness |
| Large Eggs 🥚 | 2 whole | Beaten for egg wash |
| Honey 🍯 | ½ cup | Pure, unprocessed preferred |
| Soy Sauce 🫒 | 3 tbsp | Low-sodium for balance |
| Garlic Cloves 🧄 | 4 cloves | Minced finely |
| Fresh Ginger 🌿 | 1 tbsp | Peeled and grated |
| Salt 🧂 | 1 tsp | Kosher or sea salt |
| Black Pepper 🌶️ | ½ tsp | Freshly ground preferred |
| Vegetable Oil 🫒 | 2 cups | For deep frying |
| Rice Vinegar 🍚 | 1 tbsp | For glaze acidity |
| Sesame Seeds 🌻 | 2 tbsp | Toasted, for garnish |
| Green Onions 🧅 | 4 whole | Thinly sliced for garnish |
The chicken thighs are key here—boneless, skinless ensures even cooking and maximum crispiness. Costco carries them in bulk, or grab from your local butcher. For the double coating, all-purpose flour and cornstarch create that shatteringly crisp exterior. Look for unprocessed honey at Whole Foods or natural food stores for the best glaze consistency.
No honey on hand? Maple syrup at a 1:1 ratio works in a pinch, though the flavor shifts slightly. Swap soy sauce for tamari for gluten-free or coconut aminos for a milder taste. Fresh ginger can be replaced with ground ginger at one-quarter the amount. Vegetable oil can be peanut or canola (avoid olive oil for high-heat frying).
Fry in small batches to avoid dropping oil temperature—this keeps the coating crisp. Leftovers stay fresh for 2-3 days in the fridge, but reheat in the oven (375°F for 10 minutes) to restore crunch. Freezing isn’t recommended as it softens the coating.
Why You’ll Love This Recipe
- One Bowl Wonder: I just toss the chicken thighs in flour, cornstarch, and egg—no fancy prep or multiple dishes to wash.
- Sweet & Crispy Magic: That honey glaze caramelizes into the crunchy coating for the perfect sweet-savory bite every time.
- Weeknight Hero: I’ve served this for quick dinners, potlucks, and even packed leftovers for lunch—it’s always a hit.
- Budget Stretcher: Chicken thighs stay juicy and cheap, and a little honey goes a long way for big flavor.
Step-by-Step Instructions for Crispy Sweet Chicken
Master the technique for achieving that perfect crunch with every bite.
Step 1: Prepare the Chicken and Create the Dredging Stations
Pat the 2 lb Chicken Thighs completely dry with paper towels—this ensures maximum crispiness. Cut them into 1-inch pieces and season with 1 tsp Salt and 0.5 tsp Black Pepper.
Set up two shallow bowls: one with 1.5 cups All-Purpose Flour and the other with 2 whole Large Eggs beaten with 1 tbsp Fresh Ginger and 4 cloves Garlic Cloves. In a third bowl, mix 0.5 cup Cornstarch with 1 tsp Salt for the final coating. This triple-dipping method guarantees an ultra-crispy exterior.
Step 2: Double-Coat and Fry to Golden Perfection
Heat 2 cups Vegetable Oil in a deep skillet to 350°F. Working in batches, dredge each piece of chicken first in the flour, shaking off excess, then dip in the egg mixture, and finally coat in the cornstarch mixture. Press gently to adhere.
Fry the coated chicken for 6-8 minutes until golden brown and the internal temperature reaches 165°F. Don’t overcrowd the pan—this lowers the oil temperature and results in soggy coating. Transfer to a wire rack to drain excess oil.
Step 3: Create the Honey-Glaze Sauce
In a clean saucepan, combine 0.5 cup Honey, 3 tbsp Soy Sauce, and 1 tbsp Rice Vinegar. Simmer over medium heat for 3-4 minutes until slightly thickened, stirring frequently to prevent burning.
The vinegar cuts through the sweetness while the soy sauce adds umami depth. You’ll know it’s ready when it coats the back of a spoon but still drizzles easily.
Step 4: Toss and Garnish for Maximum Crunch
While the chicken is still hot, transfer it to a large bowl and pour the glaze over. Toss gently with a spatula to coat evenly—work quickly so the coating stays crisp. The glaze will thicken slightly as it hits the hot chicken.
Garnish immediately with 2 tbsp Sesame Seeds and 4 whole Green Onions, thinly sliced. The sesame seeds add nutty crunch while the green onions provide fresh contrast. Serve at once while the coating remains at its crispest.
Pro Tips For Making Crispy Sweet Chicken
- Double Dredge: Dip the chicken in egg, then flour, then back in egg and cornstarch—this double coating is what gives that extra crunch that holds up to the honey glaze.
- Pat Dry First: I learned this the hard way—blot the chicken thighs with paper towels before dredging, or the coating slides right off instead of crisping up.
- Hot Oil, Small Batches: Use oil at 350°F and fry in small batches to avoid steaming the chicken, which turns the crust soggy before it even starts.
- Warm the Honey: Sounds weird, but it works: microwave the honey for 10-15 seconds before tossing with the cooked chicken so it coats evenly instead of pooling at the bottom.
Common Mistakes When Making This Dish
Skipping the Drying Step
Pat the chicken completely dry with paper towels before coating. Moisture creates steam during frying, which softens the coating and prevents crispiness. I use 3-4 paper towels to ensure every piece is bone-dry before dredging. 💡
Overcrowding the Pan
Fry in small batches to maintain 350°F oil temperature. Crowding drops the temperature, leading to greasy, soggy chicken. I use a deep cast-iron skillet and fry no more than 6-8 pieces at a time. Use a thermometer to monitor oil temp.
Insufficient Double-Coating
Press the cornstarch mixture firmly onto each piece after the egg dip. A light dusting won’t create that signature crunch. I find using one hand for wet ingredients and one for dry prevents clumping. Shake off excess gently to avoid thick, gummy spots.
Premature Glazing
Wait until the chicken is golden brown before adding the honey glaze. Adding it too early causes burning. I keep the glaze warm in a small saucepan and work quickly—toss while the chicken is still piping hot so the glaze adheres perfectly.
Skipping the Wire Rack
Drain fried chicken on a wire rack, not paper towels. Paper towels trap steam, making the coating soggy. I place a rack over a baking sheet to catch drips. This allows air circulation, keeping every piece crispy while you finish frying.
Ignoring Oil Temp Recovery
Let the oil return to 350°F between batches. Adding cold chicken lowers the temperature significantly. I wait 2-3 minutes between batches, testing with a wooden chopstick—it should sizzle vigorously when inserted. 🔥
Nutrition Facts
Frequently Asked Questions
What oil works best for frying?
Use vegetable, peanut, or canola oil for their high smoke points. Avoid olive oil as it burns at frying temps. Maintain 350°F for crisp results.
Can I bake instead of fry?
Yes, at 400°F for 20-25 minutes, flipping halfway. Spray with oil first for extra crunch. The texture won’t be identical but still delicious.
How do I keep the coating crispy longer?
Drain on a wire rack, not paper towels. Store in a single layer in the oven at 200°F until serving. Re-crisp in the oven if needed.
Can I make the glaze ahead?
Prepare the honey mixture up to 2 days ahead. Reheat gently before tossing with hot chicken. Avoid boiling to prevent thickening too much.

- Recipe For Zucchini Rice Casserole: Cheesy Bake With Garden Freshness - September 25, 2026
- Somali Banana and Rice Recipe: Sweet and Spiced East African Tradition - September 25, 2026
- Rice Valenciana Recipe: Festive Saffron and Chicken One-Pan Feast - September 25, 2026