
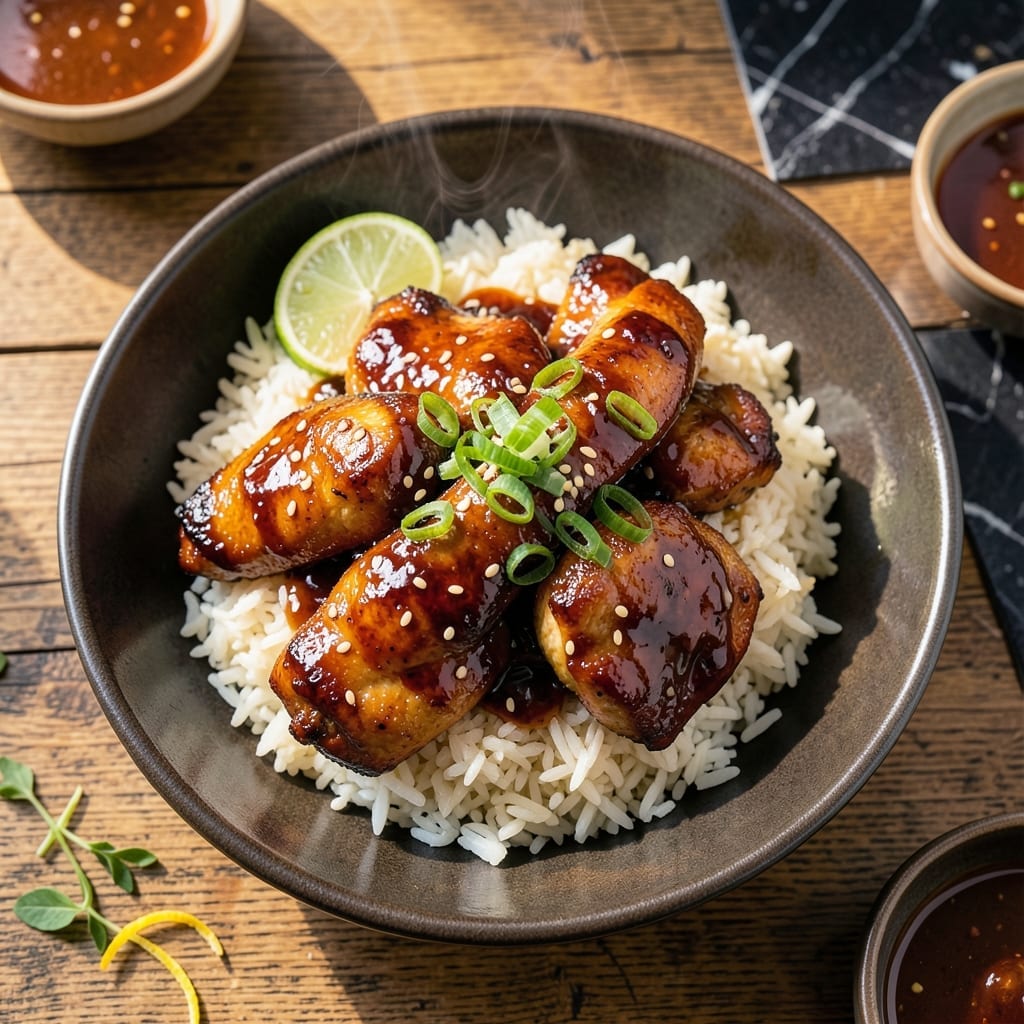
There’s a reason homemade teriyaki chicken outshines takeout—fresh ingredients and a perfectly balanced glaze make all the difference. This recipe delivers juicy thighs coated in a sticky, savory-sweet sauce that clings to every bite.
The key lies in the marinade and reduction process. A simple blend of soy sauce, brown sugar, and garlic transforms into a glossy glaze that caramelizes beautifully under the broiler or on the stovetop.
With minimal effort, you’ll achieve restaurant-quality results at home. The chicken stays tender while the sauce thickens into that signature shine.
Serve over rice with steamed vegetables for a complete meal. Here’s how to make it.
Ingredients for Homemade Teriyaki Chicken
Fresh chicken, bold glaze ingredients, and pantry staples create this restaurant-quality dish.
| Ingredient | Amount | Notes |
|---|---|---|
| Boneless Skinless Chicken Thighs 🍗 | 2 lb | Patted dry for even cooking |
| Soy Sauce 🫒 | ¾ cup | Low-sodium preferred for balance |
| Brown Sugar 🍚 | ½ cup | Light or dark works well |
| Fresh Garlic Cloves 🧄 | 4 cloves | Minced finely for maximum flavor |
| Fresh Ginger Root 🌿 | 1 tbsp | Grated for smooth texture |
| Rice Vinegar 🍋 | 2 tbsp | Or substitute apple cider vinegar |
| Sesame Oil 🫒 | 1 tbsp | Toasted for depth of flavor |
| Cornstarch 🌾 | 1 tbsp | For thickening the glaze |
| Water 💧 | ¼ cup | For cornstarch slurry |
| Neutral Cooking Oil 🫒 | 2 tbsp | For searing chicken thighs |
| Toasted Sesame Seeds 🌰 | 1 tbsp | For garnish and crunch |
| Green Onions 🧅 | 3 whole | Thinly sliced for garnish |
| Kosher Salt 🧂 | ½ tsp | Adjust to taste after reduction |
| Ground Black Pepper 🌶️ | ¼ tsp | Freshly ground preferred |
The chicken thighs are non-negotiable here—bone-in works too but boneless cooks faster and stays juicier. Look for thighs with good marbling at Whole Foods or your butcher; even Costco’s organic pack is excellent. Soy sauce quality matters: Kikkoman or San-J for consistent flavor. Fresh ginger and garlic make the glaze sing, so don’t skip them (the jarred stuff just won’t cut it).
No brown sugar? Honey or maple syrup at a 1:1 ratio works, but the flavor profile shifts slightly sweeter. Tamari for gluten-free instead of soy sauce. Out of rice vinegar? White wine vinegar in a pinch, though it’s sharper. For extra depth, a splash of mirin (find it at Asian markets) elevates the sauce beautifully. Skip the cornstarch? Reduce the sauce longer for natural thickening.
Leftovers keep 4-5 days refrigerated in an airtight container. The glaze thickens as it cools—reheat gently with a splash of water to loosen. Freeze portions for up to 3 months; thaw overnight before reheating. Always garnish fresh with sesame seeds and green onions for that restaurant touch.
Why You’ll Love This Recipe
- One Pan Wonder: I toss everything in and let the oven do the work—no babysitting required.
- Sticky Sweet Bite: The brown sugar caramelizes with the soy sauce for that irresistible glaze on every piece.
- Feeds a Crowd: I double the batch and it disappears faster than I can pack leftovers.
- Pantry Staples: Between us, I always have soy sauce, sugar, and chicken thighs on hand—no last-minute store runs.
Step-by-Step Instructions for Homemade Teriyaki Chicken
Achieve perfect balance of sweet and savory with this tested technique for exceptionally tender results.
Step 1: Prepare and Season the Chicken Thighs
Pat the 2 lb Boneless Skinless Chicken Thighs completely dry with paper towels to ensure even browning. Trim any excess fat if desired, though a small amount adds flavor. Season both sides evenly with the 0.5 tsp Kosher Salt and 0.25 tsp Ground Black Pepper.
This drying step is critical—moisture on the surface causes steam instead of searing, which prevents that desirable caramelized crust. The seasoning should be visible on the meat but not overpowering. Let the seasoned thighs sit at room temperature for 10-15 minutes while you prepare the sauce.
Step 2: Create the Teriyaki Glaze Base
In a medium bowl, whisk together the 0.75 cup Soy Sauce, 0.5 cup Brown Sugar, minced 4 cloves Fresh Garlic Cloves, grated 1 tbsp Fresh Ginger Root, 2 tbsp Rice Vinegar, and 1 tbsp Sesame Oil until the brown sugar fully dissolves. The mixture should be smooth with no visible sugar granules.
Taste the sauce base at this stage—it should be strongly flavored since it will reduce and mellow during cooking. The soy sauce provides the salty backbone, while the brown sugar adds depth and caramelization. Set this mixture aside while you cook the chicken.
Step 3: Sear and Cook the Chicken
Heat the 2 tbsp Neutral Cooking Oil in a large skillet over medium-high heat until it shimmers but doesn’t smoke. Add the chicken thighs in a single layer, working in batches if necessary to avoid crowding. Sear undisturbed for 4-5 minutes per side until deep golden brown and the internal temperature reaches 165°F.
The chicken should release easily from the pan when properly seared. Avoid moving it prematurely—this prevents the development of a flavorful fond on the pan bottom. Transfer the cooked thighs to a plate and tent with foil to keep warm.
Step 4: Thicken and Reduce the Glaze
Pour the reserved sauce mixture into the same skillet and bring to a boil over medium heat. In a small bowl, whisk together the 1 tbsp Cornstarch and 0.25 cup Water to create a smooth slurry. Slowly pour this into the simmering sauce while whisking constantly.
The glaze will thicken visibly within 1-2 minutes of adding the slurry. Continue cooking and stirring for another 2-3 minutes until the sauce coats the back of a spoon and has reduced by about one-third. The consistency should be syrupy but still pourable.
Step 5: Glaze and Garnish the Chicken
Return the chicken thighs to the skillet and spoon the thickened glaze over each piece, turning to coat evenly. Cook for an additional 1-2 minutes to allow the flavors to meld. The glaze should cling to the chicken with a glossy, sticky finish.
Transfer to a serving platter and garnish with the thinly sliced 3 whole Green Onions and 1 tbsp Toasted Sesame Seeds. The green onions add a fresh contrast, while the sesame seeds provide textural crunch. Serve immediately while the glaze is still warm and fluid.
Pro Tips For Making Homemade Teriyaki Chicken
- Sear First, Sauce Later: I learned this the hard way—browning the chicken thighs in a hot pan before adding the teriyaki sauce prevents soggy meat and builds a deeper flavor. About 3-4 minutes per side on medium-high heat does the trick.
- Grate the Ginger Fine: Sounds tedious, but finely grating the fresh ginger root (about 1 tablespoon) blends seamlessly into the sauce instead of leaving chewy bits. A microplane works best—no one wants surprise ginger chunks.
- Skip the Overcrowding: Resist the urge to cram all the thighs into one pan. Cooking in batches guarantees a proper sear and keeps the sauce from steaming the chicken instead of caramelizing it.
- Simmer the Sauce: After combining soy sauce, brown sugar, garlic, and ginger, let it bubble for 2-3 minutes on medium-low to thicken slightly. This small step actually changes the outcome from watery to glossy, sticky perfection.
Best Sauces and Condiments for This homemade teriyaki chicken
Spicy Sriracha Drizzle
Mix 2 tbsp sriracha with 1 tbsp honey and 1 tsp rice vinegar for a sweet-spicy kick. Drizzle lightly over the chicken just before serving. This adds heat without overpowering the teriyaki’s balance. 🌶️
Creamy Garlic Aioli
Whisk ½ cup mayo with 1 minced garlic clove and 1 tsp lemon juice. The cool creaminess contrasts beautifully with the sticky glaze. I love this for dipping extra chicken pieces.
Quick Pickled Vegetables
Toss thinly sliced cucumbers and carrots with ¼ cup rice vinegar, 1 tsp sugar, and ½ tsp salt. Let sit for 20 minutes before serving. The tang cuts through the richness perfectly.
Sesame-Ginger Finish
Toast 1 tbsp sesame seeds with ½ tsp grated ginger in a dry pan for 1-2 minutes. Sprinkle over the dish for extra aroma. This simple touch makes it taste restaurant-made.
Citrus Zest Boost
Add 1 tsp orange or lime zest to the glaze during the final minute of cooking. The bright citrus notes elevate the sauce’s depth. I always keep a microplane for this.
Nutrition Facts
Frequently Asked Questions
Can I use chicken breast instead of thighs?
Yes, but thighs stay juicier due to higher fat content. If using breasts, reduce cooking time to 5-6 minutes per side and monitor internal temp to avoid dryness.
How do I make the glaze thicker?
Simmer the sauce longer after adding the cornstarch slurry. For extra thickness, mix an additional 1 tsp cornstarch with 1 tbsp water and stir in gradually.
Can I make this ahead of time?
Cook the chicken and glaze separately, then combine when reheating. Store in an airtight container for up to 3 days in the fridge. Reheat gently on the stove.
What if my sauce is too salty?
Balance it with a touch of honey or brown sugar. Adding 1-2 tbsp water and reducing further can also help mellow the flavor.

- Jollof Rice Sauce Recipe: West African Tomato and Spice Infusion - September 25, 2026
- Japanese Rice Soup Recipe: Umami-Rich Comfort in a Bowl - September 25, 2026
- Homemade Cream Of Rice Recipe: Silk-Smooth Breakfast in Minutes - September 25, 2026