
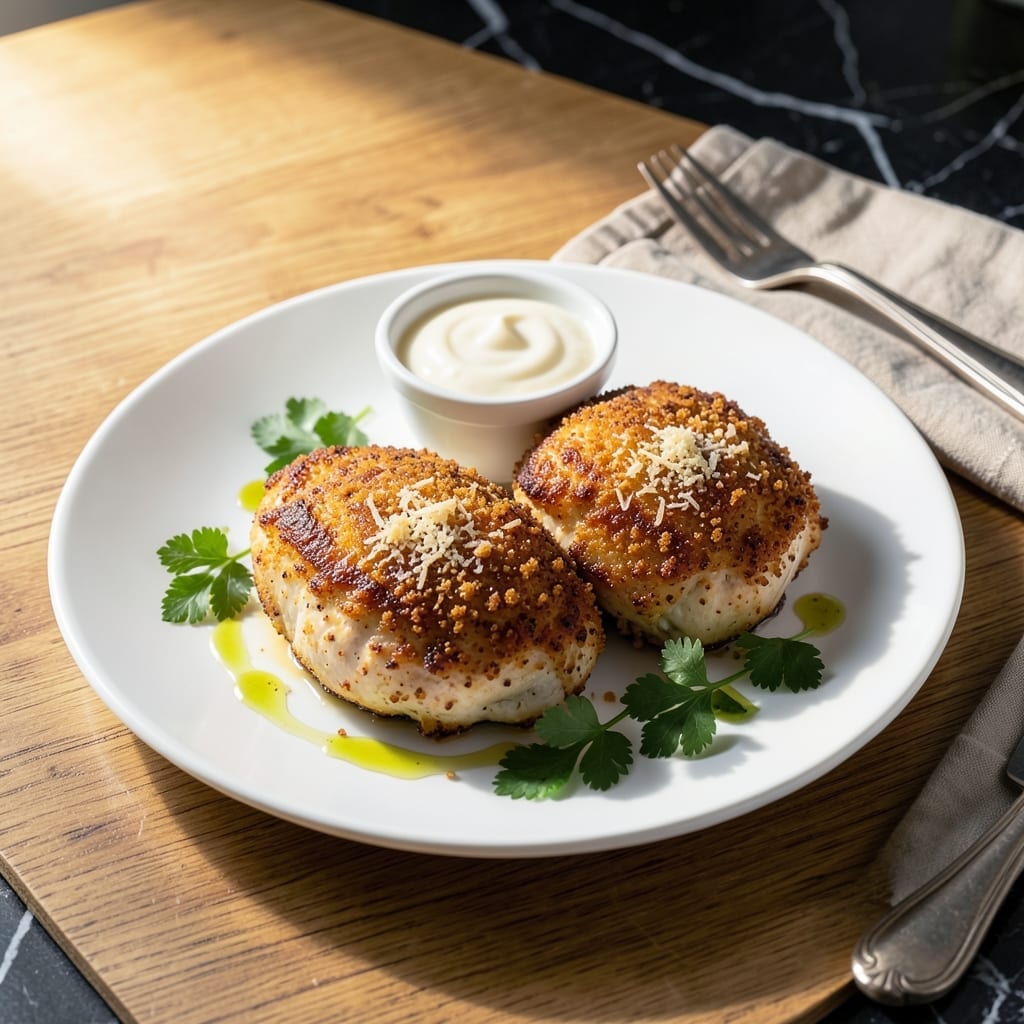
There’s an art to achieving golden breaded crunch while keeping the chicken inside perfectly juicy. This method delivers consistent results without the guesswork.
The key lies in a double-coating technique and precise frying temperature. Each bite offers shatteringly crisp texture on the outside and tender meat within. No dry or greasy outcomes here.
Whether pan-frying or oven-baking, this approach ensures even cooking and maximum flavor. The breading stays put, and the meat retains its moisture throughout.
Serve it hot for the best experience. The contrast between the crisp crust and succulent chicken makes every bite satisfying.
Ingredients for Crusted Chicken
Pantry staples plus a few fresh items deliver that golden breaded crunch with perfectly juicy meat.
| Ingredient | Amount | Notes |
|---|---|---|
| Chicken Breasts 🍗 | 1 ½ lb | Boneless, skinless, pounded to even thickness |
| All-Purpose Flour 🌾 | 1 cup | For initial dredging layer |
| Large Eggs 🥚 | 2 whole | Beaten for binding breading |
| Buttermilk 🥛 | ½ cup | For egg wash mixture |
| Panko Breadcrumbs 🍞 | 2 cups | Japanese-style for maximum crunch |
| Grated Parmesan Cheese 🧀 | ½ cup | Freshly grated from block |
| Garlic Powder 🧄 | 1 tsp | For seasoning breading mixture |
| Onion Powder 🧅 | 1 tsp | For seasoning breading mixture |
| Paprika 🌶️ | 1 tsp | Sweet or smoked variety |
| Salt 🧂 | 1 tsp | Diamond Crystal kosher preferred |
| Black Pepper 🌶️ | ½ tsp | Freshly ground preferred |
| Vegetable Oil 🫒 | 1 ½ cups | For frying, high smoke point |
| Cornstarch 🌾 | 2 tbsp | For extra crispiness in breading |
The chicken quality is paramount. Boneless, skinless breasts from a reputable butcher or Whole Foods ensure tenderness. Pound them to an even 1/2-inch thickness for consistent cooking. Panko breadcrumbs (found in the Asian aisle) are non-negotiable for that shatteringly crisp texture—regular breadcrumbs won’t achieve the same result.
No buttermilk? Whole milk plus 1 tbsp vinegar or lemon juice works in a pinch. For a gluten-free version, swap the flour for cornstarch or rice flour and use gluten-free panko. The Parmesan can be Pecorino Romano for a sharper flavor, or omitted entirely if avoiding dairy. Fresh herbs like thyme or rosemary can be added to the breading for extra depth.
Breaded chicken is best served immediately, but leftovers keep for 2-3 days in the fridge. Reheat in a 350°F oven for 10-12 minutes to restore crispness (microwaving will make it soggy). For make-ahead, bread the chicken and refrigerate up to 4 hours before cooking.
Why You’ll Love This Recipe
- One Pan Wonder: I just coat, bake, and serve—no fancy techniques, just a sheet pan and that golden panko crust.
- That Crunch Though: The buttermilk soak keeps it juicy while the panko gives it that irresistible crispy bite every time.
- Weeknight Hero: I throw this together on busy Tuesdays and it still feels like a treat—kids devour it, adults love it.
- Leftovers? Yes Please: Honestly, it tastes even better the next day in a sandwich or chopped over salad. No waste, all flavor.
Step-by-Step Instructions for Crusted Chicken
Master the technique for achieving an irresistibly crispy coating while maintaining juicy, tender meat.
Step 1: Prepare and Season the Chicken Breasts
Begin by pounding the 1.5 lb Chicken Breasts to an even ½-inch thickness using a meat mallet. This ensures uniform cooking and prevents dry, overcooked edges. Pat the breasts completely dry with paper towels—moisture is the enemy of crispiness.
Season both sides generously with 1 tsp Salt and 0.5 tsp Black Pepper. This initial seasoning penetrates the meat, enhancing flavor throughout. Let the chicken rest at room temperature for 10 minutes to allow the seasoning to adhere and the meat to cook more evenly.
Step 2: Set Up the Breading Stations
Create three shallow dishes for breading. In the first, combine 1 cup All-Purpose Flour and 2 tbsp Cornstarch. The cornstarch adds extra crispiness to the final coating. In the second dish, whisk together 2 whole Large Eggs and 0.5 cup Buttermilk until smooth.
In the third dish, mix 2 cups Panko Breadcrumbs, 0.5 cup Grated Parmesan Cheese, 1 tsp Garlic Powder, 1 tsp Onion Powder, and 1 tsp Paprika. The paprika adds a subtle depth of flavor and a hint of color to the crust.
Step 3: Bread the Chicken with Precision
Dredge each chicken breast in the flour-cornstarch mixture, pressing lightly to adhere. Shake off any excess—too much flour creates a gummy layer under the breading. Next, dip the floured chicken into the egg-buttermilk mixture, allowing any excess to drip off for 5 seconds.
Finally, press the chicken into the panko mixture, ensuring full coverage on all sides. I use one hand for wet ingredients and one for dry to prevent clumping. Place the breaded chicken on a wire rack set over a baking sheet and let it rest for 10 minutes to help the coating set.
Step 4: Fry to Golden Perfection
Heat 1.5 cups Vegetable Oil in a large, heavy skillet over medium-high heat until it reaches 350°F. Use a deep-fry thermometer for accuracy—oil that’s too cool results in greasy breading, while oil that’s too hot burns the exterior before the meat cooks through.
Carefully place the breaded chicken in the hot oil, working in batches to avoid crowding. Fry for 4-5 minutes per side until the coating is deep golden brown and the internal temperature reaches 165°F. Transfer to a wire rack or paper towels to drain excess oil.
Let the chicken rest for 5 minutes before serving. This brief rest allows the juices to redistribute, ensuring every bite is moist and flavorful beneath the crispy crust.
Pro Tips For Making Crusted Chicken
- Pound the Breasts: Even thickness means even cooking—pound the chicken to about ½-inch so the crust browns before the meat dries out.
- Chill the Coating: I learned this the hard way: pop the floured, egg-dipped, and crumb-coated chicken in the fridge for 10 minutes before frying to prevent the breading from sliding off.
- Skip the Overcrowding: Sounds obvious, but resist the urge to cram all the pieces in the pan—give them space or they’ll steam instead of crisp.
- Use Cold Buttermilk: After a few soggy batches, I finally figured out that chilled buttermilk makes the coating stick better and keeps the crust from absorbing too much oil.
Storing and Reheating This Dish
Refrigerator Storage
Let your creation cool completely before storing—this prevents condensation from making the breading soggy. Transfer to an airtight container with paper towels between layers. It keeps well for 2-3 days at 40°F or below. ❄️
Freezer Storage
For longer storage, wrap each piece individually in plastic wrap, then place in a freezer bag. Squeeze out all air to prevent freezer burn. It freezes beautifully for up to 1 month without losing texture or flavor.
Oven Reheating
Preheat your oven to 350°F for the best results. Place the chicken on a wire rack over a baking sheet to allow air circulation. Heat for 10-12 minutes until the internal temperature reaches 165°F. 🔥
Air Fryer Method
If you’re in a hurry, the air fryer works wonders. Set to 375°F and reheat for 4-5 minutes. Check halfway through to ensure the breading doesn’t over-brown. This method restores crispiness almost as well as the oven.
Avoid the Microwave
While tempting for speed, microwaving turns that perfect crust soggy. If you must use one, place a paper towel under and over the chicken. Heat on 50% power for 1-2 minutes only.
Nutrition Facts
Frequently Asked Questions
Can I use regular breadcrumbs instead of panko?
Panko creates maximum crunch, but regular breadcrumbs work in a pinch. The texture will be less crispy and more dense. For best results, toast regular breadcrumbs in a dry pan for 2-3 minutes before using.
Why does the breading fall off during cooking?
This usually happens if the chicken isn’t dry before breading or if you skip the resting step. Always pat the meat completely dry and let breaded pieces rest for 10 minutes before frying.
Can I bake instead of fry?
Bake on a wire rack at 400°F for 18-20 minutes, flipping halfway. Spray the breading lightly with oil first for extra crispiness. The texture won’t be identical but still delicious.
How do I know when it’s fully cooked?
Use a meat thermometer to check the thickest part—it should read 165°F. The juices should run clear when pierced, and the breading should be deep golden brown.

- Jollof Rice Sauce Recipe: West African Tomato and Spice Infusion - September 25, 2026
- Japanese Rice Soup Recipe: Umami-Rich Comfort in a Bowl - September 25, 2026
- Homemade Cream Of Rice Recipe: Silk-Smooth Breakfast in Minutes - September 25, 2026