
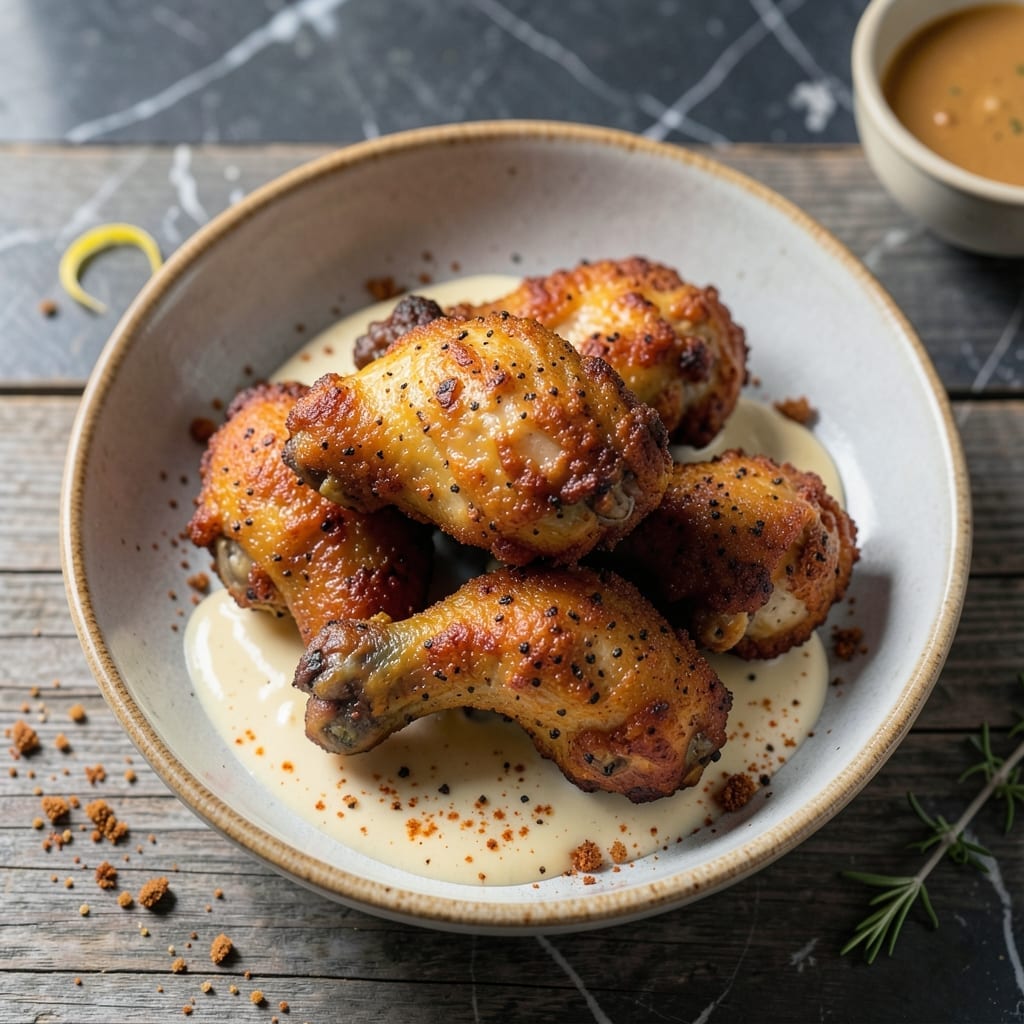
This recipe delivers crispy, golden-brown fried chicken with a secret spice blend that sets it apart. I developed this method after years of testing to achieve that perfect crunch without compromising on juicy, tender meat inside.
The key is a two-step process: a flavorful buttermilk marinade that tenderizes the chicken, followed by a well-seasoned flour coating. The spice blend is carefully balanced to enhance, not overpower, the natural taste of the chicken.
Frying at the right temperature ensures even cooking and that signature crispy exterior. Each piece emerges with a shatteringly thin crust that gives way to moist, flavorful meat with every bite.
Serve hot with your favorite sides for a meal that’s sure to impress. The results speak for themselves.
Ingredients for Danny’s Fried Chicken
Buttermilk, bold spices, and chicken. That’s the foundation for this crowd-pleaser.
| Ingredient | Amount | Notes |
|---|---|---|
| Chicken Thighs and Drumsticks 🍗 | 3 lb | Bone-in, skin-on for crispiness |
| Buttermilk 🥛 | 2 cups | Full-fat for tenderizing power |
| All-Purpose Flour 🌾 | 3 cups | Plus extra for dredging |
| Kosher Salt 🧂 | 2 tbsp | Diamond Crystal preferred for balance |
| Black Pepper 🌶️ | 2 tsp | Freshly ground for punch |
| Paprika 🌶️ | 2 tbsp | Sweet or smoked for depth |
| Garlic Powder 🧄 | 2 tsp | Not garlic salt for pure flavor |
| Onion Powder 🧅 | 2 tsp | Fresh ground for best results |
| Cayenne Pepper 🔥 | ½ tsp | Adjust for desired heat level |
| Dried Thyme 🌿 | 1 tsp | Crushed between fingers to release oils |
| Dried Oregano 🍃 | 1 tsp | Mediterranean variety preferred |
| Vegetable Oil 🫒 | 4 cups | High smoke point for frying |
| Hot Sauce 🌶️ | 2 tbsp | Added to buttermilk for tang |
The chicken is non-negotiable here—bone-in, skin-on thighs and drumsticks give you that shatteringly crisp crust and juicy meat. Costco or Sam’s Club have great bulk options if you’re feeding a crowd. Buttermilk matters too: full-fat has the acidity to really tenderize. Look for the real thing, not the cultured buttermilk substitute (it’s not even close).
No buttermilk? Whole milk plus 1 tbsp vinegar per cup works in a pinch. Swap the paprika for smoked paprika if you want a deeper, almost barbecue vibe. Out of cayenne? Red pepper flakes at half the amount. The flour coating can handle a tablespoon or two of cornstarch for extra crunch (worth trying).
Marinate the chicken overnight for maximum tenderness. Leftovers? They won’t be as crispy, but reheat in a 400°F oven for 10-15 minutes to revive the crust. Keeps 3-4 days in the fridge.
Why You’ll Love This Recipe
- One Bowl Magic: I just toss the chicken in buttermilk, then the flour and spices—no fancy steps, no mess.
- Crispy Perfection: That buttermilk marinade locks in juiciness while the crust gets golden and crunchy with just salt and pepper.
- Feeds Everyone: I’ve served this at picnics, potlucks, and lazy Sundays, and the thighs and drumsticks always disappear first.
- Budget Stretch: A bag of thighs and drumsticks costs less than breasts, and leftovers (if there are any) reheat like a dream.
Step-by-Step Instructions for Crispy Fried Chicken
This method delivers that perfect crunch every time—just follow the sequence.
Step 1: Marinate the Chicken in Spiced Buttermilk
In a large bowl, whisk together the 2 cups Buttermilk and 2 tbsp Hot Sauce until smooth. I always taste it first—you should detect a tangy kick that tells you it’s working. Add all 3 lb Chicken Thighs and Drumsticks, ensuring each piece is fully submerged.
Cover and refrigerate for at least 4 hours, or ideally overnight. The buttermilk tenderizes the meat while the hot sauce adds depth. You’ll notice the chicken plumps slightly and the surface turns pale—this means the marinade is doing its job.
Step 2: Prepare the Seasoned Flour Dredge
In a large, shallow dish, combine the 3 cups All-Purpose Flour, 2 tbsp Kosher Salt, 2 tsp Black Pepper, 2 tbsp Paprika, 2 tsp Garlic Powder, 2 tsp Onion Powder, 0.5 tsp Cayenne Pepper, 1 tsp Dried Thyme, and 1 tsp Dried Oregano. I crush the thyme and oregano between my fingers to release their oils.
Stir until the spices are evenly distributed and the mixture looks uniformly seasoned. This blend is the secret to that bold, balanced flavor in every bite. Set this aside while the chicken finishes marinating.
Step 3: Fry to Golden Perfection
Heat the 4 cups Vegetable Oil in a deep, heavy pot or Dutch oven over medium-high heat until it reaches 350°F. Use a thermometer—this isn’t negotiable. The oil should shimmer but not smoke. If it’s too hot, the outside will burn before the inside cooks.
Working in batches to avoid crowding, remove each piece from the buttermilk, let the excess drip off, then dredge it thoroughly in the seasoned flour. Press the flour onto the chicken so it adheres well. Fry for 12-15 minutes, turning occasionally, until the coating is deep golden brown and the internal temperature hits 165°F.
Step 4: Drain and Rest for Maximum Crispiness
Transfer the fried chicken to a wire rack set over a baking sheet or a paper towel-lined plate. Don’t stack the pieces—this traps steam and turns your crispy masterpiece soggy. The rack allows air to circulate on all sides, keeping the crust shatteringly crisp.
Let the chicken rest for 5-10 minutes before serving. This final step lets the juices settle, ensuring the meat stays moist inside while the crust stays crunchy. Serve hot, and watch it disappear fast—this is the kind of fried chicken people remember.
Pro Tips For Making Danny’S Fried Chicken
- Soak Overnight: Give the chicken a full 12-hour buttermilk bath—I learned this the hard way after my first batch turned out dry and the crust kept falling off.
- Double Dredge: Dip the chicken in flour, then buttermilk, then flour again. Sounds tedious, but that extra layer makes the crust shatter when you bite into it.
- Heat the Oil: Use a thermometer and keep the oil at 350°F. After burning two batches, I finally realized that guesswork just doesn’t cut it with fried chicken.
- Rest Before Frying: Let the dredged chicken sit for 10 minutes before hitting the oil. My grandmother swore by this, and she was right: it keeps the coating from sliding right off.
Essential Equipment for This Dish
Deep Fryer Essentials
For home frying, I swear by my Cuisinart Deep Fryer—it maintains 350°F perfectly and has a large 4-quart capacity. The basket lets you lower food gently without splashing, and the lid helps contain any oil spatter. 🔥
Heavy-Duty Dutch Oven
If you prefer stovetop frying, a Lodge enameled cast iron Dutch oven is my go-to. Its thick walls distribute heat evenly, and the 6-quart size accommodates multiple pieces at once. Just monitor that oil temperature religiously with a clip-on thermometer.
Accurate Thermometer
Never guess your oil temperature. I use the ThermoWorks ChefAlarm with its high-temp probe that can handle up to 500°F. The difference between 340°F and 360°F means the difference between soggy and perfectly crispy chicken.
Dredging Station Setup
For the flour dredge, a large stainless steel mixing bowl gives you room to work. I also keep a wire cooling rack over a baking sheet ready for draining. The rack elevates the chicken so air circulates, preserving that crunch you worked so hard to achieve.
Tongs and Tools
Long 12-inch tongs are essential for safely turning chicken in hot oil. I also keep a slotted spoon handy for removing smaller pieces. Finally, a splatter screen protects your stovetop from oil pops—trust me, it’s worth the $15 investment. 💡
Nutrition Facts
Frequently Asked Questions
Can I use chicken breasts instead of thighs and drumsticks?
You can, but they dry out faster. Stick to bone-in, skin-on thighs and drumsticks for juicier results, or reduce frying time to 8-10 minutes for breasts.
How do I keep the coating from falling off?
Pat the chicken dry before dredging and let the flour adhere for 5 minutes before frying. Also, avoid moving pieces too much while cooking.
What oil works best for frying?
Use oils with a high smoke point like vegetable, peanut, or canola. Avoid olive oil—it burns at frying temps.
How do I reheat leftovers without losing crispiness?
Place on a wire rack in a 400°F oven for 10-15 minutes. Microwaving makes it soggy.

- Chuy’s Green Chili Rice Copycat Recipe: Spicy Southwest Flavor in Every Bite - September 25, 2026
- Beaten Rice Recipe: Fluffy Grains With Nutty Depth - September 25, 2026
- Machboos Rice Recipe: Bahraini Spiced One-Pot Tradition - September 25, 2026