
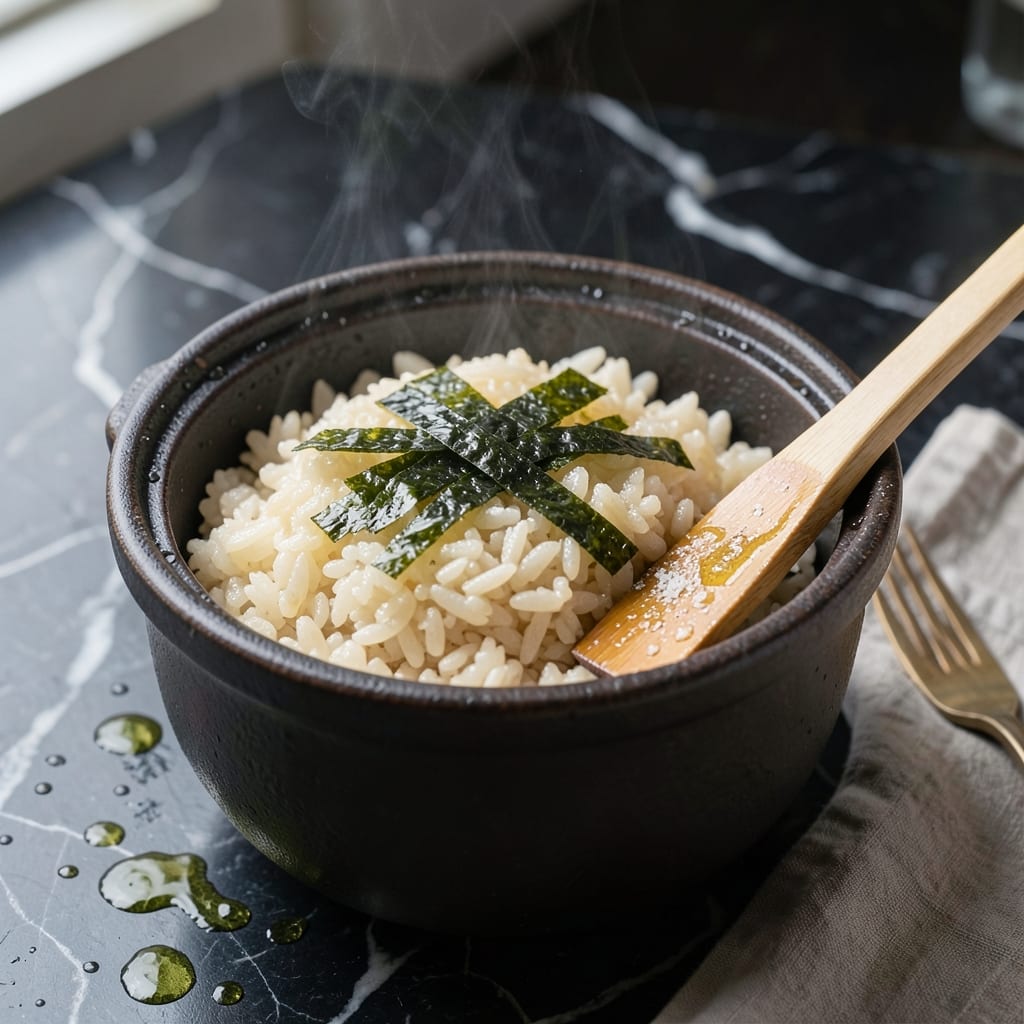
There’s something special about rice cooked in a traditional Japanese donabe clay pot. The thick, unglazed walls distribute heat evenly for perfectly fluffy grains with a crispy bottom layer.
This method captures the essence of traditional Japanese home cooking. The clay pot retains moisture while allowing excess steam to escape, creating rice with ideal texture and subtle nutty notes.
Each batch emerges with distinct sweetness and aroma you can’t achieve with modern rice cookers. The technique requires patience but rewards with exceptional flavor.
Serve this as a foundation for meals or enjoy it plain to appreciate its pure, perfect simplicity. The process connects you to centuries of culinary tradition.
Ingredients for Donabe Rice
Simple ingredients transform into extraordinary rice with this traditional method.
| Ingredient | Amount | Notes |
|---|---|---|
| Japanese Short-Grain Rice 🍚 | 2 cups | Rinsed until water runs clear |
| Water 💧 | 2 ¼ cups | Filtered preferred for best flavor |
| Donabe Clay Pot 🍲 | 1 whole | Unglazed traditional Japanese pot |
| Wooden Rice Paddle 🪵 | 1 whole | For gentle rice handling |
| Kombu Seaweed 🌊 | 1 piece | 2-inch square, optional for umami |
| Sake 🍶 | 1 tbsp | Dry variety for subtle depth |
| Salt 🧂 | ½ tsp | Kosher or sea salt preferred |
| Neutral Oil 🫒 | 1 tsp | For light pot coating |
| White Sesame Seeds 🌰 | 1 tsp | Toasted, for garnish |
| Green Onions 🧅 | 2 whole | Thinly sliced for serving |
| Nori Sheets 🌿 | 1 sheet | Cut into strips, optional garnish |
The rice must be Japanese short-grain—Koshihikari or Nishiki are ideal. Look for it at Asian markets or the international aisle at Whole Foods. The donabe pot is non-negotiable for authentic texture; Iwachi or Iga-style are traditional. Soak your new donabe before first use (follow manufacturer instructions). The kombu adds subtle oceanic sweetness—Mitoku or Eden brands are reliable.
No donabe? A heavy Dutch oven gets you close but won’t replicate the clay’s breathability. Swap sake for dry white wine at equal amounts. For deeper flavor, dashi stock instead of water works beautifully. The sesame seeds can be skipped, but toasting them (even store-bought) adds a nutty finish. If you’re omitting kombu, add a pinch of MSG for umami.
Uncooked rice keeps in a cool, dark place for 6-12 months. The donabe pot should dry completely between uses—never soap, just hot water and a soft brush. Leftover rice? 3-4 days in the fridge, or freeze for 1 month. Reheat with a splash of water to restore moisture.
Why You’ll Love This Recipe
- One Pot Magic: I just rinse the rice, add water and kombu to the donabe, and let the clay pot do all the work—no stirring, no fuss.
- Umami Bomb: The kombu infuses the short-grain rice with a subtle oceanic depth that’s honestly next-level.
- Feeds the Week: I make a big batch on Sunday and it reheats beautifully for lunches or quick dinners.
- Budget Friendly: A pound of short-grain rice and a strip of kombu stretch into multiple meals without breaking the bank.
Step-by-Step Instructions for Donabe Clay Pot Rice
Here’s the method I swear by to achieve that signature crispy bottom and fluffy texture.
Step 1: Prepare the Donabe and Rice
Start by soaking the donabe clay pot in cold water for 10-15 minutes. This prevents cracking from thermal shock when you add hot water later. While it soaks, rinse the 2 cups Japanese short-grain rice in a fine-mesh strainer until the water runs completely clear.
Drain the rice well in the strainer for 5 minutes. Properly rinsed rice ensures clean flavors and prevents a gummy texture. Meanwhile, drain the soaked donabe and pat it dry with a clean towel.
Step 2: Layer Ingredients and Season
Place the rice in the donabe and spread it evenly. Add the 2.25 cups water, then drizzle the 1 tbsp sake and sprinkle the 0.5 tsp salt over the surface. Gently stir with the wooden rice paddle just until the seasonings are evenly distributed.
Add the 1 piece kombu seaweed on top of the rice—this infuses subtle umami as it cooks. Lightly coat the inside rim of the donabe with the 1 tsp neutral oil using a paper towel. This helps create that coveted crispy crust at the bottom.
Step 3: Cook with Precision
Cover the donabe with its lid and place it over medium heat on your stovetop. Bring to a boil—you’ll hear a gentle hissing sound and see steam escaping from the lid. Once boiling, reduce heat to low and simmer for 12-15 minutes.
After the simmering time, turn off the heat completely and let it sit, covered, for another 10 minutes. This resting period allows the rice to steam in its own moisture, ensuring even cooking and that perfect fluffy texture.
Step 4: Fluff and Serve
Remove the lid and discard the kombu seaweed. Use the wooden rice paddle to gently fluff the rice from the bottom up, being careful not to break the grains. You should see a beautiful golden crust at the bottom—this is the prized “okoge” that makes donabe rice special.
Transfer the rice to serving bowls and garnish with the 1 tsp white sesame seeds and thinly sliced 2 whole green onions. For an extra touch, cut the 1 sheet nori into thin strips and sprinkle on top just before serving. The contrast of textures and flavors is what makes this dish truly traditional.
Pro Tips For Making Donabe Rice
- Soak the Rice: Rinse your Japanese short-grain rice until the water runs clear, then soak it for 20-30 minutes before cooking—this guarantees even cooking and that sticky texture donabe rice is famous for.
- Preheat the Donabe: Fill your donabe with water and let it sit for 10 minutes before adding rice, or the clay will absorb too much moisture and leave your grains undercooked.
- Skip the Peek: Resist the urge to lift the lid while cooking—every time you do, you lose precious steam and risk unevenly cooked rice.
- Use Kombu Wisely: Wipe the kombu with a damp cloth to remove grit, then add it to the water while soaking the rice for subtle umami without overpowering the dish.
Dietary Considerations for donabe rice
Gluten-Free Friendly
This creation is naturally gluten-free since the primary ingredient is Japanese short-grain rice. The sake used in the recipe is typically gluten-free, but verify the label if you have celiac disease—some brands add wheat during production.
Vegan Adaptation
The base recipe is already vegan with no animal products. For extra richness, I sometimes add 1 tbsp coconut oil to the water before cooking. This enhances the rice’s natural sweetness without compromising its traditional character.
Low-Sodium Option
To reduce sodium, simply omit the ½ tsp salt or replace it with ½ tsp potassium chloride. The kombu seaweed adds umami naturally, so the dish remains flavorful. I find this works especially well when using high-quality dashi. 💪
Allergen Awareness
The main potential allergen is sesame seeds in the garnish. If you or your guests have a sesame allergy, you can skip them entirely or replace with black sesame seeds (if tolerated) or toasted nori strips for visual appeal.
Diabetic Considerations
White rice has a high glycemic index, but pairing this dish with protein and fiber can help moderate blood sugar response. I recommend serving with grilled fish or steamed vegetables to create a balanced meal. Portion control is also beneficial.
Keto Alternative
Traditional rice isn’t keto-friendly, but you can adapt the technique for cauliflower rice. Sauté 4 cups riced cauliflower with 2 tbsp oil in the donabe, then add ½ cup water and cook covered for 8-10 minutes. The clay pot still imparts that signature earthy flavor.
Nutrition Facts
Frequently Asked Questions
Do I need to soak the donabe before each use?
Yes, soak your donabe in cold water for 10-15 minutes before cooking. This prevents thermal shock and cracking from sudden temperature changes. Always pat it dry before adding ingredients.
Can I use other rice varieties?
Japanese short-grain rice is essential for authentic texture. Long-grain or basmati won’t achieve the same sticky consistency. Brands like Koshihikari or Nishiki work perfectly.
Why did my rice turn out mushy?
Over-rinsing or using too much water causes gummy rice. Rinse just until water runs clear, then use exactly 2.25 cups water per 2 cups rice. Let it rest 10 minutes after cooking.
How do I get that crispy bottom layer?
Lightly coat the pot with 1 tsp oil before adding rice. Cook over medium heat initially, then reduce to low. The crust forms naturally during the final 10-minute rest.

- Jollof Rice Sauce Recipe: West African Tomato and Spice Infusion - September 25, 2026
- Japanese Rice Soup Recipe: Umami-Rich Comfort in a Bowl - September 25, 2026
- Homemade Cream Of Rice Recipe: Silk-Smooth Breakfast in Minutes - September 25, 2026