
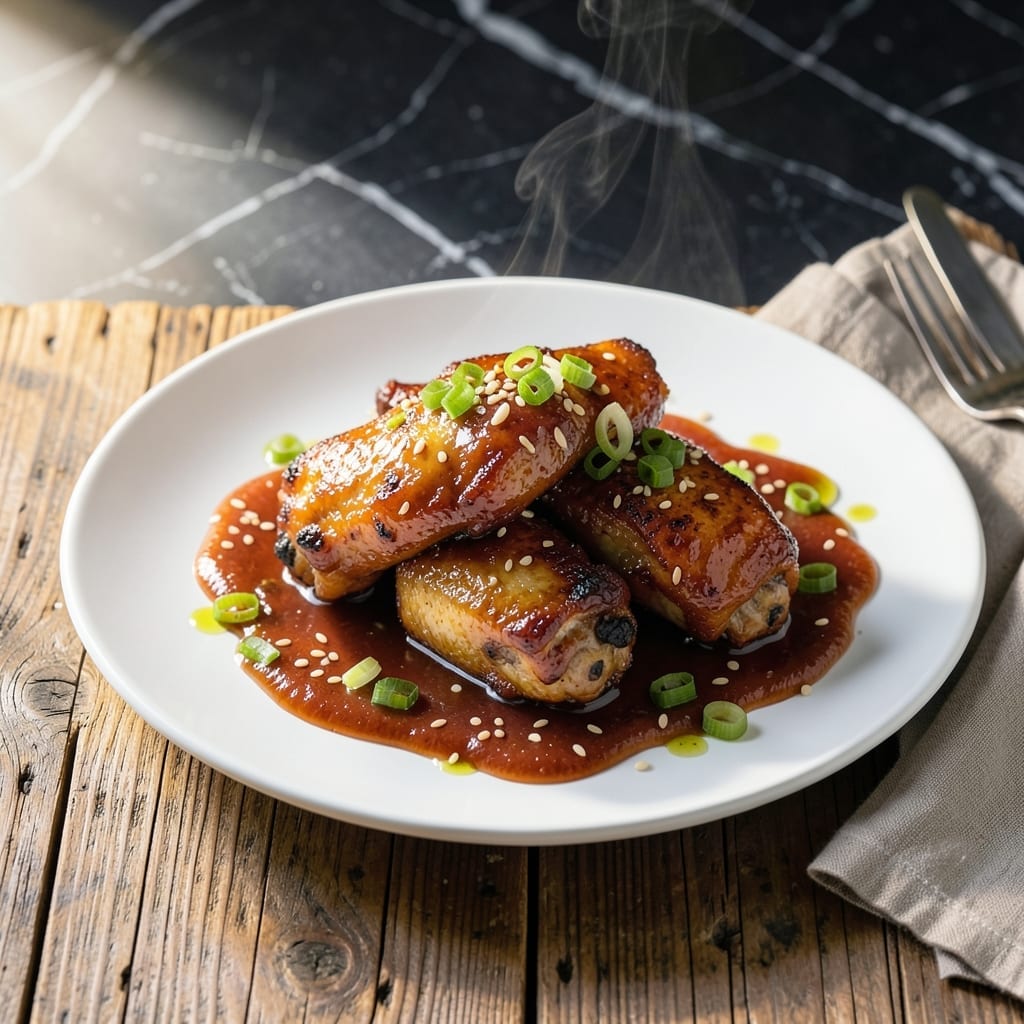
This recipe transforms ordinary chicken into something extraordinary with a unique soda-based glaze. The Dr Pepper creates a perfect balance of sweetness and depth that elevates the dish.
What makes this stand out is how the carbonation helps tenderize the meat while building layers of caramelized flavor. The result is juicy chicken with a sticky, glossy finish that’s both familiar and surprising.
The sauce reduces down to a thick, rich coating that clings to every bite. It’s the kind of dish that gets better as it sits, allowing the flavors to meld together.
Serve it over rice or with roasted vegetables for a complete meal that’s sure to impress.
Ingredients for Dr Pepper Chicken
Ordinary chicken becomes extraordinary with this unique soda-based glaze and a few pantry staples.
| Ingredient | Amount | Notes |
|---|---|---|
| Chicken Thighs 🍗 | 2 lb | Boneless, skinless preferred |
| Dr Pepper 🥤 | 2 cups | Regular, not diet variety |
| Ketchup 🍅 | ½ cup | For sauce base |
| Soy Sauce 🫒 | ¼ cup | Low-sodium preferred |
| Apple Cider Vinegar 🍏 | 2 tbsp | Balances sweetness |
| Brown Sugar 🍚 | ¼ cup | Packed for richness |
| Garlic Cloves 🧄 | 4 cloves | Minced for depth |
| Ginger 🌿 | 1 tbsp | Fresh, grated |
| Cornstarch 🌾 | 2 tbsp | For sauce thickening |
| Olive Oil 🫒 | 2 tbsp | For searing chicken |
| Salt 🧂 | 1 tsp | Kosher or sea salt |
| Black Pepper 🌶️ | ½ tsp | Freshly ground preferred |
| Red Pepper Flakes 🌶️ | ½ tsp | Optional for heat |
The chicken thighs are ideal here—boneless, skinless stay juicy while the glaze caramelizes. Costco or Sam’s Club are great for bulk purchases. The Dr Pepper must be regular (not diet) for the right sugar content to reduce properly. Coke works in a pinch but lacks the spice notes that make this special.
No Dr Pepper? A mix of cola and root beer gets surprisingly close. Out of ketchup? Tomato paste plus a touch of honey (skip the honey if vegan). The brown sugar can be swapped for maple syrup at one-third less volume. Fresh ginger is best, but ground ginger at half the amount works if that’s all you’ve got.
The chicken tastes even better the next day. Store in an airtight container for up to 4 days in the fridge or freeze for 3 months. The sauce thickens as it cools—reheat gently with a splash of water.
Why You’ll Love This Recipe
- One Pan Wonder: I toss everything in a skillet and let the Dr Pepper do the work—no fancy techniques, just set it and forget it.
- Sweet & Tangy: The Dr Pepper caramelizes with the ketchup and vinegar into this sticky, finger-licking glaze on the chicken thighs.
- Weeknight Hero: Honestly, it’s my go-to when I need dinner ready before the kids start asking what’s for dinner.
- Budget Stretcher: A bottle of Dr Pepper and a pack of thighs feed my family for two nights, and the leftovers taste even better.
Step-by-Step Instructions for Dr Pepper Chicken
This method transforms simple ingredients into a glossy, restaurant-worthy dish with balanced sweetness and depth.
Step 1: Sear the Chicken Thighs to Golden Perfection
Pat the 2 lb Chicken Thighs completely dry with paper towels to ensure a good sear. Season both sides evenly with the 1 tsp Salt, 0.5 tsp Black Pepper, and 0.5 tsp Red Pepper Flakes—this builds flavor in every bite.
Heat the 2 tbsp Olive Oil in a large skillet over medium-high heat until shimmering. Add the chicken and cook for 5-6 minutes per side until deep golden brown and crisp. Don’t crowd the pan; work in batches if needed. Remove the chicken and set aside.
Step 2: Build the Soda-Infused Sauce Base
In the same skillet, add the 4 cloves Garlic Cloves and 1 tbsp Ginger. Sauté for 1-2 minutes until fragrant, stirring constantly to prevent burning. These aromatics form the backbone of the sauce’s complex flavor.
Pour in the 2 cups Dr Pepper, 0.5 cup Ketchup, 0.25 cup Soy Sauce, 2 tbsp Apple Cider Vinegar, and 0.25 cup Brown Sugar. Stir well to combine. Bring to a gentle simmer and cook for 5-7 minutes until reduced by about half and slightly thickened.
Step 3: Thicken and Finish the Glaze
In a small bowl, mix the 2 tbsp Cornstarch with 2 tbsp of cold water to create a slurry. Slowly pour this into the simmering sauce while stirring constantly. Continue cooking for 2-3 minutes until the glaze reaches a syrup-like consistency that coats the back of a spoon.
The sauce should be glossy and thick enough to cling to the chicken. If it’s too thin, simmer a bit longer. If too thick, add a splash of water. Taste and adjust seasoning if needed, though the soy sauce and ketchup typically provide enough saltiness.
Step 4: Coat and Serve the Chicken
Return the seared chicken to the skillet, turning each piece to coat evenly in the glaze. Simmer for 3-4 minutes until the chicken is heated through and fully glazed. The sauce should bubble gently around the edges, creating a beautiful sheen.
Transfer the chicken to a serving platter, spooning extra sauce over the top. The glaze should be sticky and slightly caramelized, with a balance of sweet, tangy, and umami flavors. Serve immediately with rice or steamed vegetables to soak up the rich sauce.
Pro Tips For Making Dr Pepper Chicken
- Sear the Thighs: Brown the chicken thighs well in the pan before adding liquids—this builds deep flavor that carries through the Dr Pepper glaze.
- Reduce the Soda: Simmer the Dr Pepper for 5-7 minutes first to cook off the carbonation and concentrate the sweetness, or your sauce will taste flat.
- Skip the Skinless: I learned this the hard way—skin-on thighs stay juicier and render fat that enriches the soy-ketchup-vinegar sauce.
- Balance the Tang: Taste before serving and add a pinch of sugar if the apple cider vinegar overpowers the Dr Pepper’s caramel notes.
Make-Ahead Tips for This Recipe
Overnight Marinade
For maximum flavor, marinate the chicken in the sauce mixture overnight. Combine 2 cups Dr Pepper, 0.5 cup ketchup, and 0.25 cup soy sauce in a bowl, then add the chicken. Refrigerate for 8-12 hours—the carbonation tenderizes the meat beautifully. 💡
Sauce Prep Ahead
The glaze can be made 2 days in advance. Prepare the sauce as directed, then store it in an airtight container in the fridge. Reheat gently before adding the chicken, and thin with water if needed.
Partial Cooking
Sear the chicken and make the sauce, then stop. Store both separately in the fridge for up to 24 hours. When ready, finish cooking the chicken in the sauce for 8-10 minutes until heated through.
Freezer-Friendly
Cook the dish completely, then cool and freeze in single-serving portions for up to 3 months. Thaw overnight in the fridge before reheating. The flavors deepen over time, making it taste even better.
Reheating Tips
For best results, reheat on the stovetop over low heat with a splash of water. Cover the pan to retain moisture. Microwave works in 30-second bursts, stirring between each. 🔥
Day-Of Shortcut
If short on time, prep all ingredients the night before. Measure the brown sugar, cornstarch, and spices, and store them in small containers. This speeds up the cooking process significantly.
Nutrition Facts
Frequently Asked Questions
Can I use chicken breasts instead of thighs?
Yes, but adjust cooking time. Breasts cook faster and can dry out. Reduce searing to 4-5 minutes per side and simmer in sauce for only 2-3 minutes. Thighs are recommended for juicier results.
What if I don’t have Dr Pepper?
Use regular cola plus 1/4 tsp cinnamon and 1/8 tsp nutmeg to mimic the spice notes. Root beer works too but may be sweeter. Avoid diet sodas—they lack needed sugar.
How do I prevent the sauce from being too thin?
Simmer the sauce 2-3 minutes longer before adding chicken. If still thin, mix extra 1 tbsp cornstarch with water and stir in. The sauce thickens more as it cools.
Can I make this in a slow cooker?
Yes! Sear chicken first, then combine all ingredients in the cooker. Cook on low for 4-5 hours or high for 2-3 hours. Thicken sauce afterward if needed.

- Jollof Rice Sauce Recipe: West African Tomato and Spice Infusion - September 25, 2026
- Japanese Rice Soup Recipe: Umami-Rich Comfort in a Bowl - September 25, 2026
- Homemade Cream Of Rice Recipe: Silk-Smooth Breakfast in Minutes - September 25, 2026