
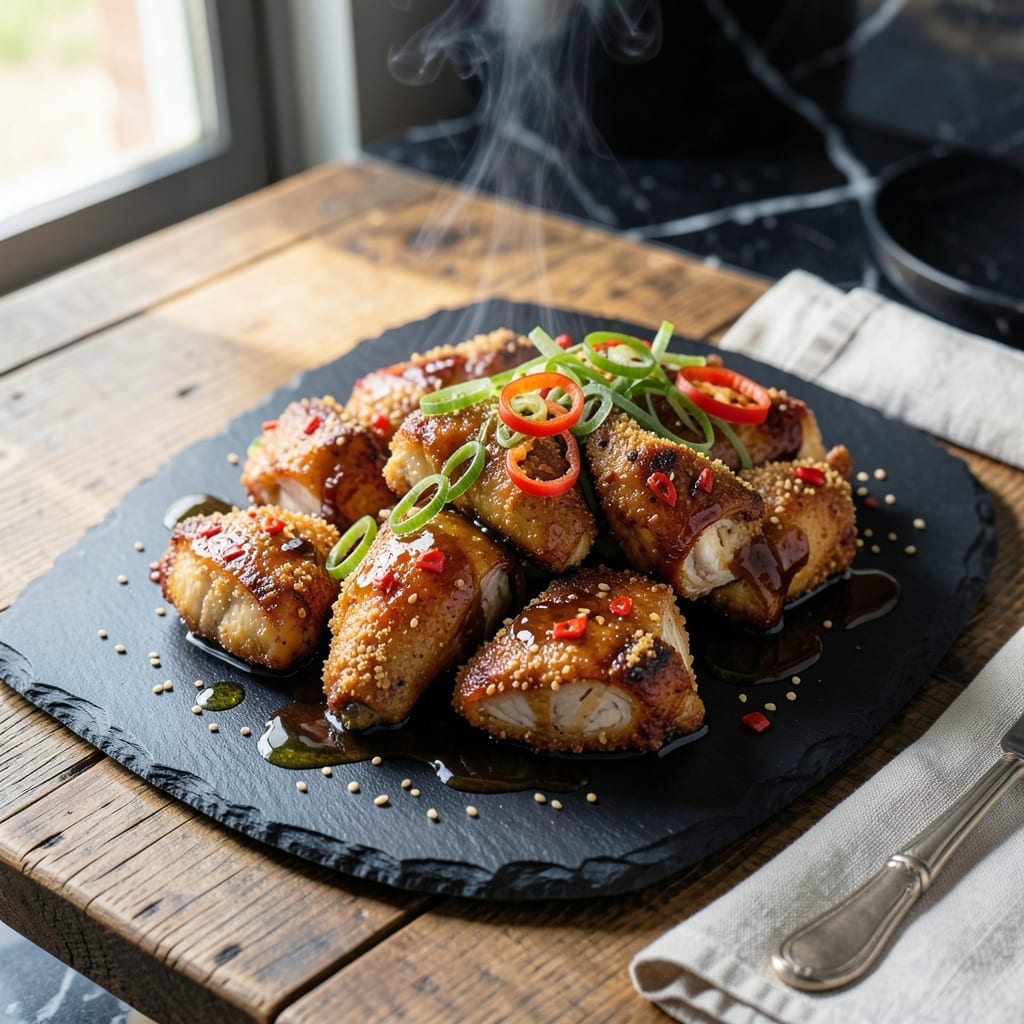
This Indo-Chinese classic delivers bold flavors that have made it a takeout favorite. The dish combines tender chicken with a fiery, sweet-spicy sauce that lingers on the palate.
I developed this version after years of perfecting the balance between heat and sweetness. The secret lies in the double-frying technique, which ensures the chicken stays juicy inside while developing a crispy exterior.
The sauce comes together quickly with simple pantry staples, creating that signature sticky, glistening coating. Each bite offers layers of garlic, ginger, and chili heat tempered by a touch of sweetness.
Serve it as a main course with steamed rice or noodles to soak up every drop of the sauce. This recipe stays true to the traditional takeout version you know and love.
Ingredients for Dragon Chicken
Simple pantry staples transform into this bold, fiery takeout favorite at home.
| Ingredient | Amount | Notes |
|---|---|---|
| Boneless Chicken Thighs 🍗 | 1 ½ lb | Cut into bite-sized pieces |
| Cornstarch 🌾 | ½ cup | For crispy coating |
| All-Purpose Flour 🌾 | ¼ cup | Helps bind coating |
| Large Egg 🥚 | 1 whole | Beaten for batter |
| Soy Sauce 🥫 | 3 tbsp | Low-sodium preferred |
| Rice Vinegar 🍶 | 2 tbsp | Or apple cider vinegar |
| Chili Sauce 🌶️ | ½ cup | Sriracha or similar |
| Honey 🍯 | 2 tbsp | Balances the heat |
| Garlic Cloves 🧄 | 6 cloves | Minced finely |
| Fresh Ginger 🌿 | 1 tbsp | Grated or minced |
| Green Onions 🧅 | 4 whole | Sliced, for garnish |
| Dried Red Chilies 🌶️ | 4 whole | Optional for extra heat |
| Vegetable Oil 🫒 | 3 cups | For deep frying |
| Salt 🧂 | 1 tsp | To taste |
| Black Pepper 🌶️ | ½ tsp | Freshly ground |
The chicken is key here—boneless thighs stay juicier than breasts through the double-frying. I grab mine from Costco for bulk savings, but any grocery store will work. Cut them uniformly so they cook evenly (1-inch pieces are perfect). For the coating, cornstarch gives that signature crispiness, but if you’re out, all-purpose flour alone works in a pinch.
No chili sauce? Sriracha plus a little ketchup gets you close. Honey can be swapped for maple syrup or brown sugar (use the same amount). Fresh ginger is ideal, but ground ginger at half the amount works. The dried chilies are optional but add that authentic touch—find them at any Asian market. If you’re sensitive to heat, reduce the chili sauce and add more honey.
Leftovers keep 3-4 days in the fridge, but the coating softens. Re-crisp in a hot oven or air fryer. To freeze, cook fully, cool, then store for up to 3 months—reheat straight from frozen in the oven for best texture.
Why You’ll Love This Recipe
- One Pan Meal: I love that I only need a bowl and a pan—no fancy equipment, just toss the chicken in cornstarch and flour, fry it up, and the soy sauce does the rest.
- Craving-Worthy Crisp: The cornstarch coating gives it that addictive crunch, and the soy sauce soaks in just enough to make every bite ridiculously good.
- Weeknight Hero: Honestly, it’s my go-to when I need dinner fast—boneless thighs cook in minutes and satisfy even the pickiest eaters at my table.
- Budget Stretcher: A pound of chicken thighs goes a long way, and with pantry staples like flour and soy sauce, I’m feeding four for less than a takeout bill.
Step-by-Step Instructions for Dragon Chicken
Here’s the method I use to get that perfect crispy exterior with juicy, flavorful chicken inside.
Step 1: Prepare and Coat the Chicken
Cut the 1.5 lb boneless chicken thighs into 1-inch pieces and pat them dry with paper towels. This removes excess moisture so the coating sticks properly. Season the pieces with 1 tsp salt and 0.5 tsp black pepper for a well-balanced base.
In a bowl, combine the 0.5 cup cornstarch and 0.25 cup all-purpose flour. This dual-starch blend gives the chicken an extra-crispy texture. Dip each piece of chicken into the 1 whole large egg (lightly beaten), then coat thoroughly in the cornstarch-flour mixture. Press gently so the coating adheres well.
Step 2: Deep Fry to Golden Perfection
Heat 3 cups vegetable oil in a deep, heavy-bottomed pot to 350°F. The oil must be hot enough to sizzle when you add the chicken, but not smoking. Working in batches to avoid crowding, carefully lower the coated chicken pieces into the oil.
Fry for 4-5 minutes until the coating turns golden brown and crisp. You’ll notice the pieces rise to the surface as they cook—this is your cue to flip them halfway through for even browning. Use a slotted spoon to transfer the fried chicken to a paper towel-lined plate to drain excess oil.
Step 3: Make the Spicy Dragon Sauce
In a separate pan, heat 1 tbsp vegetable oil over medium heat. Add the 6 cloves garlic cloves (minced) and 1 tbsp fresh ginger (grated), and sauté for 30 seconds until fragrant. Be careful not to burn the garlic—it can turn bitter quickly.
Pour in the 3 tbsp soy sauce, 2 tbsp rice vinegar, 0.5 cup chili sauce, and 2 tbsp honey. Stir well and let the sauce simmer for 2-3 minutes until it thickens slightly. If you prefer extra heat, add the 4 whole dried red chilies to the sauce as it cooks.
Step 4: Toss and Garnish
Add the fried chicken to the pan with the sauce and toss gently until every piece is evenly coated. The sauce should cling to the crispy exterior, creating a glossy, sticky finish. Cook for an additional 1-2 minutes to let the flavors meld together.
Transfer to a serving dish and garnish with the 4 whole green onions (sliced). The green onions add a fresh, mild crunch that balances the bold, spicy-sweet flavors of the sauce. Serve immediately while the chicken is still hot and crispy.
Pro Tips For Making Dragon Chicken
- Double-Coat the Chicken: Dip the chicken in the egg mixture, then the flour-cornstarch mix, and repeat—this gives it that extra-crispy texture dragon chicken needs. I learned this the hard way after my first batch turned out sad and flimsy.
- Use Thighs, Not Breast: Boneless chicken thighs stay juicy even after frying, while breast meat can dry out. After burning a few batches with breast, I finally switched and never looked back.
- Hot Oil, Small Batches: Keep the oil at 350°F and fry in small batches to avoid soggy chicken. Crowding the pan drops the temperature, and your dragon chicken will absorb oil instead of getting crispy.
- Marinate with Soy Sauce: Let the chicken soak in soy sauce for at least 20 minutes before coating—it adds depth to the flavor. I was skeptical until I tried it, but now it’s non-negotiable.
Make-Ahead Tips for This Recipe
Prep Chicken in Advance
Cut the 1.5 lb boneless chicken thighs into 1-inch pieces and store in an airtight container in the fridge for up to 24 hours. This saves time on cooking day while keeping the meat fresh.
Coat and Store
Mix the 0.5 cup cornstarch and 0.25 cup all-purpose flour in a sealed container. Coat the chicken just before frying for maximum crispiness. The dry mix stays good for 1 week at room temperature.
Sauce Prep Ahead
Combine the 3 tbsp soy sauce, 2 tbsp rice vinegar, 0.5 cup chili sauce, and 2 tbsp honey in a jar. Refrigerate for up to 3 days. Just heat and add fresh garlic and ginger when ready to cook.
Freeze Cooked Chicken
Fry the chicken completely, cool, then freeze in a single layer before transferring to a bag. Reheat in a 400°F oven for 10-12 minutes to restore crispiness. 🔥
Re-crisp Leftovers
Store cooked chicken in the fridge for 3-4 days. To revive, spread on a baking sheet and broil for 2-3 minutes until sizzling. The sauce clings better to hot, crispy pieces.
Organize Garnishes
Wash and slice the 4 green onions and store in a damp paper towel in the fridge. They stay fresh for 2-3 days and are ready to sprinkle on top just before serving.
Nutrition Facts
Frequently Asked Questions
Can I use chicken breast instead of thighs?
Yes, but thighs stay juicier. If using breast, cut into 1-inch pieces and reduce frying time by 1 minute to prevent dryness. Brining the breast for 30 minutes first helps retain moisture.
How do I make it less spicy?
Reduce chili sauce to 1/4 cup and add an extra 1 tbsp honey. Skip the dried chilies. For milder heat, substitute 1/2 the chili sauce with ketchup.
What oil works best for frying?
Use neutral oils with high smoke points like vegetable, canola, or peanut. Avoid olive oil—it burns at 350°F. Maintain oil temp between 340-360°F for even cooking.
Can I bake instead of frying?
Yes, bake at 400°F for 18-20 minutes, flipping halfway. Toss with sauce after baking. The texture won’t be as crispy, but it’s a healthier option.

- Jollof Rice Sauce Recipe: West African Tomato and Spice Infusion - September 25, 2026
- Japanese Rice Soup Recipe: Umami-Rich Comfort in a Bowl - September 25, 2026
- Homemade Cream Of Rice Recipe: Silk-Smooth Breakfast in Minutes - September 25, 2026