
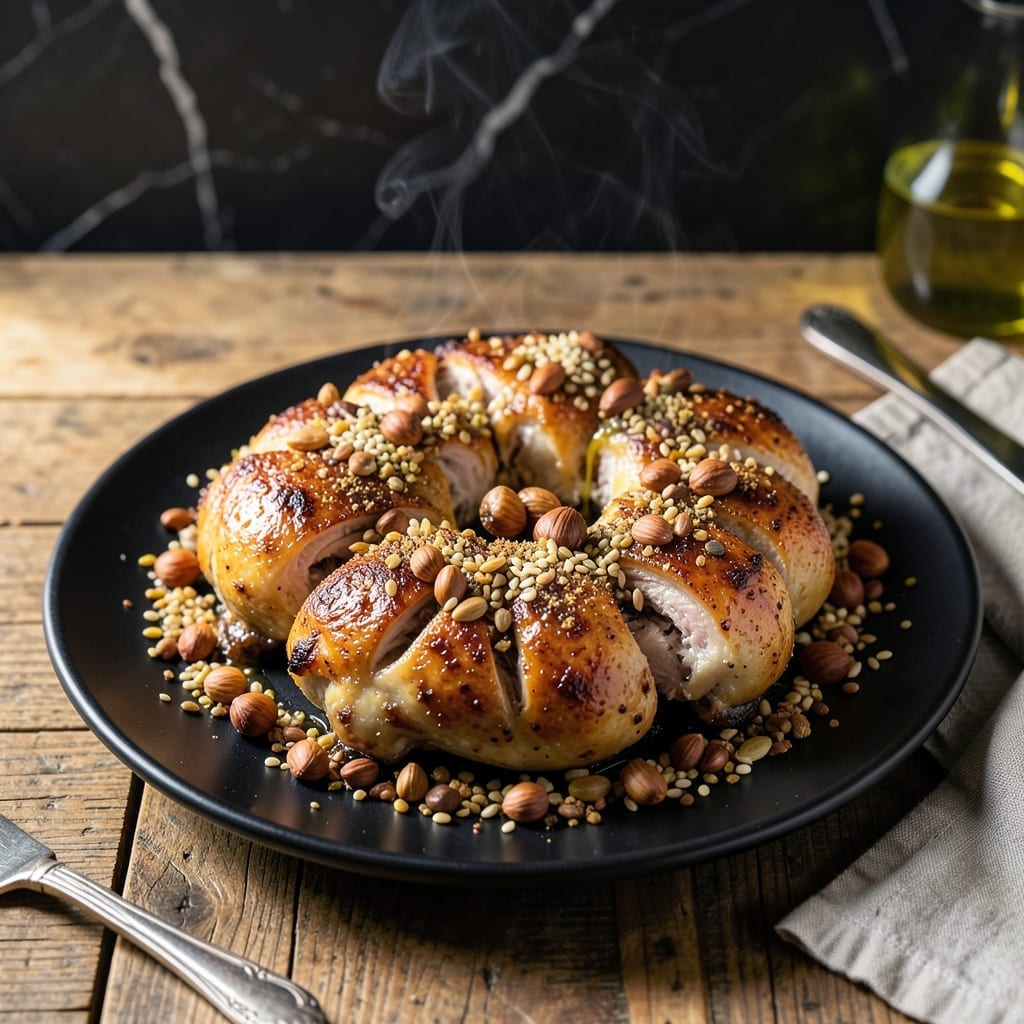
This dukkah chicken delivers a perfect balance of textures and flavors that will elevate your dinner table. The nutty, spiced crust forms a crispy golden coating that contrasts beautifully with the juicy meat inside.
I developed this method after testing various spice blends and cooking techniques. The key is pressing the dukkah mixture firmly onto the chicken to ensure it adheres during cooking, creating that signature crunch with every bite.
The aromatic blend of nuts, seeds, and warm spices transforms simple chicken into a dish that feels special enough for company. Each piece emerges from the oven fragrant and golden, with the spices toasting to perfection.
Serve this with a cooling yogurt sauce or fresh salad to complement the bold flavors. The results speak for themselves.
Ingredients for Dukkah Chicken
Nuts, seeds, and warm spices create that signature golden, crispy crust.
| Ingredient | Amount | Notes |
|---|---|---|
| Chicken Thighs 🍗 | 1 ½ lb | Boneless, skinless preferred |
| Hazelnuts 🌰 | ½ cup | Lightly toasted, skins removed |
| Sesame Seeds 🌱 | ¼ cup | Toasted for nuttiness |
| Coriander Seeds 🌿 | 2 tbsp | Lightly crushed |
| Cumin Seeds 🌿 | 1 tbsp | Lightly crushed |
| Fennel Seeds 🌿 | 1 tbsp | Lightly crushed |
| Dried Thyme 🍃 | 1 tbsp | Rubbed between fingers |
| Dried Rose Petals 🌹 | 1 tsp | Optional, for floral note |
| Salt 🧂 | 1 tsp | Fine sea salt preferred |
| Black Pepper 🌶️ | ½ tsp | Freshly ground |
| Olive Oil 🫒 | 3 tbsp | Divided for toasting and cooking |
| All-Purpose Flour 🌾 | ¼ cup | For dredging chicken |
| Plain Yogurt 🥛 | ½ cup | For cooling sauce |
| Lemon Juice 🍋 | 1 tbsp | Freshly squeezed |
| Fresh Cilantro 🌿 | ¼ cup | Chopped, for garnish |
The chicken is the canvas here. Boneless, skinless thighs stay juicier than breasts—Costco or Whole Foods have reliable options. For the dukkah, fresh hazelnuts (peeled) are ideal, but pre-toasted from Trader Joe’s saves time. Look for vibrant, fragrant spices—old ones lose their punch. Most bulk bins let you smell before buying (worth the sniff test).
No hazelnuts? Almonds or cashews work—just toast them first. Missing a spice? Ground cumin or coriander at half the amount in a pinch. The yogurt sauce is flexible—Greek yogurt for thickness or coconut yogurt for dairy-free. Skip the rose petals if they feel fussy (they’re pretty but not essential).
Dukkah blend keeps in a sealed jar for 1 month. Chicken is best cooked fresh, but leftovers reheat okay—store in the fridge for up to 3 days. The yogurt sauce? Make it fresh the day of serving (it separates if stored too long).
Why You’ll Love This Recipe
- One Pan Wonder: I just toss the chicken thighs with crushed hazelnuts and seeds, then roast—no fuss, no extra dishes.
- Flavor Bomb: The toasted coriander and cumin seeds with sesame and hazelnuts make every bite ridiculously good.
- Meal Prep Hero: I make a double batch on Sunday and it stays juicy for lunches all week.
- Budget Friendly: Chicken thighs are cheap, and the spice mix stretches across multiple meals without breaking the bank.
Step-by-Step Instructions for Dukkah Chicken
This method ensures crispy spiced crust and tender meat that stays juicy in every bite.
Step 1: Toast and Grind the Dukkah Spice Blend
Heat a dry skillet over medium heat and add the 0.5 cup Hazelnuts, 0.25 cup Sesame Seeds, 2 tbsp Coriander Seeds, 1 tbsp Cumin Seeds, and 1 tbsp Fennel Seeds. Stir frequently for 3-4 minutes until the hazelnuts turn golden brown and the seeds become fragrant.
Remove from heat and immediately transfer to a plate to cool. Once cooled, combine with 1 tbsp Dried Thyme, 1 tsp Dried Rose Petals, 1 tsp Salt, and 0.5 tsp Black Pepper in a food processor. Pulse until you achieve a coarse, sandy texture with some visible nut pieces—this is your dukkah blend.
Step 2: Prepare and Coat the Chicken
Pat the 1.5 lb Chicken Thighs completely dry with paper towels. Season lightly with additional salt if desired, then dredge each piece in the 0.25 cup All-Purpose Flour, shaking off any excess. This creates a base layer for the dukkah to adhere to.
Brush each floured thigh with 1 tbsp Olive Oil (from the 3 tbsp Olive Oil), then press generously into the dukkah mixture, ensuring all sides are fully coated. The oil helps the spice blend stick and promotes even browning during cooking.
Step 3: Pan-Sear for Crispy Perfection
Heat the remaining 2 tbsp Olive Oil in a large skillet over medium-high heat until it shimmers. Add the coated chicken thighs and cook undisturbed for 4-5 minutes until the bottoms develop a deep golden crust.
Carefully flip and cook for another 4-5 minutes until the chicken reaches an internal temperature of 165°F and the crust is evenly browned. Avoid moving the pieces too soon—this ensures the crust sets properly and doesn’t stick to the pan.
Step 4: Rest and Serve with Cooling Yogurt Sauce
Transfer the cooked chicken to a wire rack and let it rest for 5 minutes. This allows the juices to redistribute, keeping the meat moist and tender. Meanwhile, whisk together the 0.5 cup Plain Yogurt and 1 tbsp Lemon Juice in a small bowl until smooth.
Slice the chicken if desired and arrange on a platter. Drizzle with the yogurt sauce and garnish with the 0.25 cup Fresh Cilantro. The cool, tangy sauce balances the warm spices and adds a refreshing contrast to the crispy, flavorful crust.
Pro Tips For Making Dukkah Chicken
- Toast the Spices: Dry-toast the coriander and cumin seeds in a pan for 1-2 minutes until fragrant—I learned this the hard way after my first batch tasted flat and dull.
- Skin Side Down First: Start the chicken thighs skin-side down in a hot pan and resist the urge to move them for at least 4-5 minutes to get that crispy base.
- Crush the Nuts: Lightly crush the hazelnuts before toasting so they release their oils and stick better to the chicken, making a real difference in texture.
- Rest Before Serving: Let the chicken rest for 5 minutes after cooking—this keeps the juices inside where they belong, not all over your cutting board.
Troubleshooting Great dukkah chicken
Dukkah Won’t Stick
If your spice blend isn’t adhering, the chicken likely isn’t dry enough. Pat it thoroughly with paper towels before dredging in flour. I also brush each piece with olive oil right before pressing on the dukkah—this creates a tacky surface for the nuts and seeds to cling to. 🌿
Burning Spices
Dukkah can scorch if the pan is too hot. Cook over medium-high heat rather than high, and don’t walk away. If you see black spots forming, lower the heat immediately. The nuts toast best at a steady temperature.
Dry Chicken
Overcooking is the usual culprit. Use a meat thermometer and pull the chicken at 165°F internal temperature. Boneless thighs stay juicier than breasts, but even they can dry out if left too long. Resting for 5 minutes helps redistribute those precious juices.
Soggy Crust
This happens when steam gets trapped. After coating, let the chicken rest for 10 minutes before cooking to set the crust. Also, don’t crowd the pan—cook in batches if needed. The steam from overcrowding turns that crispy coating into a sad, wet blanket.
Uneven Coating
Press the dukkah firmly into every crevice of the chicken. I use my fingertips to ensure full coverage, especially around the edges. If spots look bare, sprinkle extra blend and press again. A thick, even layer gives you that perfect crunch in every bite.
Bitter Taste
Burnt seeds or over-toasted nuts can cause bitterness. Toast your dukkah ingredients just until fragrant—about 3-4 minutes—and watch them closely. Fresh spices make a difference too; old ones can taste harsh and flat. 💡
Nutrition Facts
Frequently Asked Questions
Can I use chicken breasts instead of thighs?
Yes, but thighs stay juicier. If using breasts, reduce cooking time to 3-4 minutes per side and monitor internal temperature closely to avoid dryness.
How do I make the dukkah blend ahead of time?
Toast and blend the nuts and spices as directed, then store in an airtight container for up to 1 month. This saves time on busy cooking days.
What if my dukkah crust isn’t crispy?
Ensure the chicken is completely dry before coating and cook on medium-high heat. Avoid crowding the pan to prevent steam from softening the crust.
Can I bake instead of pan-searing?
Yes! Bake at 400°F for 18-20 minutes on a wire rack over a baking sheet. This method still yields a crispy crust with less hands-on time.

- Jollof Rice Sauce Recipe: West African Tomato and Spice Infusion - September 25, 2026
- Japanese Rice Soup Recipe: Umami-Rich Comfort in a Bowl - September 25, 2026
- Homemade Cream Of Rice Recipe: Silk-Smooth Breakfast in Minutes - September 25, 2026