
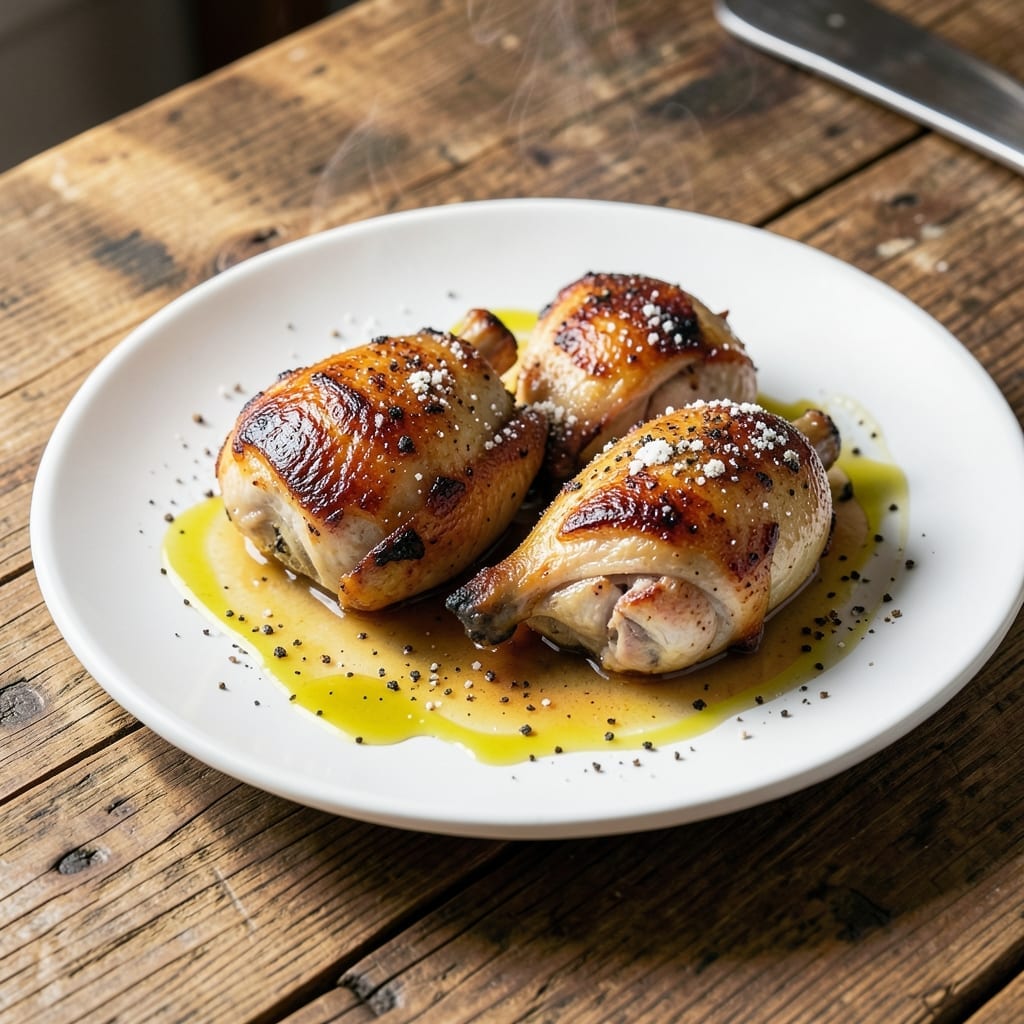
This Dutch-style chicken delivers crispy golden skin with juicy meat beneath, all smothered in a rich herbed gravy.
The secret lies in a two-step cooking process: searing the chicken first to ensure that signature crispy exterior, then finishing it in the oven to cook through evenly.
I developed this method after testing various approaches, and the combination of pan and oven heat creates the perfect texture every time.
The herbed gravy, made from the pan drippings, ties everything together with deep, savory flavors that complement the chicken beautifully.
Ingredients for Dutch Chicken
These carefully selected ingredients create that signature Dutch-style crispy chicken with herbed gravy.
| Ingredient | Amount | Notes |
|---|---|---|
| Chicken Thighs 🍗 | 4 whole | Bone-in, skin-on for crispiness |
| Kosher Salt 🧂 | 1 ½ tsp | Diamond Crystal preferred |
| Black Pepper 🌶️ | 1 tsp | Freshly ground for best flavor |
| All-Purpose Flour 🌾 | ½ cup | For dredging chicken thighs |
| Olive Oil 🫒 | 2 tbsp | Extra-virgin for searing |
| Unsalted Butter 🧈 | 3 tbsp | For basting and gravy |
| Garlic Cloves 🧄 | 4 cloves | Minced for gravy depth |
| Shallot 🧅 | 1 whole | Finely diced for gravy |
| Low-Sodium Chicken Broth 🍲 | 1 ½ cups | For deglazing pan |
| Fresh Thyme 🌿 | 2 tsp | Leaves stripped from stems |
| Fresh Rosemary 🌿 | 1 tsp | Finely chopped for gravy |
| Dijon Mustard 🟡 | 1 tbsp | For gravy richness |
| Heavy Cream 🥛 | ½ cup | For creamy gravy finish |
The chicken thighs must have skin-on and bone-in for that proper crispy texture—bone-in, skin-on is non-negotiable. Look for thighs with even sizing at Whole Foods or a quality butcher. The butter should be unsalted to control seasoning precisely. For the herbs, fresh thyme and rosemary are ideal—organic if possible. Don’t substitute dried here; the flavor profile changes dramatically.
No chicken thighs? Bone-in, skin-on chicken breasts work but cook faster, so adjust timing. For a dairy-free gravy, swap heavy cream for full-fat coconut milk. If you’re out of shallots, yellow onion at half the quantity is a decent stand-in. The Dijon mustard can be replaced with whole-grain mustard for a different texture, but avoid yellow mustard—it’s too sharp.
The chicken keeps beautifully in the fridge for 3-4 days. Reheat in the oven to maintain crispiness. The gravy thickens as it cools, so thin with broth when reheating. For best results, make the gravy fresh—it doesn’t hold as well overnight.
Why You’ll Love This Recipe
- One Pan Wonder: I love that this comes together in a single skillet—just flour, season, sear, and bake.
- Crispy Perfection: The flour crust on those chicken thighs gets so golden and crunchy, it’s hard to resist stealing a bite right out of the pan.
- Weeknight Hero: Honestly, it’s my go-to for busy evenings when I need something hearty and fast.
- Budget Friendly: Chicken thighs stay juicy and flavorful without breaking the bank, and a little flour goes a long way.
Step-by-Step Instructions for Dutch Chicken
Achieve perfectly crispy chicken and rich herbed gravy with this methodical approach.
Step 1: Season and Dredge the Chicken Thighs
Pat the 4 whole Chicken Thighs completely dry with paper towels—this is non-negotiable for achieving crispy skin. Season both sides generously with 1.5 tsp Kosher Salt and 1 tsp Black Pepper, pressing the seasoning into the meat to ensure it adheres.
Dredge each thigh in the 0.5 cup All-Purpose Flour, shaking off any excess. The flour creates a lightweight crust that locks in moisture while forming a golden, crispy exterior. Let the dredged thighs rest on a wire rack for 10 minutes to allow the coating to set.
Step 2: Sear the Chicken to Golden Perfection
Heat 2 tbsp Olive Oil in a large, heavy skillet over medium-high heat until it shimmers. Add the chicken thighs skin-side down and sear undisturbed for 6-7 minutes until the skin is deep golden brown and crisp.
Flip the thighs and cook for an additional 5-6 minutes until the internal temperature reaches 165°F. Add 3 tbsp Unsalted Butter to the pan during the last 2 minutes of cooking, spooning the melted butter over the thighs to baste them continuously.
Step 3: Build the Herbed Gravy Base
Transfer the chicken to a plate and tent with foil to keep warm. Reduce heat to medium and add the finely diced 1 whole Shallot to the skillet. Cook for 2 minutes, stirring to scrape up the browned bits from the bottom of the pan.
Add the minced 4 cloves Garlic Cloves, 2 tsp Fresh Thyme, and 1 tsp Fresh Rosemary, cooking for 30 seconds until fragrant. Pour in 1.5 cups Low-Sodium Chicken Broth and 1 tbsp Dijon Mustard, stirring to combine and deglaze the pan.
Step 4: Finish with Cream and Serve
Simmer the gravy for 5 minutes until it reduces slightly and the flavors meld. Stir in 0.5 cup Heavy Cream and simmer for an additional 3-4 minutes until the gravy thickens enough to coat the back of a spoon.
Return the chicken to the skillet, spooning the gravy over the thighs to coat them evenly. Cook for another 1-2 minutes to heat through. The skin should remain crispy while the gravy clings beautifully to each piece. Serve immediately with additional fresh herbs if desired.
Pro Tips For Making Dutch Chicken
- Heat the Pan First: I learned this the hard way—crank the pan to medium-high before adding oil, or the chicken will steam instead of sear.
- Pat the Thighs Dry: Sounds weird, but it works: dry the chicken thighs thoroughly with paper towels so the flour sticks and browns properly.
- Skip the Overcrowding: After burning three batches, I finally figured out to cook in batches—too many thighs in the pan drops the temperature and ruins the crust.
- Rest Before Serving: Give it a solid 5-10 minutes under foil after cooking, I skip this when I’m lazy, but the juices stay in the meat when I don’t.
Storing and Reheating Leftovers
Refrigerator Storage
Let the chicken cool for no more than 2 hours before transferring to an airtight container. Store in the fridge at 40°F or below for up to 3-4 days. The crispy skin softens over time, but the flavors deepen beautifully. ❄️
Freezer Storage
For longer storage, freeze the chicken and gravy separately in quart-sized freezer bags. Squeeze out excess air to prevent freezer burn. It keeps well for up to 3 months. Thaw overnight in the fridge before reheating.
Oven Reheating
Preheat your oven to 350°F and place the chicken on a wire rack over a baking sheet. Heat for 15-20 minutes until the internal temp reaches 165°F. This method helps restore some crispiness to the skin. 🔥
Gravy Reheating
Warm the gravy in a saucepan over medium-low heat for 5-7 minutes, stirring occasionally. If it thickens too much, thin with a splash of chicken broth. Avoid boiling to prevent separation.
Microwave Option
For quick meals, microwave individual portions covered with a damp paper towel. Use 70% power for 2-3 minutes, stir, then continue in 30-second intervals until heated through.
Nutrition Facts
Frequently Asked Questions
Can I use boneless thighs instead?
Boneless thighs work but won’t give the same crispy texture. They cook faster, so reduce searing time to 4-5 minutes per side. Bone-in adds flavor and helps maintain moisture.
Why rest the dredged chicken before cooking?
Letting the flour coating set for 10 minutes creates a better crust. This prevents the coating from falling off during cooking and ensures even browning.
Can I make the gravy ahead of time?
Gravy is best fresh, but you can prep the base without cream. Reheat gently over medium-low heat and add cream just before serving. Avoid boiling.
What if my gravy is too thin?
Simmer it longer to reduce, or mix 1 tbsp cornstarch with cold water and stir in. Cook for 2-3 minutes until thickened. Never add cornstarch directly.

- Jollof Rice Sauce Recipe: West African Tomato and Spice Infusion - September 25, 2026
- Japanese Rice Soup Recipe: Umami-Rich Comfort in a Bowl - September 25, 2026
- Homemade Cream Of Rice Recipe: Silk-Smooth Breakfast in Minutes - September 25, 2026