
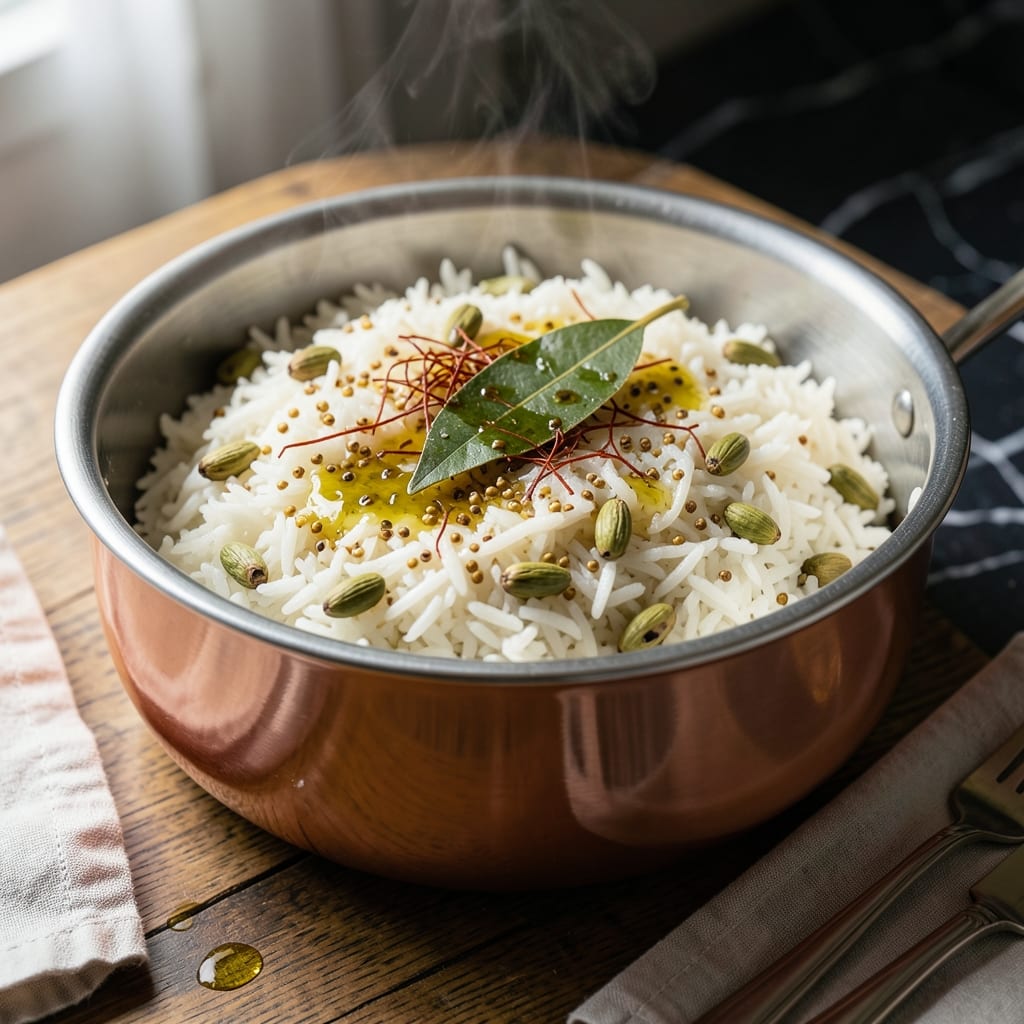
This electric rice cooker method transforms simple ingredients into fragrant, perfectly spiced pulao with minimal effort. I developed this approach after testing multiple techniques in my small apartment kitchen, ensuring foolproof results every time.
The beauty lies in its simplicity—one pot, layered flavors, and hands-off cooking. Whole spices bloom in hot oil before rice and liquid join the mix, creating a base that infuses every grain with aromatic depth without constant stirring.
What emerges is fluffy, separate grains of rice, each carrying the warm notes of cumin, cardamom, and bay leaf. The electric cooker handles the timing, so you avoid the common pitfalls of stovetop methods.
Ideal for busy weeknights or when you want restaurant-quality rice without the fuss. The process is streamlined, the cleanup effortless.
Ingredients for Electric Rice Cooker Pulao
Basmati rice and warm whole spices create this aromatic one-pot wonder in your cooker.
| Ingredient | Amount | Notes |
|---|---|---|
| Basmati Rice 🌾 | 2 cups | Rinsed until water runs clear |
| Water 💧 | 4 cups | Or vegetable broth for extra flavor |
| Ghee 🧈 | 3 tbsp | Or substitute neutral oil |
| Cumin Seeds 🌿 | 1 tsp | Whole, not ground |
| Green Cardamom Pods 🌿 | 4 whole | Lightly crushed to release aroma |
| Bay Leaf 🍃 | 1 whole | Dried or fresh |
| Cloves 🌶️ | 3 whole | Optional for deeper spice |
| Cinnamon Stick 🌿 | 1 piece | Small, about 2 inches long |
| Yellow Onion 🧅 | 1 whole | Finely diced for even distribution |
| Fresh Ginger 🌿 | 1 tbsp | Minced or grated finely |
| Garlic Cloves 🧄 | 4 cloves | Minced for maximum flavor |
| Green Chilies 🌶️ | 2 whole | Sliced lengthwise, adjust to taste |
| Fresh Cilantro 🌿 | ¼ cup | Chopped, for garnish |
| Salt 🧂 | 1 ½ tsp | Adjust to taste at the end |
The spices are everything here. Whole cumin, cardamom, and bay leaf bloom in hot ghee to release their oils—this step can’t be rushed. I grab my whole spices from Indian grocery stores (cheaper and fresher), but the spice aisle at Whole Foods works in a pinch. Basmati rice is non-negotiable for that fluffy texture; Tilda or Daawat are reliable brands.
No ghee? Clarified butter or neutral oil work fine. Skip the cardamom pods? Ground cardamom at one-quarter the amount (but whole is better). Fresh ginger and garlic are ideal, but paste from a jar saves time without sacrificing too much flavor. Vegetable broth instead of water adds depth if you have it on hand.
Leftovers keep well for 3-4 days in the fridge—reheat with a splash of water to revive. Freeze portions for up to 3 months (thaw overnight before reheating). The spices lose potency over time, so buy whole and grind as needed.
Why You’ll Love This Recipe
- Set and Forget: It literally cooks itself in the rice cooker while I do other things—no stirring, no watching.
- Aromatic Magic: The ghee, cumin, and cardamom fill my kitchen with the most intoxicating scent before the rice even finishes.
- Feeds the Crowd: I make a big batch and it stretches for days, tasting just as good reheated.
- Budget Friendly: Basmati rice and a few spices create a meal that feels fancy but costs pennies per serving.
Step-by-Step Instructions for Electric Rice Cooker Pulao
This one-pot method delivers perfectly fragrant rice with minimal effort and maximum flavor.
Step 1: Prepare and Rinse the Basmati Rice
Start by placing the 2 cups Basmati Rice in a fine-mesh strainer. Rinse under cold running water, gently swirling with your hand, until the water runs completely clear. This removes excess starch and prevents the grains from sticking together during cooking.
I always soak the rinsed rice in fresh water for 15-20 minutes while I prep the other ingredients. This hydration step ensures the grains cook evenly and absorb the spices beautifully. Drain thoroughly before using—the rice should be damp but not dripping.
Real talk: skipping the rinse will leave you with gummy, clumpy rice. The extra minute this takes is worth the perfect texture you’ll get.
Step 2: Bloom Whole Spices in Ghee
Turn on your rice cooker to the sauté or quick cook function (if available) or use a separate small pan. Add the 3 tbsp Ghee and let it melt completely. The ghee should be hot but not smoking—look for it to shimmer slightly.
Add the 1 tsp Cumin Seeds, 4 whole Green Cardamom Pods (lightly crushed), 1 whole Bay Leaf, 3 whole Cloves, and 1 piece Cinnamon Stick. Stir constantly for 30-45 seconds until the spices become fragrant and the cumin seeds start to sizzle and turn a shade darker.
This blooming process unlocks the essential oils in the spices, creating the deep, aromatic base that defines a good pulao. Don’t let them burn—burnt spices will make your dish bitter.
Step 3: Sauté Aromatics Until Soft
To the spiced ghee, add the finely diced Yellow Onion. Sauté for 4-5 minutes until the onions turn translucent and just begin to caramelize at the edges. The kitchen should smell incredible at this point—sweet, warm, and inviting.
Stir in the 1 tbsp Fresh Ginger, 4 cloves Garlic Cloves (minced), and 2 whole Green Chilies (sliced lengthwise). Cook for another 1-2 minutes until the raw smell of garlic disappears. Here’s the thing—you want these aromatics to soften but not brown, so keep the heat moderate.
The onion should be golden but not dark brown. If it starts to stick, add a splash of the 4 cups Water to deglaze the pan and prevent burning.
Step 4: Combine and Cook in Rice Cooker
Add the drained rice to the rice cooker pot along with the spiced ghee and aromatics. Stir gently to coat every grain with the fragrant mixture. This step ensures each bite is infused with flavor.
Pour in the 4 cups Water and add the 1.5 tsp Salt. Stir once more, then level the surface with the back of a spoon. Don’t stir again after this point—it can break the rice grains.
Close the lid and set the rice cooker to the standard white rice setting. Let it cook undisturbed for the full cycle, which should take about 20-25 minutes. You’ll know it’s done when the cooker switches to the keep-warm setting and all the water has been absorbed.
Step 5: Rest and Garnish Before Serving
Once the cooker switches to keep-warm, let the pulao rest for 10 minutes with the lid closed. This allows the steam to redistribute and the flavors to meld together. The rice will finish cooking gently in this residual heat.
After resting, fluff the rice gently with a fork, lifting from the bottom to separate the grains. Sprinkle the 0.25 cup Fresh Cilantro (chopped) evenly over the top. The cilantro adds a bright, fresh contrast to the warm spices.
Serve hot in bowls, making sure each portion gets some of the whole spices and aromatic bits from the bottom of the pot. The rice should be light, fluffy, and each grain distinct, with a beautiful fragrance that fills the room.
Pro Tips For Making Electric Rice Cooker Pulao
- Rinse the Rice: Soak basmati rice for 20 minutes then rinse until water runs clear—this removes excess starch so your pulao stays light and fluffy, not gummy.
- Toast Whole Spices: Heat ghee in the rice cooker pot first, then add cumin seeds and cardamom pods until they sizzle and release aroma, about 30 seconds. I learned this the hard way—skip it and the flavor falls flat.
- Use the Right Ratio: For electric rice cookers, stick to 1:1.5 rice-to-water ratio. After burning two batches, I finally figured out that more water just makes mush, not perfectly cooked grains.
- Let It Steam: Once the cooker switches to “keep warm,” resist the urge to open it—give it a solid 10 minutes to finish steaming. Sounds weird, but it works: the rice absorbs the last bit of moisture and the spices meld.
Storing and Reheating This Recipe
Fridge Storage
Let your pulao cool completely before storing—this prevents condensation from making the rice soggy. I use glass containers with tight lids to keep it fresh. It’ll stay perfect in the fridge for 3-4 days. 💡
Freezing for Later
Portion leftovers into freezer-safe bags or containers, leaving 1-inch headspace for expansion. Squeeze out excess air to avoid freezer burn. Pulao freezes beautifully for up to 3 months without losing texture.
Stovetop Reheating
My preferred method: heat in a skillet with 2 tbsp water or broth over low heat, covered, for 5-7 minutes. Stir occasionally to redistribute moisture. This revives the fluffiness better than any other method.
Microwave Method
For quick meals, microwave individual portions covered with a damp paper towel. Use 50% power for 2-3 minutes, stir, then repeat in 30-second bursts until heated through. Add a splash of water if it seems dry. ❄️
Reviving Dry Rice
If your pulao dried out, sprinkle 1-2 tbsp water over the portion before reheating. The steam will rehydrate the grains. I’ve tested this trick multiple times—it works like a charm every time.
Spice Refresh
After reheating, taste and adjust seasoning. A pinch of salt or a squeeze of lemon juice can brighten the flavors. Fresh cilantro on top adds that final aromatic touch.
Nutrition Facts
Frequently Asked Questions
Can I use regular long-grain rice instead of Basmati?
Basmati gives the best texture, but long-grain works in a pinch. Expect slightly less fragrance and potentially stickier results. Rinse well and reduce water by 1/4 cup to prevent mushiness.
Why does my pulao turn out mushy?
Over-rinsing or using too much water are common culprits. Stick to 2:1 water-to-rice ratio and rinse just until water runs clear. Let it rest 10 minutes after cooking to firm up.
Can I add vegetables or protein?
Stir in 1 cup diced veggies with onions or add 1 lb cubed chicken after blooming spices. Adjust liquid by 1/4 cup per addition.
How do I know when it’s done?
Your cooker will switch to “keep warm” mode automatically. Let it sit 10 minutes longer—this ensures even cooking and fluffier grains. Don’t peek mid-cycle!

- Cream of Wild Rice Soup Recipe: Earthy Grains in Silky Broth - October 9, 2026
- Filipino Garlic Rice Recipe: Crispy Fried Aroma With Every Bite - October 9, 2026
- Gobi Manchurian Rice Recipe: Indo-Chinese Fusion in One Bowl - October 9, 2026