
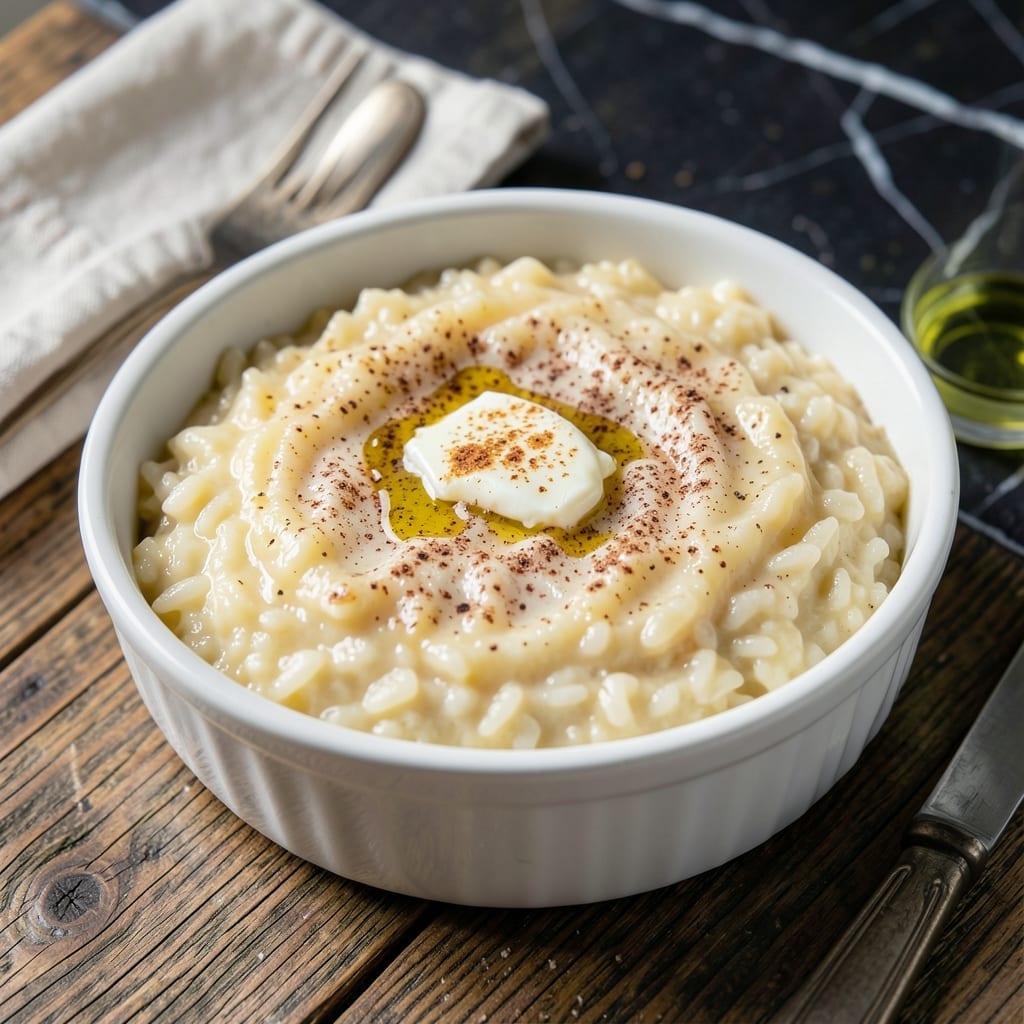
There’s a reason English rice pudding has stood the test of time—its creamy texture and comforting warmth are unmatched. I developed this version after testing multiple ratios of rice to liquid to achieve the perfect custard-like consistency.
The secret lies in slow baking, which allows the rice to absorb the milk gradually while developing a golden skin on top. A touch of nutmeg adds authentic flavor, and the vanilla bean ensures every bite is fragrant and rich.
What emerges is a dessert that’s both rustic and refined, with tender rice suspended in a creamy custard. The top forms a delicate caramelized layer that contrasts beautifully with the softness underneath.
Serve it warm or chilled, with a drizzle of cream or a sprinkle of cinnamon. This is old-fashioned comfort at its finest.
Ingredients for English Rice Pudding
Short list, long tradition. These ingredients make magic in the oven.
| Ingredient | Amount | Notes |
|---|---|---|
| Short-Grain White Rice 🍚 | ¾ cup | Arborio or pudding rice preferred |
| Whole Milk 🥛 | 4 cups | Full-fat for creaminess |
| Heavy Cream 🥛 | 1 cup | For extra richness |
| Granulated Sugar 🍚 | ¾ cup | Adjust to taste preference |
| Unsalted Butter 🧈 | 2 tbsp | Melted for mixing |
| Large Eggs 🥚 | 2 whole | Lightly beaten for custard |
| Vanilla Bean 🌿 | 1 whole | Split and scraped |
| Ground Nutmeg 🌰 | ½ tsp | Freshly grated preferred |
| Ground Cinnamon 🌿 | ¼ tsp | For garnish |
| Salt 🧂 | ¼ tsp | Balances sweetness |
| Vanilla Extract 🌿 | 1 tsp | Pure extract recommended |
The rice is everything here. Arborio or pudding rice gives that signature creamy texture—long-grain just won’t cut it. Look for full-fat whole milk and heavy cream at your regular grocery store; Organic Valley or Horizon are solid choices. The vanilla bean? Splurge if you can (I grab mine at Whole Foods), but good extract works too.
No vanilla bean? Use 1 tbsp of pure vanilla extract instead. Swap the nutmeg for allspice if that’s what you’ve got. Want it lighter? 2% milk works but won’t be as rich. The eggs are key for the custard—don’t skip them. And if you’re out of pudding rice, sushi rice is the closest sub you’ll find.
This pudding keeps 4-5 days in the fridge—actually gets creamier as it sits. Reheat in the microwave with a splash of milk to loosen. Can be served warm or cold (I like it both ways). Freezes for 2-3 months if you’ve got extras.
Why You’ll Love This Recipe
- One Pot Wonder: I love that it all comes together in a single saucepan—no fancy equipment, just rice, milk, and a little patience.
- Velvety Indulgence: The combo of whole milk and heavy cream makes it so rich and creamy, with just the right sweetness from the sugar.
- Weeknight Comfort: Honestly, it’s my go-to when I need something warm and satisfying after a long day.
- Stretches Easily: Between us, this recipe doubles beautifully, so I always have leftovers for a quick, cozy breakfast the next morning.
Step-by-Step Instructions for Old-Fashioned Creamy Rice Pudding
Here’s how I make this classic custard with that perfect velvety texture every time.
Step 1: Prepare the Rice Base
In a medium saucepan, combine the 0.75 cup Short-Grain White Rice with the 4 cups Whole Milk and 1 cup Heavy Cream. Bring to a gentle simmer over medium heat, stirring occasionally to prevent scorching.
I use short-grain rice because it releases starch as it cooks, which gives the pudding its signature creamy consistency. You’ll notice the mixture starting to thicken after about 15 minutes—this is your cue that the rice is absorbing the liquid properly.
Continue cooking for another 10-15 minutes until the rice is tender and the mixture has thickened slightly. The grains should be soft but still hold their shape. Don’t rush this step—low and slow is key for that perfect texture.
Step 2: Sweeten and Flavor the Mixture
Stir in the 0.75 cup Granulated Sugar, 2 tbsp Unsalted Butter, and 0.25 tsp Salt. The sugar should dissolve completely as you stir. Now, split the 1 whole Vanilla Bean lengthwise, scrape out the seeds, and add both the seeds and the pod to the pot.
I always use a real vanilla bean when possible—it adds those beautiful speckles and a depth of flavor that extract alone can’t match. Let the mixture simmer for another 5 minutes to allow the vanilla to infuse. You’ll start to smell that wonderful aromatic scent as it cooks.
Step 3: Temper and Add the Eggs
In a separate bowl, lightly beat the 2 whole Large Eggs. Slowly ladle about 1 cup of the hot rice mixture into the eggs while whisking constantly—this tempers them and prevents curdling. Then pour the tempered egg mixture back into the pot, stirring constantly.
Return the mixture to a gentle simmer and cook for another 3-5 minutes until it thickens enough to coat the back of a spoon. The pudding should look creamy and luxurious at this stage. Remove the vanilla bean pod before proceeding to the next step.
Step 4: Finish with Spices and Extract
Stir in the 0.5 tsp Ground Nutmeg and 1 tsp Vanilla Extract. The nutmeg adds that classic warm spice note that’s essential to traditional English rice pudding. Taste and adjust sweetness if needed—the sugar amount can be flexible based on your preference.
Pour the pudding into a serving dish or individual ramekins. Sprinkle the 0.25 tsp Ground Cinnamon on top for garnish. The cinnamon adds a lovely aromatic finish that complements the vanilla and nutmeg beautifully.
Step 5: Chill and Serve
Let the pudding cool to room temperature, then cover and refrigerate for at least 2 hours or until completely chilled. I know it’s hard to wait, but this resting time allows the flavors to meld and the texture to set properly.
Serve cold or at room temperature. Each spoonful should be rich, creamy, and comforting with those perfect flecks of vanilla. For an extra touch, you can add a dollop of whipped cream or a sprinkle of additional cinnamon when serving.
Pro Tips For Making English Rice Pudding
- Simmer Low and Slow: Keep the heat at a gentle simmer—any higher and the milk will scorch before the rice cooks through. I learned this the hard way after scraping burnt bits off the bottom of my pot.
- Rinse the Rice First: Give the short-grain rice a quick rinse under cold water to remove excess starch. It prevents a gummy texture and lets the grains plump up properly in the milk.
- Stir Often at First: For the first 15 minutes, stir every 5 minutes to keep the rice from sticking. After that, you can ease up, but don’t walk away completely.
- Swap Water for Cream: Replace half the milk with heavy cream for a richer pudding—it’s the easiest upgrade. My grandmother swore by this, and she was right.
Pro Cooking Tips for english rice pudding
Rice Selection Matters
I learned the hard way that short-grain rice is non-negotiable here. Arborio or pudding rice releases starch as it cooks, creating that signature creamy texture. Long-grain varieties stay separate and won’t give you the custard-like consistency you want.
Slow and Steady Wins
Don’t rush the simmering process. The rice needs 25-30 minutes total to absorb the liquid and soften properly. I stir every 5 minutes to prevent scorching, especially with the milk and cream combination. Patience pays off in the final texture. 🌡️
Tempering the Eggs
This step is crucial to avoid scrambled eggs in your pudding. Slowly add 1 cup of the hot mixture to your beaten eggs while whisking constantly. Then return the tempered eggs to the pot, stirring nonstop. You’ll see the pudding thicken beautifully.
Vanilla Bean Magic
If you can splurge, use a real vanilla bean. Scrape the seeds into the mixture and add the pod while simmering. The seeds give those beautiful black speckles and a depth of flavor that extract alone can’t match. I find mine at Whole Foods.
Nutmeg Timing
Add the 0.5 tsp nutmeg at the very end of cooking. This preserves its delicate aroma. Freshly grated nutmeg tastes even better than pre-ground. I use my Microplane for this—it makes a noticeable difference. 💡
Chilling is Key
Resist the urge to dig in right away. The pudding needs at least 2 hours in the fridge to set properly. This resting time allows the flavors to meld and the texture to become perfectly creamy throughout.
Nutrition Facts
Frequently Asked Questions
Can I make this without eggs?
You can, but the texture will be less custard-like. Eggs create that rich, creamy base. Without them, increase the rice to 1 cup and simmer longer for thickness.
Why did my pudding turn out grainy?
This usually means the rice wasn’t fully cooked or the mixture boiled too vigorously. Keep it at a gentle simmer and cook for the full 25-30 minutes. Stir regularly to prevent scorching.
Can I use a different type of milk?
For best results, stick with whole milk. Lower-fat versions will yield a thinner pudding. For extra richness, replace 1 cup of milk with coconut milk.
How do I prevent a skin from forming on top?
Press plastic wrap directly onto the surface before chilling. This creates a barrier. Alternatively, stir occasionally as it cools.

- Gambia Jollof Rice Recipe: West African One-Pot Spice Fusion - October 5, 2026
- Cream of Wild Rice Soup Recipe Minnesota: Northwoods Creaminess With Foraged Grains - October 5, 2026
- Frozen Cauliflower Fried Rice Recipe: Quick Low-Carb Wok Magic - October 5, 2026