
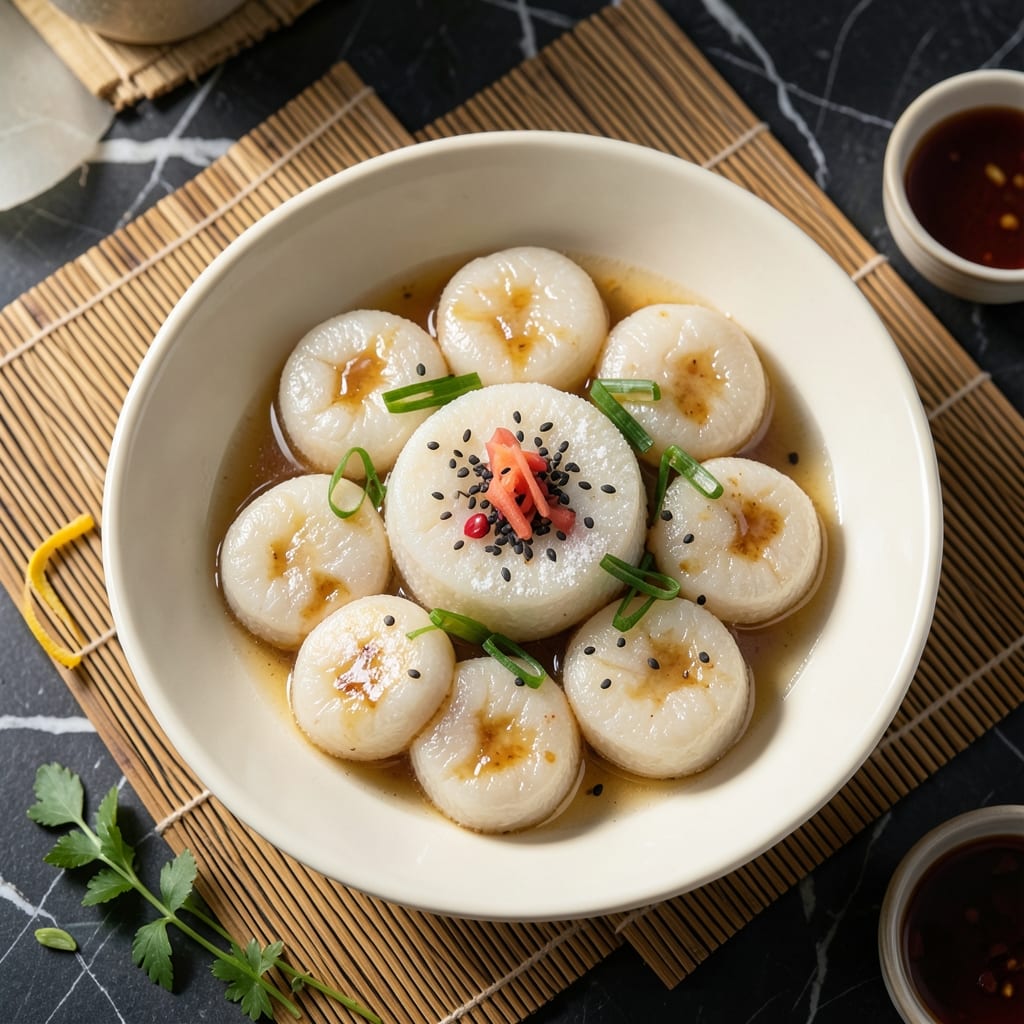
Fermented rice cakes offer a unique blend of tangy flavor and chewy texture that traditional recipes often miss. This method preserves the authentic taste while ensuring consistent results every time.
The process begins with soaking and fermenting the rice, which develops the characteristic sour notes. Proper fermentation time is crucial—rushing this step compromises both flavor and texture.
Once fermented, the rice is steamed into soft, slightly sticky cakes that hold their shape. The balance between fermentation and cooking creates that signature tangy bite.
This dish works as a base for savory or sweet toppings, making it versatile for any meal. The fermentation also enhances digestibility and nutritional value.
Ingredients for Fermented Rice Cake
A handful of pantry staples transforms into tangy, chewy fermented rice cakes with authentic flavor and texture.
| Ingredient | Amount | Notes |
|---|---|---|
| Short-Grain White Rice 🍚 | 2 cups | Rinsed until water runs clear |
| Water 💧 | 4 cups | Filtered, for soaking rice |
| Rice Vinegar 🍶 | 2 tbsp | For fermentation starter |
| Sea Salt 🧂 | 1 tsp | Fine grain preferred |
| Sugar 🍚 | 1 tsp | Organic cane preferred |
| Cornstarch 🌾 | 2 tbsp | For dusting steamer |
| Sesame Oil 🫒 | 1 tsp | Toasted, for brushing |
| Green Onions 🧅 | 3 pieces | Thinly sliced for garnish |
| Sesame Seeds 🌰 | 1 tbsp | Toasted, for topping |
| Soy Sauce 🥢 | 1 tbsp | Low-sodium preferred |
| Garlic Cloves 🧄 | 2 cloves | Minced for dipping sauce |
| Red Pepper Flakes 🌶️ | ½ tsp | Adjust to taste preference |
The rice is non-negotiable here. Short-grain white rice (like sushi rice) delivers the right sticky texture—long-grain stays too firm. Asian markets often have the best selection and prices. For fermentation, filtered water prevents chlorine from inhibiting the process. The vinegar kickstarts the souring, so use a quality rice vinegar (not white vinegar). Look for brands like Kikkoman or Marukan in the international aisle.
No rice vinegar? Apple cider vinegar at the same amount works in a pinch. Skip the sugar if you prefer a less sweet tang, but it does help feed the fermentation. For the steaming step, a bamboo steamer is ideal, but a metal colander over a pot works too—just line it with parchment to prevent sticking. The cornstarch is just to keep things from adhering, so arrowroot powder is a fine swap.
Fermented rice cakes keep in an airtight container in the fridge for 3-4 days. They’ll continue to develop flavor over time. For longer storage, freeze for up to 1 month—thaw at room temperature before steaming. The garnishes (green onions, sesame seeds) are best added fresh, not stored with the cakes.
Why You’ll Love This Recipe
- Five-Ingredient Wonder: I love that this only needs rice, water, vinegar, salt, and sugar—no hunting down obscure items at the Asian market.
- Tangy & Sweet: The rice vinegar gives it this bright zing that balances the subtle sweetness perfectly. Honestly, I could eat the whole batch in one sitting.
- Feeds a Crowd: I make a big batch on Sunday and we snack on these all week—breakfast, lunchbox treat, or midnight craving.
- Pennies Per Serving: A two-pound bag of short-grain rice makes dozens. I’ll be real: it’s the cheapest snack I’ve ever felt fancy serving.
Step-by-Step Instructions for Fermented Rice Cake
This traditional method ensures proper fermentation and a delightful tangy flavor in every bite.
Step 1: Soak and Ferment the Rice
Begin by rinsing the 2 cups Short-Grain White Rice under cold water until the water runs completely clear. This removes excess starch that could inhibit fermentation. Transfer the rinsed rice to a large bowl and cover with the 4 cups Water.
Add the 2 tbsp Rice Vinegar, 1 tsp Sea Salt, and 1 tsp Sugar to the water. Stir well to dissolve completely. The vinegar jumpstarts the fermentation process while the salt and sugar balance the flavor development. Cover with a clean cloth and let ferment at room temperature for 8-12 hours until you see small bubbles forming on the surface.
Step 2: Prepare the Steaming Equipment
Lightly dust your steamer basket or bamboo steamer with the 2 tbsp Cornstarch to prevent sticking. This creates a non-stick surface that makes removal easier after steaming. Make sure to cover all the surfaces that will come into contact with the rice mixture.
Brush the inside of your steamer lid with the 1 tsp Sesame Oil to prevent water droplets from falling onto the rice cakes during cooking. This also adds a subtle toasted aroma to your final product.
Step 3: Steam the Fermented Rice
After fermentation, drain the rice thoroughly in a fine-mesh strainer, pressing gently to remove excess liquid. The grains should hold together slightly but not be mushy. Transfer the rice to your prepared steamer, spreading it into an even layer about 1 inch thick.
Bring water to a boil in your steamer base, then reduce to medium heat. Steam the rice for 20-25 minutes until the mixture sets into a firm cake that pulls away slightly from the edges. Check by inserting a toothpick—it should come out clean when done.
Step 4: Prepare the Garnishes and Dipping Sauce
While the rice steams, thinly slice the 3 pieces Green Onions and toast the 1 tbsp Sesame Seeds in a dry pan over low heat for 2-3 minutes until golden brown and fragrant. Set both aside for garnishing.
Create your dipping sauce by combining the 1 tbsp Soy Sauce, minced 2 cloves Garlic Cloves, and 0.5 tsp Red Pepper Flakes in a small bowl. The garlic should be minced finely to distribute its flavor evenly throughout the sauce.
Step 5: Serve and Enjoy
Once steamed, let the rice cake cool in the steamer for 5 minutes before carefully transferring to a serving plate. This brief rest helps it hold its shape. Slice into wedges or squares while still warm.
Arrange the pieces on a platter and sprinkle with the toasted sesame seeds and sliced green onions. Serve immediately with the garlic dipping sauce on the side. The contrast of the tangy rice cake with the savory, spicy sauce creates a perfect balance of flavors.
Pro Tips For Making Fermented Rice Cake
- Soak the Rice: Give your short-grain rice a good 4-6 hour soak before cooking—I learned this the hard way after my first few batches turned out dense and gummy.
- Use Warm Water: Mix your rice with warm water (around 100°F) for fermentation; cold water slows the process and can leave you with uneven texture.
- Skip the Metal: Resist the urge to use metal utensils when handling the fermented mixture; it can react with the rice vinegar and add a metallic taste.
- Add Sugar Last: Stir in the sugar only after the rice has fermented for at least 12 hours—adding it earlier can interfere with the natural fermentation process.
Regional Styles of This fermented rice cake
Korean Tteok
In Korea, these are called tteok and often use a traditional starter called nuruk for fermentation. The rice is ground into flour first, then mixed with water and left to ferment for 1-2 days. This creates a slightly effervescent batter that steams into soft, chewy cakes. 🌟
Chinese Jiu Niang Bing
Chinese jiu niang bing uses a sweet rice wine starter for fermentation, giving it a distinct wine-like aroma. The rice is typically steamed whole, then mashed and shaped into small cakes. These are often sweetened with red bean paste or served with savory toppings.
Japanese Mochi
While not always fermented, Japanese mochi shares the chewy texture. For a fermented version, koji (a mold culture) is mixed with steamed rice and left to ferment for 24-48 hours. The result is a subtly sweet, tangy cake with a stretchy consistency.
Thai Khanom Krok
Thai khanom krok uses a rice flour and coconut milk batter that ferments briefly before cooking in special half-sphere pans. The fermentation develops a mild sourness that balances the coconut’s richness. These are often topped with crispy shallots.
Indonesian Kue Pancong
Indonesian kue pancong features glutinous rice flour mixed with palm sugar and fermented with yeast or natural starters. The batter is steamed in banana leaves, imparting a subtle earthy aroma. These are typically sweeter than other regional versions.
The fermentation time is shorter here, about 4-6 hours, but the banana leaf wrapping adds a unique flavor profile. ✨
Nutrition Facts
Frequently Asked Questions
How long does the fermentation process take?
Fermentation typically takes 8-12 hours at room temperature. You’ll know it’s ready when small bubbles form on the surface.
Can I use a different type of rice?
Short-grain white rice is essential for the right texture. Long-grain rice won’t give you the sticky consistency needed for proper rice cakes.
What if my rice cakes don’t set properly?
This usually means they needed more steaming time. Try 5-10 additional minutes and check again with a toothpick.
How should I store leftovers?
Keep in an airtight container in the fridge for 3-4 days. For longer storage, freeze for up to 1 month.

- Rice Mix Recipe: Fluffy Grains With Customizable Flavor Boost - September 25, 2026
- Soupy Rice Recipe: Broth-Soaked Grains With Rustic Depth - September 25, 2026
- Rice Paper Pancakes Recipe: Crispy Vietnamese Breakfast Delight - September 25, 2026