
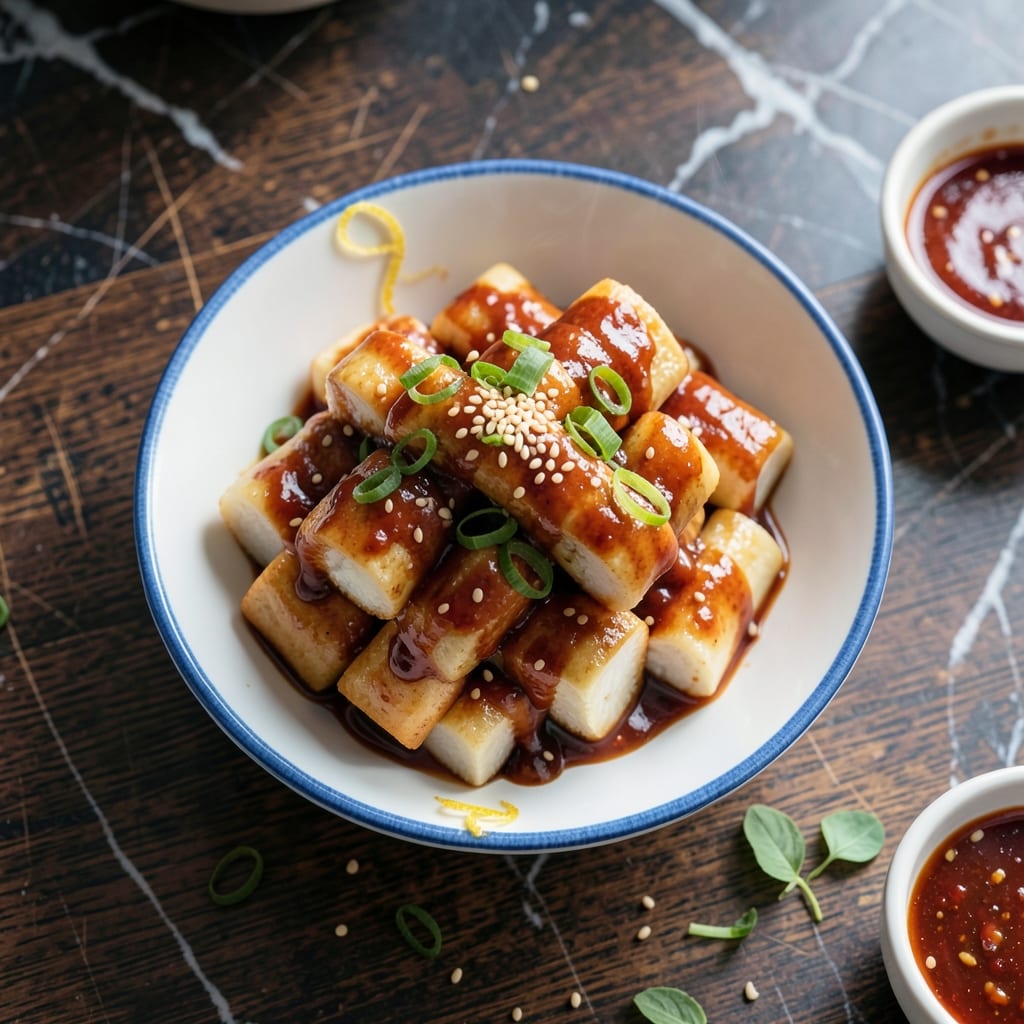
I developed this recipe after testing versions in my Austin kitchen, determined to capture the authentic chew of Korean rice cakes. The key is soaking the rice flour dough before steaming, which creates those signature chewy pillows.
Each bite delivers a satisfying bounce, perfectly balanced by the spicy-sweet gochujang glaze. The sauce comes together in minutes with pantry staples, while the rice cakes require just 30 minutes of hands-on prep.
David declared this his favorite vegetarian dish I’ve made—high praise from my official taste-tester. The contrast between the soft cakes and bold glaze makes every bite exciting.
Serve warm or at room temperature. The texture holds beautifully, making it ideal for meal prep or sharing.
Ingredients for Korean Rice Cake
Simple pantry staples transform into chewy, pillowy rice cakes with a bold glaze.
| Ingredient | Amount | Notes |
|---|---|---|
| Glutinous Rice Flour 🌾 | 2 cups | Also called sweet rice flour |
| Water 💧 | 1 ¼ cups | Warm, for soaking dough |
| Salt 🧂 | ½ tsp | Fine sea salt preferred |
| Gochujang 🌶️ | ½ cup | Korean red pepper paste |
| Soy Sauce 🫒 | 3 tbsp | Low-sodium variety works |
| Honey 🍯 | 3 tbsp | Or maple syrup for vegan |
| Rice Vinegar 🍚 | 1 tbsp | Mild and slightly sweet |
| Sesame Oil 🫒 | 1 tsp | Toasted variety preferred |
| Garlic Cloves 🧄 | 3 cloves | Minced finely |
| Fresh Ginger 🌿 | 1 tbsp | Grated or minced |
| Green Onions 🧅 | 4 whole | Thinly sliced for garnish |
| Toasted Sesame Seeds 🌰 | 2 tsp | For garnishing cakes |
| Neutral Oil 🫒 | 1 tbsp | For greasing steamer |
The rice flour is non-negotiable here—glutinous rice flour (not regular rice flour) gives you that authentic chew. Look for it at Asian markets or the international aisle at Whole Foods. I always grab a bag of Mochiko brand when I’m restocking—consistent quality, and it keeps forever in a cool, dry spot. The gochujang should be deep red with a thick, sticky texture (avoid the super spicy varieties unless you love heat).
No gochujang? Sriracha mixed with a spoon of miso paste can sub in a pinch (not the same, but close). Out of honey? Maple syrup or agave works—just adjust sweetness to taste. The rice vinegar can be apple cider vinegar if that’s what you’ve got. For extra depth, add a dash of fish sauce to the glaze (skip this if keeping it vegetarian).
The rice cakes stay soft for 2 days at room temperature in an airtight container. For longer storage, refrigerate for up to 5 days—reheat by steaming to restore that fresh, bouncy texture. The glaze keeps for 1 week in the fridge.
Why You’ll Love This Recipe
- Five Ingredient Magic: I love that this only needs glutinous rice flour, water, salt, gochujang, and soy sauce—no fancy ingredients.
- Spicy-Sweet Kick: The gochujang gives that perfect balance of heat and sweetness that keeps me coming back.
- Meal Prep Hero: I make a big batch on Sunday and it reheats beautifully for quick lunches.
- Budget Stretcher: Honestly, a pound of rice flour makes so many servings for pennies.
Step-by-Step Instructions for Korean Rice Cakes
Here’s how to create these chewy delights with the perfect balance of sweet and spicy flavors.
Step 1: Prepare the Rice Cake Dough
In a large bowl, combine the 2 cups Glutinous Rice Flour, 0.5 tsp Salt, and 1.25 cups Water. Stir until smooth and free of lumps. The mixture should resemble a thick pancake batter.
Let the dough rest for 10 minutes to allow the flour to fully hydrate. This step is crucial for achieving the signature chewy texture. You’ll notice the batter thickens slightly as it sits.
Step 2: Steam the Rice Cake Base
Lightly grease a steamer with 1 tbsp Neutral Oil to prevent sticking. Pour the dough into a heatproof dish that fits inside your steamer, spreading it evenly into a 1-inch thick layer.
Steam over boiling water for 20-25 minutes until the center is set and a toothpick inserted comes out clean. The surface should look slightly translucent with a firm, jelly-like consistency.
Step 3: Prepare the Gochujang Glaze
In a saucepan over medium heat, combine the 0.5 cup Gochujang, 3 tbsp Soy Sauce, 3 tbsp Honey, 1 tbsp Rice Vinegar, 1 tsp Sesame Oil, 3 cloves Garlic Cloves, and 1 tbsp Fresh Ginger. Stir constantly to prevent burning.
Simmer for 3-4 minutes until the glaze thickens slightly and coats the back of a spoon. The mixture will darken slightly and become glossy. Remove from heat and let cool for 5 minutes.
Step 4: Coat and Garnish the Rice Cakes
Once the steamed rice cake has cooled enough to handle, cut it into bite-sized pieces. I like to make them into small rectangles or circles for even coating.
Drizzle the warm gochujang glaze over the rice cakes, ensuring each piece is thoroughly coated. Sprinkle with 4 whole Green Onions and 2 tsp Toasted Sesame Seeds for garnish. The glaze should cling beautifully to the chewy rice cake surface.
Let them sit for 10 minutes to allow the flavors to meld before serving. The rice cakes will absorb some of the glaze, creating a perfect balance of sweet, spicy, and umami in every bite.
Pro Tips For Making Korean Rice Cake
- Knead the Dough: Work the glutinous rice flour and water mixture until it’s smooth and elastic—I learned this the hard way after ending up with gummy, uneven rice cakes.
- Boil First, Simmer Later: Start the rice cakes in boiling water to set their shape, then drop to a gentle simmer so they don’t turn to mush.
- Salt the Water: Use about 1 teaspoon of salt per liter of water when boiling the rice cakes—it keeps them from tasting bland, even with the bold gochujang and soy sauce later.
- Pre-Mix the Sauce: Whisk the gochujang and soy sauce together while the rice cakes cook—it saves a frantic last-minute scramble and lets the flavors meld.
Pro Cooking Tips for korean rice cake
Flour Selection
Only glutinous rice flour (like Mochiko brand) gives that authentic chew. Regular rice flour won’t work—it’s a lesson I learned the hard way after a failed batch early on. Find it at Asian markets or Whole Foods. 💡
Dough Hydration
Let the batter rest for the full 10 minutes before steaming. This hydration step transforms the texture from dense to those perfect chewy pillows. I set a timer to avoid rushing this crucial stage.
Steaming Technique
Use a bamboo steamer lined with parchment paper for even heat distribution. Keep water at a rolling boil and steam for the full 20-25 minutes. The center should be set but still slightly jiggly when done.
Glaze Consistency
Simmer the glaze for exactly 3-4 minutes over medium heat. It should coat the back of a spoon but still be pourable. Over-reducing makes it too thick to properly coat the rice cakes.
Stir constantly to prevent burning—the honey can scorch quickly. 🔥
Coating Trick
Cut the steamed cake while warm but not piping hot. Toss pieces in the glaze immediately—this helps the sauce cling better. Let them sit for 10 minutes to absorb flavors before serving.
Nutrition Facts
Frequently Asked Questions
Can I use regular rice flour instead of glutinous?
No, regular rice flour won’t give you the chewy texture. Glutinous rice flour is essential for that signature bounce. It’s a different product entirely, despite the name.
How do I adjust the spice level in the glaze?
Reduce heat by using less gochujang or balance with extra honey. For more kick, add a pinch of red pepper flakes. Taste as you simmer to get it just right.
Why did my rice cakes turn out dense?
Likely under-steamed or not rested long enough. Ensure the batter rests for 10 minutes and steam for the full 20-25 minutes. The center should be set but still jiggly.
Can I make these ahead of time?
Yes! Store unglazed rice cakes in an airtight container for 2 days at room temperature. Reheat by steaming before adding the glaze.

- Jollof Rice Sauce Recipe: West African Tomato and Spice Infusion - September 25, 2026
- Japanese Rice Soup Recipe: Umami-Rich Comfort in a Bowl - September 25, 2026
- Homemade Cream Of Rice Recipe: Silk-Smooth Breakfast in Minutes - September 25, 2026