
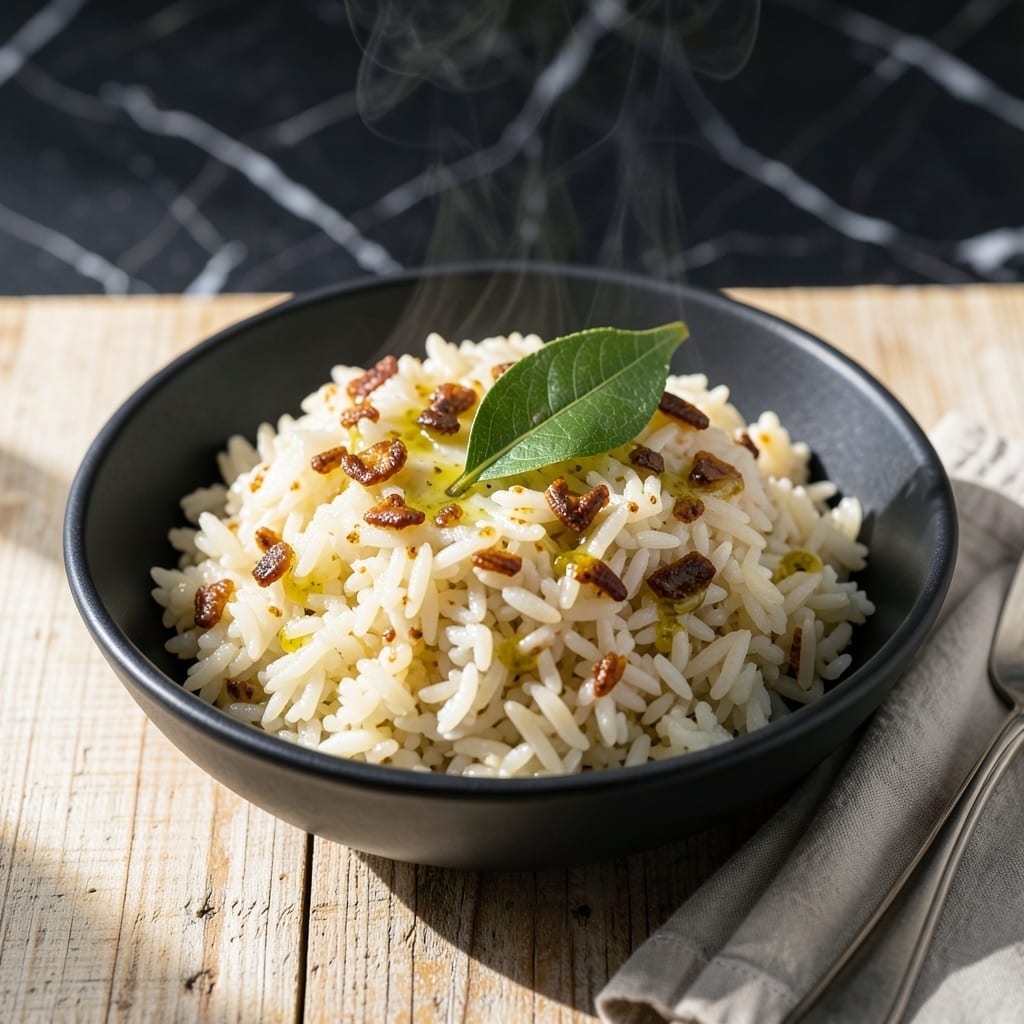
I’ve mastered the art of Filipino-style rice that delivers crispy golden bits at the bottom while keeping every grain fluffy and fragrant. This isn’t just a side—it’s the foundation of countless meals, elevated with garlic and rendered fat for depth.
The technique is simple but precise: toasting the rice first enhances its nutty aroma, while the right water ratio ensures perfect texture. A heavy pot with a tight lid guarantees even cooking and that coveted crispy layer at the base.
You’ll end up with savory, garlicky rice topped with shatteringly crispy bits that add texture to every bite. It pairs effortlessly with any protein or stands proudly on its own.
Traditional yet adaptable, this method transforms everyday rice into something extraordinary. Follow these steps for consistent results every time.
Ingredients for Filipino Rice
Simple pantry staples transformed into fragrant, garlicky rice with crispy golden bits at the bottom.
| Ingredient | Amount | Notes |
|---|---|---|
| Jasmine Rice 🌾 | 2 cups | Long grain, rinsed thoroughly |
| Garlic Cloves 🧄 | 8 cloves | Minced for even distribution |
| Neutral Cooking Oil 🫒 | 3 tbsp | Vegetable or canola oil |
| Chicken Broth 🥣 | 3 cups | Low-sodium preferred |
| Water 💧 | 1 cup | For rinsing rice |
| Bay Leaf 🍃 | 1 whole | Optional for aroma |
| Salt 🧂 | 1 ½ tsp | Diamond Crystal kosher salt |
| Black Pepper 🌶️ | ½ tsp | Freshly ground |
| Green Onions 🧅 | 4 whole | Thinly sliced for garnish |
| Rendered Chicken Fat 🍗 | 2 tbsp | Optional for authentic flavor |
| Butter 🧈 | 1 tbsp | Unsalted, for richness |
The rice is everything here. Jasmine long-grain gives you that signature Filipino texture—fluffy yet slightly sticky. Rinsing it first removes excess starch for perfect separation. For the garlic, fresh cloves are non-negotiable (none of that jarred stuff). I always grab mine from Asian markets where the selection is fresher and cheaper. A heavy pot—like enamel-coated cast iron—creates the crispy bottom layer.
No jasmine rice? Long-grain white rice works in a pinch, but the aroma won’t be the same. Skip the chicken fat? Bacon grease or neutral oil adds similar depth. Vegetable broth can replace chicken broth for a vegetarian version. The bay leaf is optional but adds a subtle complexity. If you’ve got pork lard (a traditional Filipino ingredient), use that instead of chicken fat for extra authenticity.
Leftovers keep well for 3-4 days in the fridge, but that crispy bottom softens. Reheat in a dry pan to revive it. The rice freezes beautifully for up to 3 months—portion it first for easy meals.
Why You’ll Love This Recipe
- One Pot Wonder: I just dump jasmine rice, garlic, and broth in a pot—no fancy steps, no stress.
- Garlic Heaven: The golden, crispy garlic bits mixed into fluffy rice? Ridiculously good with every bite.
- Pairs With Anything: I serve it with adobo one night, then fried eggs the next—so reliable for any meal.
- Budget Stretcher: A pound of rice and a few cloves of garlic feed my family for days without breaking the bank.
Step-by-Step Instructions for Garlicky Savory Rice with Crispy Bits
Here’s the method I use to achieve perfectly cooked rice with irresistibly crispy garlic bits.
Step 1: Rinse Rice and Prepare Aromatics
Place the 2 cups Jasmine Rice in a fine-mesh strainer and rinse under cold water until the water runs clear. This removes excess starch and prevents the grains from becoming gummy during cooking. While the rice drains, mince the 8 cloves Garlic Cloves finely for even distribution throughout the dish.
Thinly slice the 4 whole Green Onions, separating the white and green parts if desired for color contrast. The white portions can be cooked with the garlic for added flavor, while the green tops make an excellent garnish. Keep these components separate until the final step to maintain their distinct textures.
Step 2: Bloom Garlic in Fat for Maximum Flavor
Heat the 3 tbsp Neutral Cooking Oil and 2 tbsp Rendered Chicken Fat in a heavy-bottomed pot over medium heat. When the oil shimmers, add the minced garlic and cook for 2-3 minutes, stirring constantly, until the edges turn light golden brown and the aroma becomes fragrant.
Here’s the thing—you want to cook the garlic until it’s crispy but not burnt. As soon as it reaches a deep golden color, immediately remove about half of the crispy bits with a slotted spoon and set aside on a paper towel-lined plate. These will be used as a garnish to add texture to the finished dish.
Step 3: Toast Rice and Add Liquids
Add the drained rice to the pot with the remaining garlic and oil. Stir to coat the grains thoroughly and toast for 1-2 minutes until the rice becomes slightly translucent at the edges. This step enhances the nutty flavor of the rice and ensures each grain absorbs the garlic essence.
Pour in the 3 cups Chicken Broth, 1 whole Bay Leaf, 1.5 tsp Salt, and 0.5 tsp Black Pepper. Stir well to distribute the seasonings evenly. The liquid should come to a gentle simmer—this is your signal that the rice is ready to finish cooking.
Step 4: Cook Rice to Perfection
Once simmering, reduce the heat to low, cover the pot with a tight-fitting lid, and cook for 15-18 minutes. Resist the urge to lift the lid during this time—steam is crucial for even cooking. The rice is done when all the liquid has been absorbed and the grains are tender with no chalky center.
Remove from heat and let it sit, covered, for an additional 5 minutes. This resting period allows the rice to steam in its own moisture, resulting in perfectly fluffy grains. Gently fluff with a fork, then discard the bay leaf.
Step 5: Finish with Butter and Garnish
Stir in the 1 tbsp Butter until fully melted, which adds a rich, silky finish to the rice. Taste and adjust seasoning if needed, though the crispy garlic and broth should provide ample flavor.
Transfer to a serving dish and top with the reserved crispy garlic bits and sliced green onions. The contrast between the soft, savory rice and the crunchy garlic pieces delivers the authentic texture this dish promises. Serve immediately while hot.
Pro Tips For Making Filipino Rice
- Toast the Garlic: Cook the minced garlic in oil over medium-low until golden but not brown—I learned this the hard way after burning three batches. Pull it off the heat the second it turns pale gold.
- Rinse the Rice: Wash the jasmine rice until the water runs clear, or you’ll end up with gummy rice. My grandmother swore by this, and she was right.
- Use Broth First: Start with chicken broth instead of water for the first half of the liquid—it adds depth without overpowering. Sounds weird, but it works.
- Let It Steam: After the liquid’s absorbed, cover and let it sit off the heat for 10 minutes. I skip this when I’m lazy, but the rice is noticeably fluffier when I don’t.
Common Mistakes When Making This Dish
Overcooking the Garlic
Burnt garlic turns bitter and ruins the dish. Cook it over medium heat for only 2-3 minutes until golden, not dark brown. I pull mine off the heat as soon as the edges crisp up. 🌡️
Skipping the Rice Toast
Toasting the rice for 1-2 minutes enhances its nutty flavor. Don’t rush this step—it makes a noticeable difference in the final taste. Stir constantly to prevent burning.
Wrong Liquid Ratio
Use 3 cups chicken broth for 2 cups rice. Too much liquid makes it mushy; too little leaves it undercooked. The broth should just cover the rice when you start.
Peeking While Cooking
Every time you lift the lid, you release steam and lower the temperature. Keep it covered for the full 15-18 minutes on low heat. Trust the process.
Neglecting the Rest
Letting the rice sit covered for 5 minutes off heat allows the grains to steam evenly. Skip this, and you’ll end up with uneven texture. I set a timer to remind myself.
Forgetting the Crispy Bits
Reserve half the crispy garlic before adding rice. These bits add crucial texture contrast. Sprinkle them on top just before serving for maximum crunch. 💪
Nutrition Facts
Frequently Asked Questions
Can I use a different type of rice?
Yes, but jasmine is ideal for its fragrance and texture. Long-grain white rice works, though it lacks the same aroma. Avoid short-grain varieties as they become too sticky.
Why toast the rice first?
Toasting for 1-2 minutes enhances the nutty flavor and helps the grains absorb the garlic oil better. It also prevents a mushy texture by removing excess moisture.
How do I get the crispy bottom layer?
Use a heavy pot with a tight lid and cook on low heat without peeking. The steam and heat create the coveted crispy bits at the bottom.
Can I make this ahead of time?
Yes, but the crispy bits soften when stored. Reheat in a dry pan to revive the texture. Keeps for 3-4 days in the fridge.

- Gambia Jollof Rice Recipe: West African One-Pot Spice Fusion - October 5, 2026
- Cream of Wild Rice Soup Recipe Minnesota: Northwoods Creaminess With Foraged Grains - October 5, 2026
- Frozen Cauliflower Fried Rice Recipe: Quick Low-Carb Wok Magic - October 5, 2026