
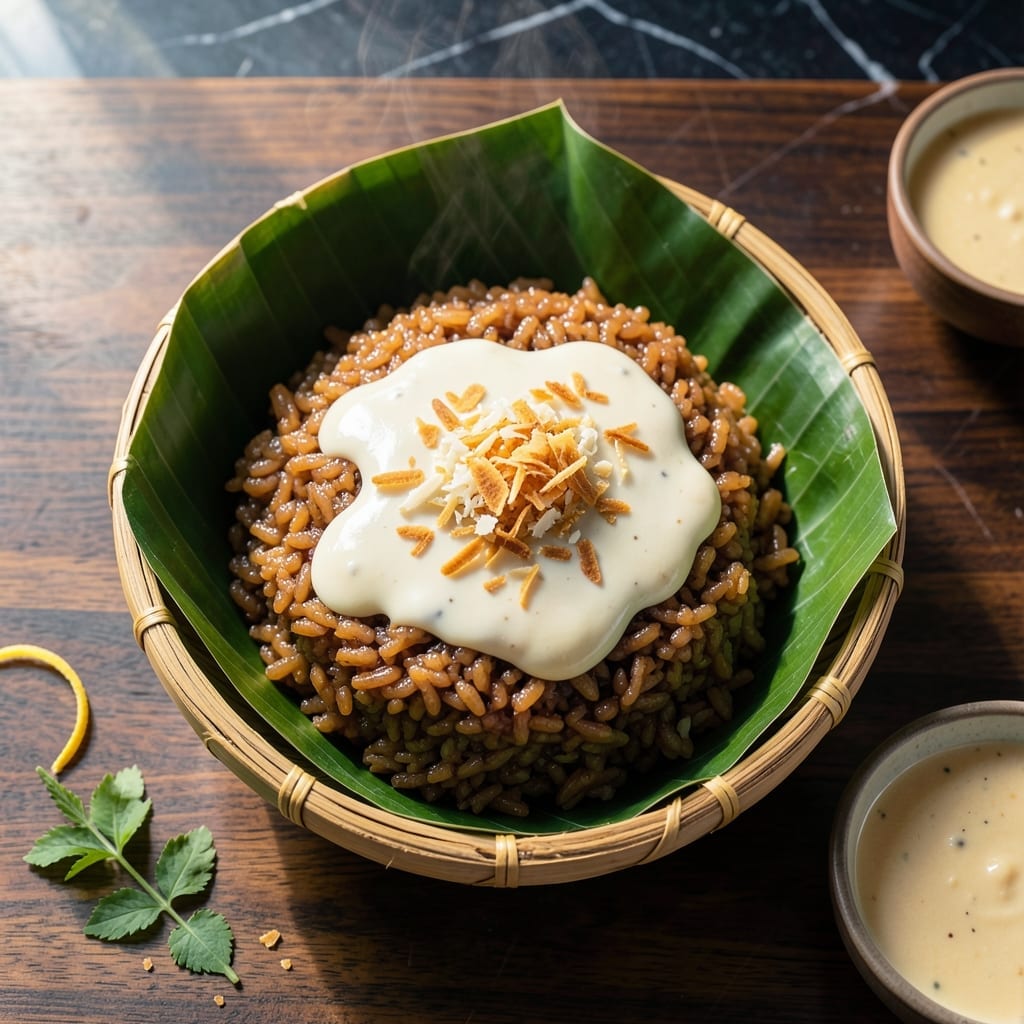
This traditional Filipino dessert transforms simple sticky rice into coconut-infused bite-sized treats that melt in your mouth. The secret lies in the perfect balance of sweetness and rich coconut flavor.
With just a few ingredients and minimal effort, you’ll create a dish that’s both comforting and elegant. The result is a chewy, slightly sticky texture that’s impossible to resist.
Ingredients for Filipino Sweet Sticky Rice
Simple sticky rice, rich coconut, and a touch of sweetness create these melt-in-your-mouth treats.
| Ingredient | Amount | Notes |
|---|---|---|
| Glutinous Rice 🍚 | 2 cups | Sweet or sticky rice variety |
| Coconut Milk 🥥 | 1 ½ cups | Full-fat, canned preferred |
| Brown Sugar 🍚 | 1 cup | Packed, or coconut sugar |
| Water 💧 | 2 ½ cups | For soaking and cooking |
| Shredded Coconut 🥥 | ½ cup | Unsweetened, toasted optional |
| Salt 🧂 | ½ tsp | Fine sea salt preferred |
| Vanilla Extract 🌿 | 1 tsp | Pure, not imitation |
| Pandan Leaves 🍃 | 2 pieces | Optional, for authentic flavor |
| Coconut Oil 🫒 | 1 tbsp | For greasing molds |
The glutinous rice is non-negotiable—look for it at Asian markets or the international aisle. Thai sticky rice works perfectly. Coconut milk should be full-fat for that creamy texture; Native Forest or Thai Kitchen are solid brands. Don’t skip soaking the rice overnight (it’s worth the extra minute). Pandan leaves add that authentic Filipino touch, but most grocery stores won’t carry them—try Amazon or a local Asian grocer.
No brown sugar? Coconut sugar works great and adds depth. Swap coconut milk for almond or oat milk if needed, but the richness won’t be the same. Skip the pandan if you can’t find it—a drop of vanilla enhances the flavor. For extra texture, toast the shredded coconut in a dry pan before mixing (frozen works in a pinch).
Store leftovers in an airtight container at room temp for 2 days, or refrigerate for up to 5 days. These freeze beautifully—layer with parchment paper to prevent sticking. Thaw at room temp before serving.
Why You’ll Love This Recipe
- One Pot Wonder: I just dump the glutinous rice, coconut milk, and brown sugar in a pot and let it simmer—no fancy steps.
- Coconut Heaven: The toasted shredded coconut on top with that creamy, sweet base? I could eat the whole pan.
- Feeds a Crowd: Between us, this is my go-to for potlucks since it stretches easily and everyone loves it.
- Better Next Day: Honestly, the leftovers taste even richer after the flavors meld overnight.
Step-by-Step Instructions for Filipino Sweet Sticky Rice
This method delivers perfectly tender, fragrant rice with just the right amount of sweetness.
Step 1: Soak the Glutinous Rice
Place the 2 cups Glutinous Rice in a large bowl and cover it completely with the 2.5 cups Water. Add the 2 pieces Pandan Leaves to infuse the rice with their distinctive aroma as it soaks.
Let it sit at room temperature for at least 30 minutes, or up to 4 hours for maximum flavor absorption. The rice kernels will plump up significantly, nearly doubling in size. Drain the rice thoroughly in a fine-mesh sieve before cooking—this prevents excess water from diluting your coconut mixture.
Step 2: Prepare the Coconut Mixture
In a medium saucepan, combine the 1.5 cups Coconut Milk, 1 cup Brown Sugar, and 0.5 tsp Salt. Stir over medium heat until the brown sugar fully dissolves and the mixture just begins to simmer—you’ll see small bubbles forming around the edges.
Remove from heat and stir in the 1 tsp Vanilla Extract and 0.5 cup Shredded Coconut. The vanilla deepens the flavor profile while the shredded coconut adds texture. Let this mixture cool slightly while you finish preparing the rice—this prevents it from curdling when mixed with the hot rice.
Step 3: Steam the Rice to Perfection
Transfer the drained glutinous rice to a steamer basket lined with cheesecloth or a clean kitchen towel. Steam over boiling water for 25-30 minutes until the rice is tender and translucent. The grains should be soft enough to mash easily between your fingers with no hard center.
Check the water level halfway through and replenish with hot water if needed. The rice is done when it looks glossy and slightly sticky. Remove the pandan leaves at this point—they’ve imparted all their flavor and aren’t meant to be eaten.
Step 4: Combine and Set the Mixture
Transfer the hot steamed rice to a large mixing bowl. Pour the warm coconut mixture evenly over the rice. Using a silicone spatula, gently fold everything together until the rice is uniformly coated and the liquid is fully absorbed.
The mixture will look slightly soupy at first, but it thickens as it cools. Let it sit for 10 minutes at room temperature, stirring occasionally, until you achieve a pudding-like consistency where the rice holds together when pressed.
Step 5: Shape and Chill for Serving
Grease your molds or a baking dish with the 1 tbsp Coconut Oil to prevent sticking. Press the rice mixture firmly into the prepared mold—this creates those characteristic bite-sized portions. For individual servings, use small ramekins or muffin tins.
Refrigerate for at least 2 hours until completely set. This chilling step is crucial—it transforms the mixture from a warm porridge into firm, sliceable squares. Serve cold or at room temperature, garnished with additional toasted shredded coconut if desired. The texture should be sticky yet firm, with a rich coconut aroma in every bite.
Pro Tips For Making Filipino Sweet Sticky Rice
- Soak the Rice: Glutinous rice needs at least 4 hours in cold water—any less and it won’t get that perfect sticky texture. I learned this the hard way after ending up with a dry, crumbly mess.
- Simmer Low and Slow: Keep the coconut milk and sugar at a gentle simmer, not a boil, or it’ll separate and turn oily. About 15-20 minutes on medium-low heat does the trick.
- Use Full-Fat Coconut Milk: Skip the light version—full-fat coconut milk is non-negotiable for that rich, creamy consistency. Sounds obvious, but I’ve seen people try to cut corners and regret it.
- Toast the Shredded Coconut: Toss the shredded coconut in a dry pan over low heat for 2-3 minutes until golden. It adds a nutty depth that raw coconut just can’t match.
Dietary Considerations for This filipino sweet sticky rice
Vegan and Dairy-Free
This dessert is naturally 100% vegan—no animal products are used in the traditional recipe. The coconut milk provides all the creaminess you need, making it perfect for plant-based diets. I’ve served it to dairy-intolerant friends with rave reviews. 🌱
Gluten-Free Friendly
Glutinous rice is inherently gluten-free, despite its name. Just ensure your brown sugar and shredded coconut are certified gluten-free to avoid cross-contamination. Brands like Bob’s Red Mill are safe choices for the rice.
Nut Allergy Note
While coconut is technically a fruit, those with tree nut allergies should exercise caution. Check with your allergist before trying this dish. For a nut-free alternative, use oat milk instead of coconut milk, though the flavor will differ.
Low Glycemic Option
To reduce the sugar impact, swap brown sugar for ½ cup coconut sugar and add 1 tsp stevia. This cuts the glycemic load while keeping the sweetness. The texture remains just as delightful.
Salt-Reduced Version
For a lower-sodium version, reduce the salt to ¼ tsp or omit it entirely. The coconut milk and sugar provide enough natural flavor. I often skip the salt when serving to my mom, who watches her sodium intake.
Diabetic Considerations
This treat is high in natural sugars, so portion control is key. Serve smaller pieces (about 1-inch squares) and pair with protein like roasted nuts to balance blood sugar. Always consult a healthcare provider for personalized advice. 💡
Nutrition Facts
Frequently Asked Questions
Can I use regular rice instead of glutinous rice?
No, regular rice won’t give you the same sticky, chewy texture. Glutinous rice is essential for that signature bite. You can find it at Asian markets or the international aisle.
How long can I store leftovers?
Keep leftovers in an airtight container at room temperature for up to 2 days. For longer storage, refrigerate for up to 5 days or freeze for 1 month.
What if I don’t have pandan leaves?
You can skip them, but for authentic flavor, add 1 tsp vanilla extract or a drop of pandan extract. The dish will still taste great without them!
Can I make this ahead of time?
Prepare the mixture, shape it, and refrigerate for up to 2 days before serving. This makes it perfect for parties or gatherings.

- Gobi Fried Rice Recipe: Spiced Cauliflower Wok Delight - October 8, 2026
- Glutinous Rice Roll Recipe: Chewy Pillows With Savory Fillings - October 8, 2026
- Garlic Jasmine Rice Recipe: Fragrant Grains with Aromatic Depth - October 8, 2026