
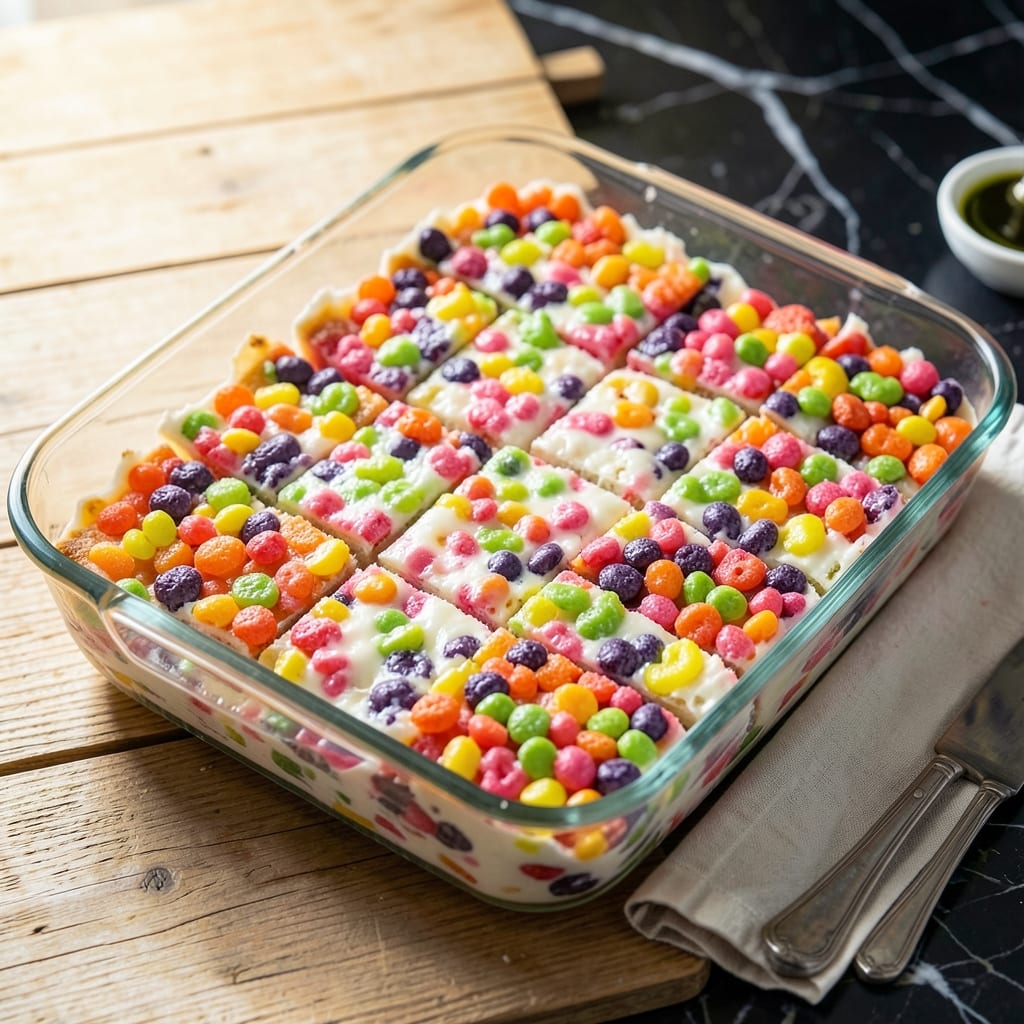
This colorful twist on classic Rice Krispie treats brings nostalgic cereal flavor to a beloved dessert format. The combination of crispy cereal and gooey marshmallows creates an irresistible texture that kids and adults alike will love.
The process requires just 10 minutes of active time, using simple ingredients you likely already have on hand. Melting butter and marshmallows together forms the sticky base that binds the vibrant cereal into perfect squares.
What results is a treat that’s both crunchy and chewy, with bursts of fruity flavor in every bite. The bright colors make these ideal for parties, lunchboxes, or whenever you need a sweet pick-me-up.
No baking required—just mix, press, and let set before cutting into squares. This recipe delivers consistent results with minimal effort.
Ingredients for Fruity Pebbles Rice Krispie
Six ingredients. Ten minutes. Vibrant, fruity, nostalgic perfection in every bite.
| Ingredient | Amount | Notes |
|---|---|---|
| Fruity Pebbles Cereal 🥣 | 6 cups | Divided, any flavor combination |
| Mini Marshmallows 🍬 | 10 oz | About 6 cups unpacked |
| Unsalted Butter 🧈 | ½ cup | 1 stick, for melting |
| Pinch of Salt 🧂 | 1 pinch | Enhances sweetness balance |
| Vanilla Extract 🌿 | 1 tsp | Pure for best flavor |
| Cooking Spray 💨 | 1 can | For greasing pan |
The cereal is the star here. Fruity Pebbles (the classic Post brand) give that perfect crunch and color, but any fruity cereal works in a pinch. I usually grab mine from Target or Walmart—they always have the big boxes. The marshmallows need to be fresh; stale ones won’t melt as smoothly. Jet-Puffed is my go-to for consistent quality and that perfect stretchy texture.
No mini marshmallows? Regular marshmallows chopped into quarters work just as well (about 40 large ones). Want extra richness? Swap half the butter for coconut oil—adds a subtle flavor that pairs great with the fruitiness. The vanilla extract is optional but highly recommended (trust me, it elevates the flavor). If you’re out, a dash of almond extract works too.
These keep at room temperature in an airtight container for 3-4 days. For longer storage, freeze for up to 6 weeks—just let them thaw before serving. Cut into squares once completely cool, or press into fun shapes for parties (the kids will love it).
Why You’ll Love This Recipe
- No Fuss Melting: I melt the butter and marshmallows in one pot, stir in the cereal, and it’s done. Honestly, it’s the easiest no-bake treat I make.
- Rainbow Crunch: The Fruity Pebbles keep their bright color and that signature crisp, even after mixing with gooey marshmallows.
- Party Ready: I’ve brought these to potlucks, birthdays, and even school bake sales—they’re always the first to disappear.
- Budget Stretch: A box of cereal and a bag of marshmallows feed a crowd for pennies. Between us, I’ve made two batches from one grocery run.
Step-by-Step Instructions for Fruity Pebbles Treats
Here’s the method that guarantees perfectly colorful, chewy squares every single time.
Step 1: Prepare the Pan and Melt the Butter
Lightly coat a 9×13-inch baking dish with the cooking spray, making sure to cover the bottom and sides completely. This prevents sticking and makes cutting easier later. Set the prepared pan aside while you work.
In a large saucepan, melt the 0.5 cup unsalted butter over low heat. Watch for the foaming to subside and the butter to turn completely liquid with no solid pieces remaining. This gentle melting prevents burning and ensures even incorporation into the marshmallows.
Step 2: Create the Marshmallow Mixture
Once the butter is fully melted, add the 10 oz mini marshmallows and the 1 pinch pinch of salt. Stir constantly with a silicone spatula or wooden spoon to prevent scorching. The marshmallows will begin to melt and combine with the butter.
Continue stirring until the mixture is completely smooth and no marshmallow lumps remain. This usually takes 3-5 minutes over low heat. Remove the saucepan from heat and immediately stir in the 1 tsp vanilla extract—this preserves its delicate flavor.
Step 3: Incorporate the Fruity Pebbles Cereal
Working quickly (the mixture will begin to set as it cools), add all 6 cups Fruity Pebbles Cereal to the saucepan. Gently fold the cereal into the marshmallow mixture using your spatula, making sure every piece is evenly coated. Be careful not to crush the cereal—you want those vibrant colors and crunch to stay intact.
The mixture should glisten slightly and hold together when pressed. If it seems too sticky, you can add a handful more cereal, but the specified amount should give you the perfect ratio of chewy to crispy.
Step 4: Press and Set the Treats
Transfer the cereal mixture to your prepared baking dish. Using your spatula or the back of a greased spoon, press the mixture evenly into the pan. I like to press firmly but not too hard—you want the treats to hold together without becoming dense.
For that signature professional look, lightly coat your hands with cooking spray and use your fingers to press the top into a smooth, even layer. Allow the treats to cool at room temperature for 30 minutes until completely set.
Step 5: Cut and Serve
Once fully cooled and firm to the touch, use a sharp knife to cut into 12 equal squares. For clean cuts, dip the knife in hot water between each slice. The treats should hold their shape perfectly with a slight sheen from the marshmallow coating.
Serve immediately or store in an airtight container at room temperature for up to 3 days. These are best enjoyed the same day when the cereal still has that satisfying crunch contrasted with the soft marshmallow binding.
Pro Tips For Making Fruity Pebbles Rice Krispie
- Melt Butter Low: Keep the heat on medium-low when melting the butter and marshmallows—I learned this the hard way after burning two batches. The sugar in mini marshmallows caramelizes fast.
- Use Fresh Cereal: Skip the stale box in the back of your pantry. Fruity Pebbles lose their crunch and vibrant color fast, so fresher cereal means better texture and brighter treats.
- Press While Warm: Don’t wait for the mixture to cool before pressing it into the pan. The marshmallows stiffen up quickly, and working it while warm guarantees an even, sticky hold.
- Add Vanilla Last: Stir in the vanilla extract after removing from heat. High heat can dull its flavor, and adding it at the end keeps that bright, fruity aroma front and center.
Regional Styles of fruity pebbles rice krispie
Midwest Classic
In the heartland, we keep it simple but bold. I use extra butter (¾ cup instead of ½ cup) for a richer, more decadent treat. The marshmallows stay standard, but I add 1 tbsp corn syrup for extra chewiness. This version is a hit at church potlucks and school bake sales. 💛
West Coast Twist
California bakers love adding 1 cup dried fruit like chopped apricots or raisins for a textural surprise. Some even sprinkle toasted almond slices on top before pressing. The combination of fruity cereal and real fruit creates a layered flavor experience that feels gourmet.
Southern Comfort
Down south, we can’t resist adding a touch of warmth. I stir in ½ tsp cinnamon and ¼ tsp nutmeg with the vanilla extract. Some bakers even drizzle caramel sauce over the top before cutting. These treats pair perfectly with sweet tea.
Northeast Innovation
New Englanders love their chocolate, so we fold in 1 cup mini chocolate chips with the cereal. The chocolate melts slightly from the warm marshmallow mixture, creating pockets of gooey goodness. For extra flair, press chocolate sprinkles into the top before it sets.
Southwest Spice
For a bold flavor kick, add ½ tsp chili powder and ¼ tsp cayenne to the melted butter. The heat is subtle but noticeable, balanced by the sweetness. Some even add 1 tsp lime zest for brightness. This version is surprisingly addictive.
Pacific Northwest
In Oregon and Washington, we embrace the local love for all things natural. I use organic Fruity Pebbles and swap the butter for coconut oil. For extra crunch, add ¼ cup pumpkin seeds to the cereal mix. These treats have a lighter, more wholesome feel. 🌟
Nutrition Facts
Frequently Asked Questions
Can I use regular marshmallows instead of mini?
Yes! Chop 40 large marshmallows into quarters for equivalent volume. They melt the same way and create the perfect sticky base for your cereal mix.
How do I prevent the treats from sticking to my hands?
Lightly coat your hands with cooking spray or butter before pressing the mixture into the pan. This keeps everything smooth and mess-free.
Can I make these ahead for a party?
Prepare them 1 day ahead and store in an airtight container at room temperature. They stay fresh and maintain their texture perfectly.
Why are my treats too hard?
Over-pressing or using too much marshmallow can make them dense. Press gently and stick to the 10 oz marshmallow to 6 cups cereal ratio.

- Gobi Fried Rice Recipe: Spiced Cauliflower Wok Delight - October 8, 2026
- Glutinous Rice Roll Recipe: Chewy Pillows With Savory Fillings - October 8, 2026
- Garlic Jasmine Rice Recipe: Fragrant Grains with Aromatic Depth - October 8, 2026